


Table of contents: Door panels ↓ Rear Door Panel (Hatchback) ↓ Door sill protective panel ↓ Footwell trim panel ↓ Door center pillar trim panel ↓ Windshield pillar trim panel ↓ Rear Quarter Trim Panel - Sedan ↓ Rear Door Pillar Trim Panel -…↓ Luggage Compartment Panels - Sedan ↓ Luggage Compartment Panels -…↓ Door Shelf - Sedan ↓ Glove compartment ↓ Passenger handle ↓ Sun shield ↓ Ceiling ↓
Door panels
1. On the front doors, remove the small triangular plastic covering plate from the front corner of the door, remove the screw and plate (see photo).

33.1. Removing the front door corner trim plate
2. On manual window models, use a long, bent wire to pull out the window handle retaining clip. Remove the plastic gasket (see photo).

33.2A. Pass the bent wire behind the regulator handle...

33.2B.... remove the mounting bracket from the groove of the regulator shaft

33.2C. Remove the regulator handle with the plastic gasket
3. Where fitted, remove the screws securing the threshold light bulb cover, remove its housing and disconnect the wiring (see photo).

ZZ.ZA. Remove the threshold illumination lamp shade...

33. CALL... and disconnect the electrical connector from the lamp
4. On the rear doors, remove the ashtray, unscrew and remove its fastener (see photo).
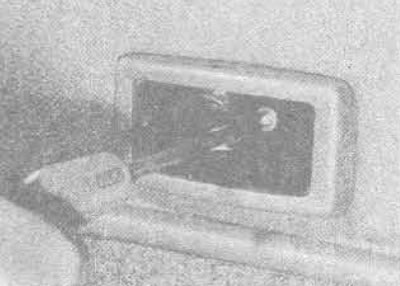
33.4. The ashtray is secured with a single screw
5. Remove the inner door handle frame (see photo) - see figure 11.16 or 11.17.

33.5. Removing the door handle frame
6. On T72 models built after May 1988, remove the plate from the top edge of the door handle and remove the mounting screw, then remove the bracket from the bottom edge and loosen the mounting screw. Remove the door handle (see photos).

33.6A. Removing the door handle (late models T72) - remove the protective coating...

33.6V.... and remove the mounting screw...

33.6C.... then remove the brackets from the armrest...

33.6D.... and loosen the mounting screw...

33.6E.... pull out the door handle
7. Where windows are equipped with a power window, remove the switch from the armrest and disconnect the wiring (see photos).

33.7A. Remove the switch from the power window...

33.7V.... and disconnect the wiring
8. On T12 and early T72 models, remove the covers from the top edge of the handle and the caps from the bottom edge of the armrest. Remove the mounting screws and remove the armrest handle assembly.
9. Using a suitable flat tool (like a wide screwdriver) or your fingers, pull out the clips holding the trim panel to the door. Pull out the clip in the center of the panel, then lift the panel up to release it at the top edge, remove the interior lock button, and remove the panel (see photos).

33.9A. Remove the mounting brackets from the corners of the panel...

33.9V... then pull the panel up to remove it
10. Replace broken staples.
11. Joints such as door pockets, speaker grilles, etc. can be removed by loosening the mounting screws or detaching the trim panel brackets.
12. Before removing the armrest or ashtray mount, pay attention to how they are installed in the interior trim panels (see photos 25.1 or 28.3).
13. Assembly is carried out in the reverse order. When installing the window lift handle, install the retaining bracket as shown in photo 33.2b.
Rear Door Panel (Hatchback)
14. Open the rear door and using a suitable flat tool, remove the brackets from the four posts along the edge of the base panel.
15. Carefully remove the trim panel from the rear door by pulling out the six mounting brackets.
16. If the panel is hooked, remove the upper sealing strip from the rear door glass. Replace any broken clips.
17. Assembly is carried out in reverse order.
Door sill protective panel
18. Remove the mounting screws (see photo) and remove the panel.

33.18. Removing the driver's door sill protective panel mounting screws
Footwell trim panel
19. Remove the door sill protective panel.
20. On the right side, remove the single mounting screw and remove the panel by pulling out the bracket (see photo). On the left side, remove the two screws and remove the panel.

33.20. Footwell trim panel mounting screw, right side (marked with an arrow)
21. Assembly is carried out in reverse order.
Door center pillar trim panel
22. Remove the bolt from the upper front seat belt anchor (see Chapter 35 of this Section).
23. Carefully remove the upper trim panel from the pillar by removing the two mounting brackets (see photo).

33.23. The upper trim panel of the central door pillar is attached with two brackets (marked with arrows)
24. Remove the two screws from the top of the lower trim panel (see photo).

33.24. Removing the lower trim panel mounting screws
25. Remove both door sill panels or loosen their screws to allow the lower trim panel clips to be pulled out.
26. After removing the four mounting brackets, remove the lower trim panel from the pillar (see photo), then unhook it from the seat belt.

33.26. Unhook the trim panel from the seat belt through the groove
27. Assembly is carried out in reverse order.
Windshield pillar trim panel
28. Open the door and remove, if necessary, the seal around the perimeter of the panel.
29. Carefully remove the panel from the rack by removing the mounting brackets.
Rear Quarter Trim Panel - Sedan
30. Remove the rear seat (see Chapter 34 of this Section).
31. Remove the bolt from the rear seat upper seat belt anchor (see Chapter 35 of this Section).
32. Remove the door edge gasket, remove the panel if necessary and remove the three brackets along the edge of the pillar panel.
33. After removing the staples, carefully remove the panel from the rack.
Rear Door Pillar Trim Panel - Hatchback
34. Remove the rear seat (see Chapter 34 of this Section).
35. Remove the bolt from the rear seat upper seat belt anchor (see Chapter 35 of this Section).
36. Using a lever, remove the gasket around the perimeter of the rear door and, if necessary, remove the panel.
37. Remove the screw from the top corner of the panel and remove the pillar mounting brackets from its front bottom corner and rear edge.
38. Remove the retaining clips and carefully lift the panel off the pillar at the front edge of the door, then remove it by unhooking the metal clips at the rear edge.
The article was copied from here nissanbook.ru
Luggage Compartment Panels - Sedan
39. Remove the rear seat (see Chapter 34 of this Section).
40. Remove the luggage compartment carpet by removing the fastening clips along the front edge.
41. Remove the edge gasket from the rear seat aperture, unscrew the bolt from the rear seat belt anchors and remove the luggage compartment light bulb (see photo).

33.41. Removing the rear seat aperture edge gasket - note the metal brackets securing the trim panel
42. Remove the retaining clips and screws along the edges of the side trim panels, then the panel can be removed.
43. To remove the rear panel, remove the trim from both wings or pull out their rear edges, then remove the seal along the top edge of the panel and remove the panels blocking access to the rear lights.
44. Remove the mounting brackets around and remove the back panel.
Luggage Compartment Panels - Hatchback
45. Open the rear door and remove the shelf on the door.
46. Remove the rear seat base, fold the seat back pad and remove the side pads (see Chapter 34 of this Section).
47. Lift the luggage compartment carpet, release the fastening clips and roll it forward towards the seat back pads.
48. Remove the two brackets and lift the rear door kick plate access panel, remove the gasket from the edge of the rear panel and remove the rear light access panels.
49. Remove the brackets and screws around the entire perimeter of the rear panel.
50. Remove the side panels: first remove the back one, then remove the mounting screws and the speaker together with the mounting panel.
51. Remove the mounting screws and brackets along the edge of the panel, then remove the panel.
Door Shelf - Sedan
52. Remove the rear seat (see Chapter 34 of this Section).
53. Remove the speaker cover and remove the screws and nuts to take out the speaker with the mounts.
54. Carefully remove the mounting brackets and remove the shelf, disconnecting it from the seat belts.
Glove compartment
55. Pull out the hinge pins at the corners of the glove compartment lid base, then open and remove it (see photos).
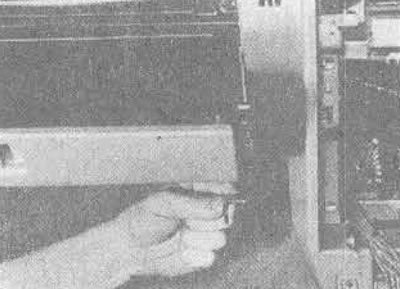
33.55A. The glove compartment lid rotates on two hinge pins...

33.55V.... which are attached as shown
56. The front panel of the glove compartment is attached with many screws along the top and sides (see photos).

33.56A. Remove the mounting screws...

33.56V.... and remove the front panel of the glove compartment
Passenger handle
57. Remove the protective covers around the edges and unscrew the two mounting bolts to remove the handle (see photo).

33.57. Fastening the handle for the passenger
Sun shield
58. Remove the mounting screws (see photo), To remove the swivel assembly from the roof, detach the sun visor from the holder and remove it.

33.58. Sun shield pivot point mounting screws
Ceiling
59. Removing and installing the ceiling requires considerable skill and experience to avoid damaging it. Therefore, leave this work to a specialist.