In some places, to remove this panel, you will need to remove adjacent panels.
Facing panel in the niche of the driver's feet
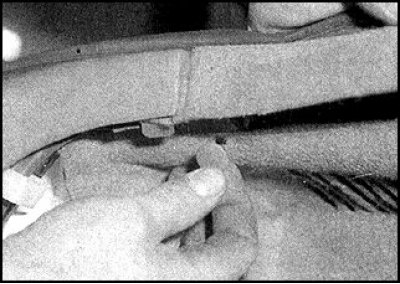
1. Pry and remove the cover, unscrew the screws.
2. Turn and get a back clamp, remove the panel.
3. Install the panel in reverse order.
Nut pads
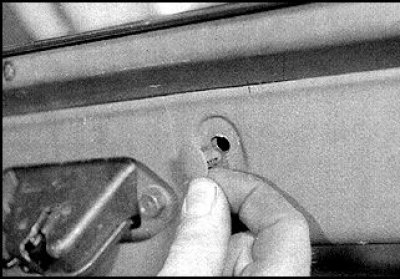
4. Disconnect the opening seal, pry up the trim and release the latches.
5. When installing, press the cover until it clicks.
Pillar trim
6. Disconnect the door seal, pry and remove the trim.
7. Carefully insert the door seal when assembling.
Inner door panel
8. See subsection 13.11.
Rear shelf (sedan)
9. Remove the rear armrest.
10. Disconnect the two front plastic latches of the shelf tray.
11. Pry from behind and remove the shelf tray.
12. If necessary, the shelf assembly can be removed by unscrewing the lower seat belt bolt and passing the belt through the shelf hatch.
13. Install the shelf in reverse order.
Trunk lining (sedan)
14. To remove the rear panel, remove the seal and move the panel up, detaching from the brackets.
15. The trunk flooring is secured with plastic clips. Remove the brackets of the fastening tapes and the cover, then remove the mats.
16. Assembly is carried out in the reverse order.
Trunk lining (coupe and hatchback)
17. Remove the plastic plugs and unscrew the 4 screws securing the rear panel.
18. The trunk flooring is removed as follows.
19. Raise the back of the deck.
20. Pry and disconnect the latches on the rear of the deck from the body.
21. Assembly is carried out in the reverse order.
Trunk lid inner panel (sedan)
22. Pry and disconnect the plastic latches, remove the panel from the brackets at the back of the cover and remove.
23. Assembly is carried out in the reverse order.
Internal lining of the cargo compartment (hatchback)
 | 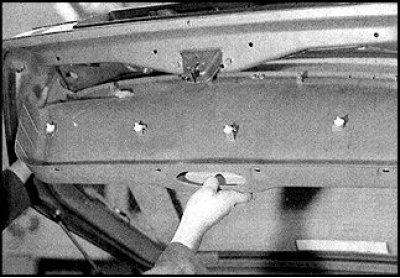 |
24. Pry and disconnect the plastic latches, remove the screws. Carefully feed the cladding panel with a fork puller, taking out the latches hidden under the back of the panel (photo on the left) and remove the trim panel (photo on the right).