


Removal and installation
Removal
1. Remove the cover from the smart key.
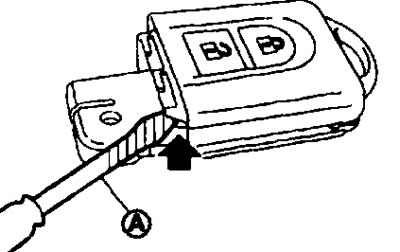
2. Insert a flat-tip screwdriver (A) wrapped with tape as shown in the figure and separate the lower case from the upper case by turning the screwdriver.
Attention:
- Do not touch the printed circuit board or electrical contacts.
- The smart key is waterproof. However, if it gets wet, wipe it dry immediately.
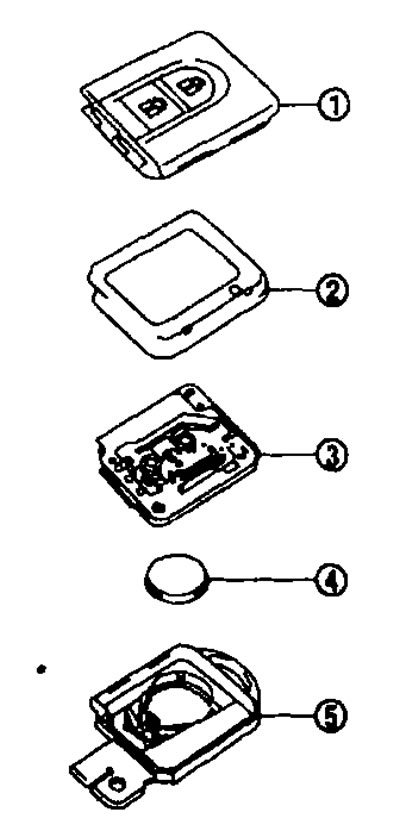
3. Remove the printed circuit board assembly from the upper housing (1).
[Assembled base plate: printed circuit board (3) + rubber seal (2)]
4. Lightly press the rubber seal (2) and remove the printed circuit board (3).
Caution: Do not touch the printed circuit directly.
5. Remove the power supply (4) from the lower housing (5) and replace it.
Recommended power supply: CR2032 lithium button cell.
Caution: When replacing the battery, do not allow dust, oil or other foreign particles to come into contact with the electrical contacts.
6. After replacing the battery, assemble the upper and lower housings by engaging the hooks on their periphery without squeezing the rubber seal.
Note: After replacing the battery, please make sure that the smart key works normally.
Installation
Installation is carried out in the reverse order of removal.