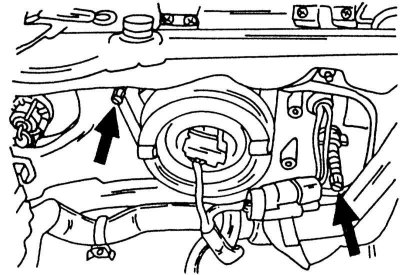
The position of the headlight adjustment screws without beam tilt adjustment.
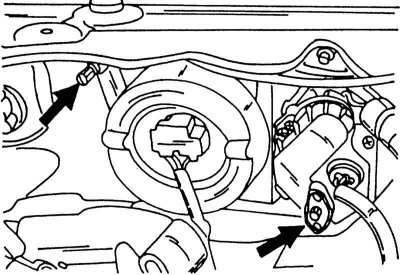
The position of the headlight adjustment screws with the beam tilt adjustment system.
1. If an emergency adjustment is made, park the vehicle 5 meters away from a wall or garage door, and draw the diagram shown in the illustration below. Adjust the headlights so that the center point of the beam with the main beam on against the wall is approximately the same height as the center point of the headlight. Switch on the dipped beam and apply a light border about 65 mm below the mentioned light center.
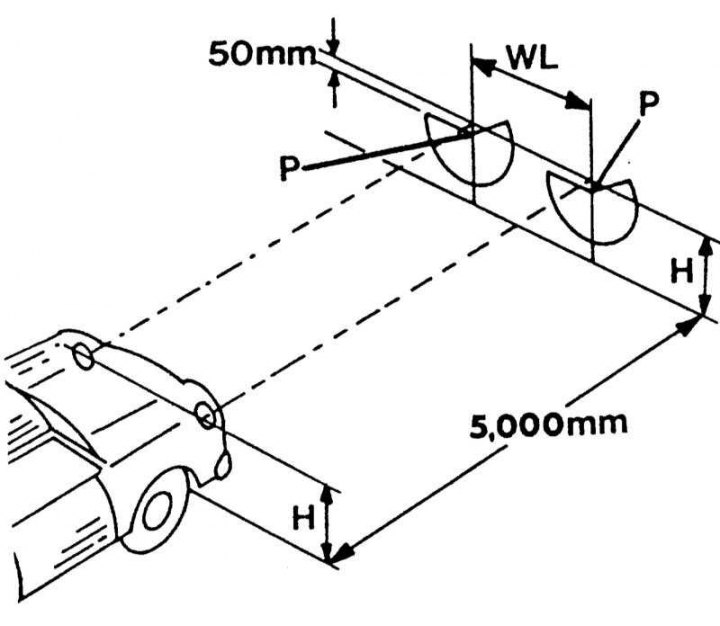
Headlight adjustment diagram. The dimension between the arrows at the top left for Primera models must be 65 mm
H - headlight height
WL - distance between headlights
P - midpoints of headlights
2. Turn the screw shown on the right side to adjust the beam horizontally, turn the screw shown on the left side to adjust the beam vertically.
3. Before adjusting the headlights, the tires must be created with an appropriate Specifications pressure.
4. Place the car on a level surface, the tank must be full. As already mentioned, the described adjustment is only belt.
5. At the first opportunity, the headlights should be checked and adjusted with optical instruments.