


2. If you have a special device for adjusting the direction of the headlight beams, carefully read the instructions provided.
3. When using the control board, the car should be parked five meters away from it (distance A in the illustration - see below) and perpendicular to the plane of the shield.
Note: A flat wall can be used as a control board, on which the appropriate markings should be applied with chalk.
4. Using chalk, draw a horizontal marking line on the shield, passing through the axial plane of the car's headlights and at the height of their centers (see accompanying illustration).
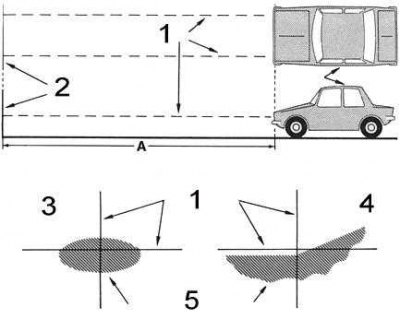
1 - central lines; 2 - control panel; 3 - car; 4 - high beam spot; 5 - low beam spot; 6 - correct placement of light spots
5. Draw two vertical lines corresponding to the vertical center lines of the car's headlights.
6. Turn on the low beam headlights.
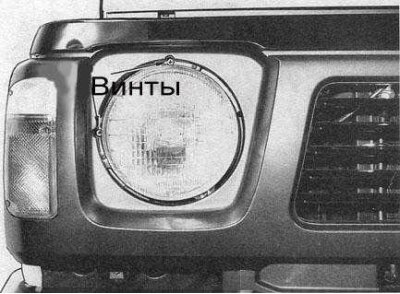
7. Screw in the adjusting screws located at the top and sides of the headlights until they stop (see accompanying illustration), then release them, achieving the desired direction of the headlight beams.
8. Adjust the direction of the headlight beams in accordance with the requirements of the traffic regulations adopted in a particular region. In general, achieve such placement of the low beam spots when the horizontal cut line of the spot is on the horizontal line of marking on the shield, or slightly below it. The raised part of the spot should be on the vertical line of marking, or slightly to the right of it.