All models except Utility (Van) and mini truck)
1. Give fixing screws and remove assemblage of a lantern of the car.
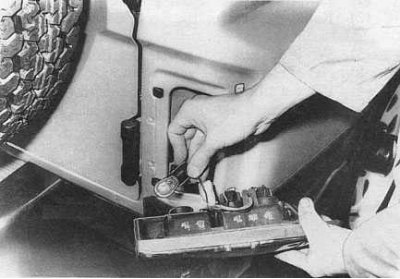
2. Turn the cartridge counterclockwise and remove it from the lamp assembly (the removal of one of the lamps of the rear combination lamp of the Hardtop and Station wagon models is shown in the accompanying illustration).
3. Press the bulb, turn it counterclockwise and remove it from the socket.
4. Install the lamp in the socket, having previously checked the socket for signs of corrosion, and the lamp itself for compliance with the nominal requirements for power and supply voltage (see tables of sizes and adjustments at the end of the guide).
5. Install the combined lamp assembly on the vehicle.
Utility Models (Van) and mini truck
1. Loosen the fixing screws and remove the combination lamp lens with seal.
2. Press the bulb, turn it counterclockwise and remove it from the socket.
3. Install the lamp in the socket, having previously checked the socket for signs of corrosion, and the lamp itself for compliance with the nominal requirements for power and supply voltage (see tables of sizes and adjustments at the end of the guide).
4. Replace the lens of the lamp, following the installation of the rubber seal.
Utility Models (Van) and Late Years Mini Truck
1. Give fixing screws and remove assemblage of a lantern of the car.
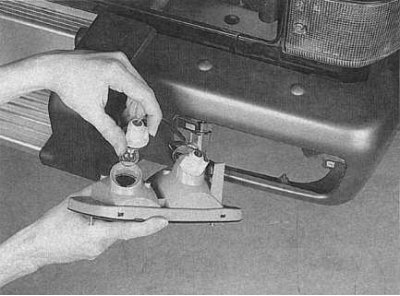
2. Press the lamp, turn it counterclockwise and remove it from the socket (see accompanying illustration).
3. Install the lamp in the socket, having previously checked the socket for signs of corrosion, and the lamp itself for compliance with the nominal requirements for power and supply voltage (see tables of sizes and adjustments at the end of the guide).
4. Install the combined lamp assembly on the vehicle.