


Removal and installation
Removal
1. Remove the rear side door trim. See section above "Interior equipment".
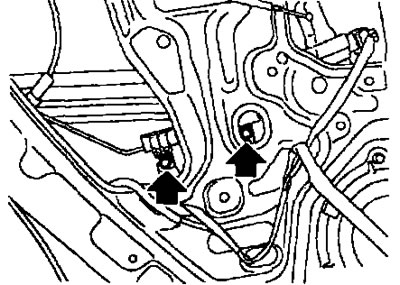
2. Disconnect the connector from the speaker in the rear side door.
3. Remove the sealing mesh using a knife.
Note: If reusing the sealing mesh, cut the butyl tape so that it remains on the sealing mesh.
4. Partially remove the glass guide channel (see fig below).
5. Slightly lift the door glass, unscrew the mounting bolts of the lower guide partition and remove it.
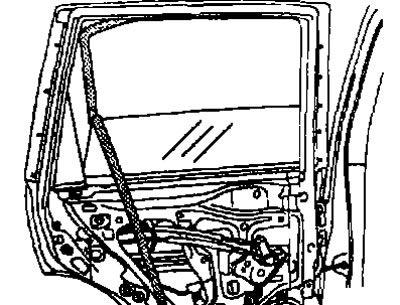
6. Loosen the corner cover mounting screws and bolts and remove the corner cover assembly.
7. Lower or raise the door glass using the window switch until the glass mounting bolts are visible.
8. Unscrew the glass mounting bolts.
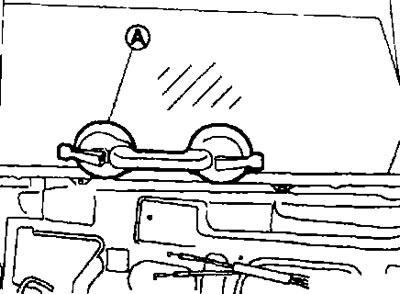
9. Lift the door glass and secure it with the suction cup (A).
10. Disconnect the connector from the window regulator assembly.
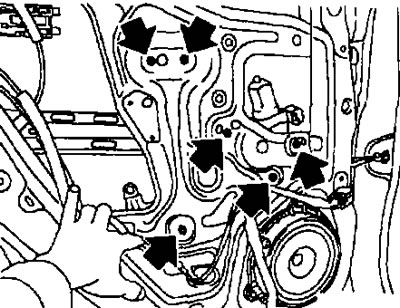
11. Loosen the window regulator assembly mounting bolts and remove it from the door panel.
Installation
Installation is carried out in the reverse order of removal.
Disassembly and assembly
Disassembly
Remove the motor from the window regulator assembly.
Assembly
Assembly is performed in the reverse order of disassembly.
Checking and adjusting
Check after removal
Check the window regulator assembly as follows. If any abnormalities are found, replace or lubricate.
Check:
- is the cable worn out?;
- is the window regulator deformed?;
- the condition of the lubricant in the sliding areas.
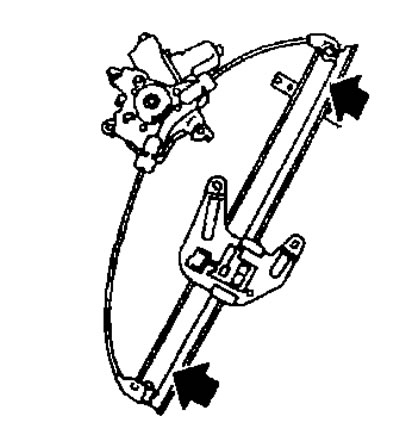
The application points of the universal grease are shown in the figure by arrows.
Checking the fit
- Make sure the glass fits snugly into the guide groove.
- Lower the glass slightly (approximately 10-20 mm) and make sure that the glass edge is parallel to the guide. If not, loosen the window regulator mounting bolts, glass guide and carrier, and adjust the glass position.