


Table of contents: Removal and installation ↓ Adjustment ↓
Removal and installation
Removal
Attention: Carry out work with a partner.
1. Remove the ceiling. See the section above "Interior equipment".
2. Remove the top side of the side cover and unscrew the cover until the TORX bolts become visible.
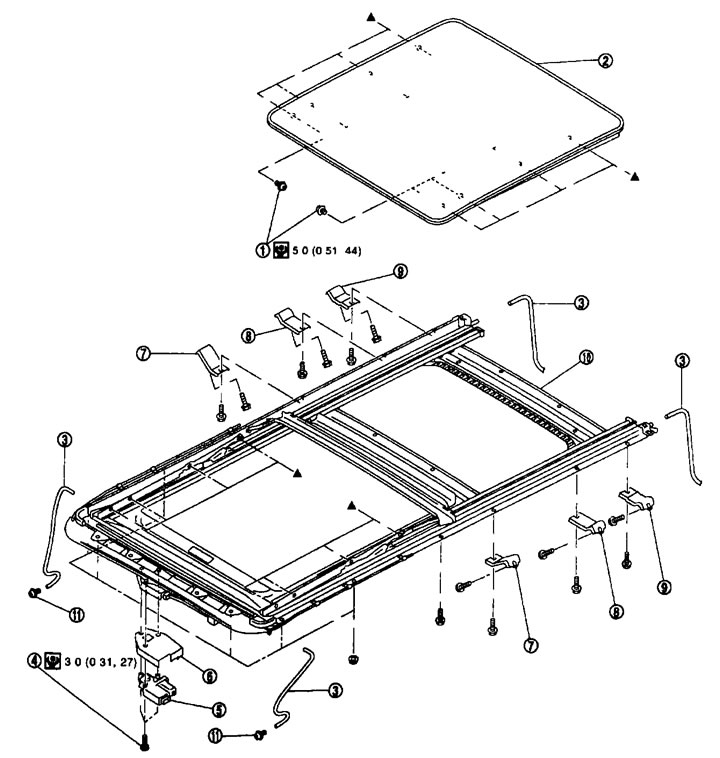
Glass lid 1. TORX bolt; 2. Glass lid; 3. Drain hose; 4. TORX bolt; 5. Hatch motor assembly; 6. Hatch engine cover; 7. Front sunroof bracket (left/right); 8. Central hatch bracket (left/right); 9. Rear sunroof bracket (left/right); 10. Hatch assembly; 11. Drain hose coupling.
3. Unscrew the TORX bolts (A), then remove the glass cover and disconnect the rear drain hose fitting (1).
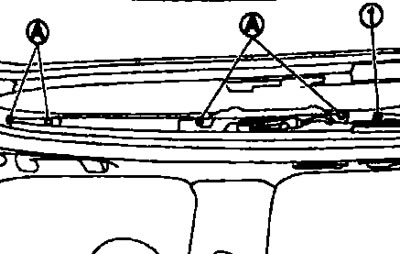
4. Remove the sunroof cover from the vehicle.
Installation
After installing the glass cover, check for water leakage and make sure there are no abnormalities.
After installation, adjust the fit. See below.
Installation is performed in the reverse order of removal.
Adjustment
Adjusting the lid seal overlap and lid height
1. Remove the top side of the side cover and unscrew the cover until the TORX bolts are visible.
2. Loosen the TORX mounting bolts (left and right) glass lid, lower it.
3. Adjust the position of the glass cover outside the car along the cuts "A-A", "B-B", "C-C", as shown in the figure.
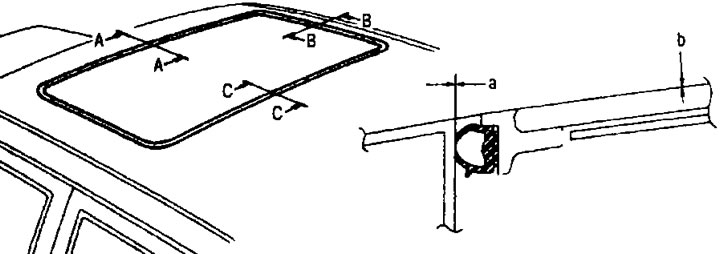
| a | b | |
| A-A | 0.3-1.7 mm | from -1.5 to 1.5 mm |
| B-B | 0.3-1.7 mm | from -1.5 to 1.5 mm |
| S-S | 0.3-1.7 mm | from -1.5 to 1.5 mm |
4. To prevent the glass cover from moving after adjustment, first tighten the TORX bolts at the front left, then at the rear right.
5. Tighten the remaining TORX screws without allowing the glass cover to move.
6. Tilt the glass lid several times and make sure it moves up and down freely.