


Table of contents: Door glass ↓ Window lifter assembly ↓ Check after removal ↓ Post-installation check ↓
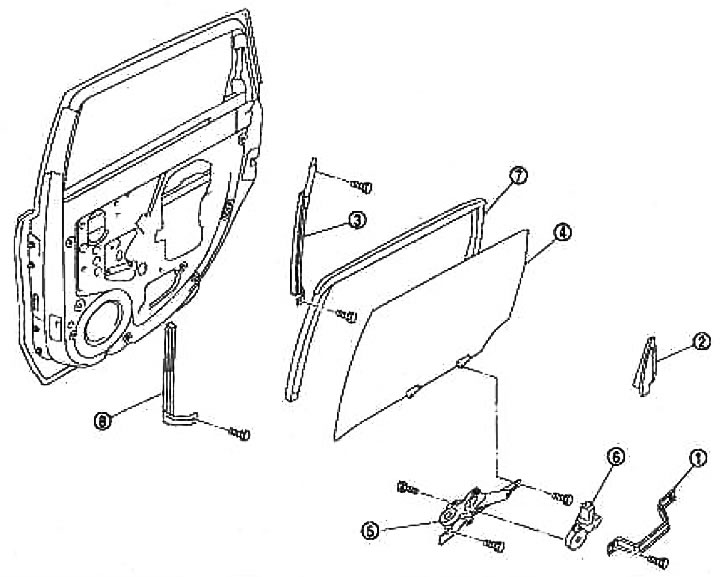
1. Door handle bracket; 2. Corner inner cover; 3. Lower guide (rear); 4. Door glass; 5. Window lifter assembly; 6. Window lift motor; 7. Door glass guide channel; 8. Lower guide (front)
Door glass
Removal
1. Lower the door glass completely.
2. Remove the rear side door trim. See section "Exterior finishing".
3. Remove the door handle bracket
4. Disconnect the connector from the speaker in the rear side door.
5. Remove the corner inner cover.
6. Remove the sealing mesh.
Note: If reusing the sealing mesh, cut the butyl tape with a knife so that it remains on the sealing mesh.
7. Unscrew the mounting bolts of the lower guide (rear) and remove it.
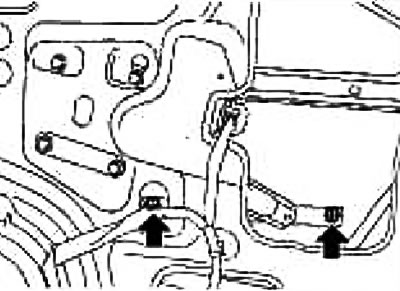
8. While supporting the door glass, lower or raise it using the window switch until the glass mounting bolts are visible.
9. Unscrew the glass mounting bolts.
10. Lift the glass and remove it.
11. Pull the door glass guide channel and remove it from the door panel.
12. Unscrew the mounting bolts of the lower guide (front) and remove it.
Installation
Installation is performed in the reverse order of removal.
Window lifter assembly
Removal
1. Remove the rear side door trim. See section "Exterior finishing".
2. Remove the door handle bracket.
3. Disconnect the connector from the speaker in the rear side door.
4. Remove the sealing mesh.
Note: If reusing the sealing mesh, cut the butyl tape with a knife so that it remains on the sealing mesh.
5. While supporting the door glass, lower or raise it using the window switch until the glass mounting bolts are visible.
6. Unscrew the glass mounting bolts.
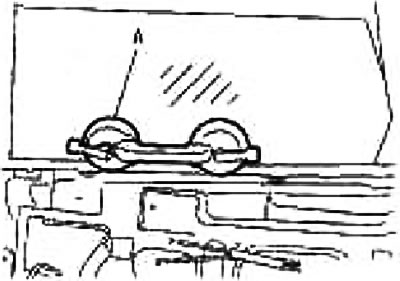
7. Lift the door glass and fix it using suction cup A.
 |
 |
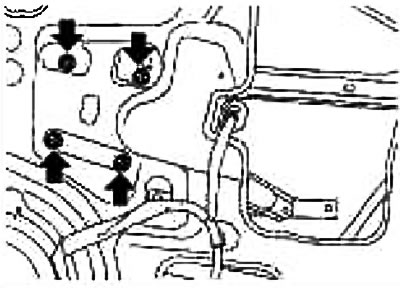
8. Loosen the window regulator mounting bolts and remove it from the door panel.
Installation
Installation is performed in the reverse order of removal.
Check after removal
Check the window regulator assembly as follows. If any abnormalities are found, replace or lubricate.
Check:
- is the drive gear worn out?;
- is the window regulator deformed?;
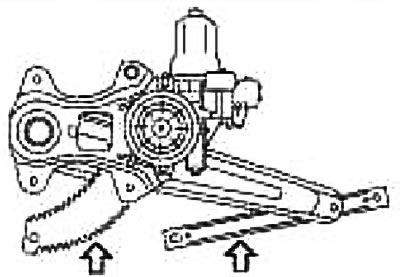
- condition of the lubricant in the sliding areas
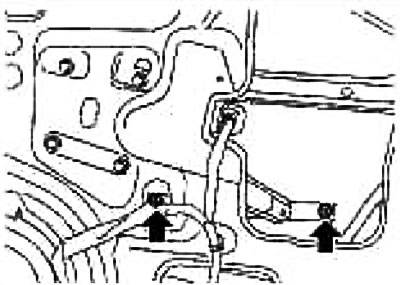
Lubrication points (Nissan MP Special Grease No 2) are shown in the figure by arrows.
Post-installation check
Checking the fit
Make sure the glass fits snugly into the guide groove.
Lower the glass slightly (approx 10-20 mm) and make sure that the glass edge is parallel to the guide. If not, loosen the window regulator, guide, glass and support element mounting bolts and adjust the glass position.