


Headlights and vehicle lighting system Nissan Note 1
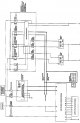

Lighting System — Conventional Headlights — Component and Connector Locations
1. IPDM E/R Block (microprocessor power distribution unit in the engine compartment) EB, E11, E12. 2. VSM block (body control unit) M57, M59 (view with the top part of...
1. IPDM E/R Block (microprocessor power distribution unit in the engine compartment) EB, E11, E12. 2. VSM block (body control unit) M57, M59 (view with the top part of...

Lighting system — conventional headlights — headlight beam adjustment
Adjust the headlight beam direction by turning the adjusting screws. See the figure for the locations of the adjustment screws. Caution: First tighten the adjusting...
Adjust the headlight beam direction by turning the adjusting screws. See the figure for the locations of the adjustment screws. Caution: First tighten the adjusting...

Lighting system — conventional headlights — removal and installation
1. Bolt; 2. Headlight Removal 1. Disconnect the cable from the negative battery terminal. 2. Remove the front bumper. See chapter Body . 3. Unscrew the headlight...
1. Bolt; 2. Headlight Removal 1. Disconnect the cable from the negative battery terminal. 2. Remove the front bumper. See chapter Body . 3. Unscrew the headlight...

Lighting system — conventional headlights — disassembly and assembly
1. Retaining spring; 2. Parking light (front side light) lantern; 3. Parking light bulb socket (front side light) lantern; 4. Halogen bulb (low/high beam); 5. Cap; 6....
1. Retaining spring; 2. Parking light (front side light) lantern; 3. Parking light bulb socket (front side light) lantern; 4. Halogen bulb (low/high beam); 5. Cap; 6....

Daytime Lighting System — Component and Connector Locations
1. IPDM E/R block E8, E11, E12. 2. Block VSM M57, M59 (view with the top part of the dashboard removed). 3. Combination switch M38. 4. Instrument cluster M27. 5. Daytime...
1. IPDM E/R block E8, E11, E12. 2. Block VSM M57, M59 (view with the top part of the dashboard removed). 3. Combination switch M38. 4. Instrument cluster M27. 5. Daytime...
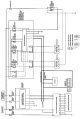

Automatic Lighting System — Component and Connector Locations
1. IPDM E/R unit EB, E11, E12. 2. Block VSM M57, M59 (view with the top part of the dashboard removed). 3. Light and rain sensor R2. 4. Combination switch M38. 5. Front...
1. IPDM E/R unit EB, E11, E12. 2. Block VSM M57, M59 (view with the top part of the dashboard removed). 3. Light and rain sensor R2. 4. Combination switch M38. 5. Front...


Automatic lighting system — standard voltage values at the contacts of the VSM and IPDM E/A blocks
Standard voltage values at the contacts of the VSM block Attention: Check the waveform at the combination switch contacts under load with the headlight switch, turn...
Standard voltage values at the contacts of the VSM block Attention: Check the waveform at the combination switch contacts under load with the headlight switch, turn...

Automatic Lighting System — Removing and Installing Light and Rain Sensor
Removal 1. Remove the interior mirror. See chapter Body . 2. Remove the clamp and press the latches. 3. Remove the light and rain sensor. 4. Disconnect the connector...
Removal 1. Remove the interior mirror. See chapter Body . 2. Remove the clamp and press the latches. 3. Remove the light and rain sensor. 4. Disconnect the connector...
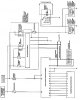

Headlight leveling adjuster — removal and installation
Removal 1. Remove the regulator panel assembly. 2. Release the latches (A) of the headlight leveler assembly panel and remove the headlight leveler (1). Installation...
Removal 1. Remove the regulator panel assembly. 2. Release the latches (A) of the headlight leveler assembly panel and remove the headlight leveler (1). Installation...

Fog lights — component and connector locations
1. IPDM E/R unit EB, E11, E12. 2. Block VSM M57, M59 (view with the top part of the dashboard removed). 3. Combination switch M38. 4. Instrument cluster M27.
1. IPDM E/R unit EB, E11, E12. 2. Block VSM M57, M59 (view with the top part of the dashboard removed). 3. Combination switch M38. 4. Instrument cluster M27.


Fog lights — standard voltage values at the contacts of the VSM and IPDM E/A units
Standard voltage values at the contacts of the VSM block Attention: Check the waveform at the combination switch contacts under load with the headlight switch, turn...
Standard voltage values at the contacts of the VSM block Attention: Check the waveform at the combination switch contacts under load with the headlight switch, turn...

Fog lights — headlight beam adjustment
Fog lights - semi-disassemblable type with replaceable halogen bulb. Before adjusting the beam direction of the headlights, check the following: Adjust the pressure in...
Fog lights - semi-disassemblable type with replaceable halogen bulb. Before adjusting the beam direction of the headlights, check the following: Adjust the pressure in...

Fog lights — removal and installation
Removal 1. Turn the fog light switch to the "OFF" position. 2. To increase the working space between the wing guard and the wing, fold back the wing guard and engine...
Removal 1. Turn the fog light switch to the "OFF" position. 2. To increase the working space between the wing guard and the wing, fold back the wing guard and engine...

Rear Fog Light — Component and Connector Locations
1. BCM block M57, M59 (view with the top part of the dashboard removed). 2. Combination switch M36. 3. Instrument cluster M27. Replacing a light bulb 1. Remove the rear...
1. BCM block M57, M59 (view with the top part of the dashboard removed). 2. Combination switch M36. 3. Instrument cluster M27. Replacing a light bulb 1. Remove the rear...

Rear fog light — removal and installation
Removal 1. Remove the rear bumper cornice. See chapter Body . 2. Disconnect the connector from the rear fog light. 3. Remove the rear fog light (1) by pressing the metal...
Removal 1. Remove the rear bumper cornice. See chapter Body . 2. Disconnect the connector from the rear fog light. 3. Remove the rear fog light (1) by pressing the metal...

Direction Indicator and Hazard Warning Lights — Component and Connector Locations
1. Block VSM M57, M59 (view with the top part of the dashboard removed). 2. Combination switch M38. 3. Hazard warning switch. 4. Instrument cluster M27.
1. Block VSM M57, M59 (view with the top part of the dashboard removed). 2. Combination switch M38. 3. Hazard warning switch. 4. Instrument cluster M27.

Direction Indicator and Hazard Warning Lights — Replacing Bulbs
Replacing a light bulb (front turn signal light) See the "Replacing Bulbs" section in the "Conventional Headlights" section. Replacing a light bulb (rear turn signal...
Replacing a light bulb (front turn signal light) See the "Replacing Bulbs" section in the "Conventional Headlights" section. Replacing a light bulb (rear turn signal...

Direction indicator and hazard warning lights — removal and installation
Removal and installation the front turn signal light See the section "Removal and installation" in the section "Conventional headlights". Removal and installation the...
Removal and installation the front turn signal light See the section "Removal and installation" in the section "Conventional headlights". Removal and installation the...

Headlight and turn signal switch — removal and installation
Removal 1. Remove the steering column cover. See chapter Body . 2. While pressing the latches in the direction (A) shown in the illustration, pull the headlight and turn...
Removal 1. Remove the steering column cover. See chapter Body . 2. While pressing the latches in the direction (A) shown in the illustration, pull the headlight and turn...

Hazard warning switch — removal and installation
Removal 1. Remove the air conditioner regulator (1) See chapter Automatic air conditioner . 2. Disconnect the connector from the hazard warning switch. 3. Press the...
Removal 1. Remove the air conditioner regulator (1) See chapter Automatic air conditioner . 2. Disconnect the connector from the hazard warning switch. 3. Press the...

Brake lights bulb replacement
Replacing the upper brake light bulb 1. Remove the upper brake light (1). 2. Turn the bulb holder (2) counterclockwise and unlock it. 3. Remove the light bulb (3) from...
Replacing the upper brake light bulb 1. Remove the upper brake light (1). 2. Turn the bulb holder (2) counterclockwise and unlock it. 3. Remove the light bulb (3) from...

Brake lights — removal and installation
Removal and installation the upper brake light Removal 1. Open the rear door and remove the sealing cover (1). 2. Unscrew the nuts (A). 3. Pull the upper brake light...
Removal and installation the upper brake light Removal 1. Open the rear door and remove the sealing cover (1). 2. Unscrew the nuts (A). 3. Pull the upper brake light...

Reversing lights
Replacing a light bulb See the section "Replacing Light Bulbs" " Rear combination light ". Removal and installation See "Removal and installation" in the section " Rear...
Replacing a light bulb See the section "Replacing Light Bulbs" " Rear combination light ". Removal and installation See "Removal and installation" in the section " Rear...

Parking, License Plate and Tail Lights — Component and Connector Locations
1. IPDM E/R unit EB, E11, E12. 2. Block VSM M57, M59 (view with the top part of the dashboard removed). 3. Combination switch M38.
1. IPDM E/R unit EB, E11, E12. 2. Block VSM M57, M59 (view with the top part of the dashboard removed). 3. Combination switch M38.
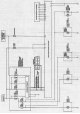

Parking lights, number plate lights and tail lights — replacing bulbs
Parking light See the section "Replacing Light Bulbs" " Rear combination light ". License plate light 1. Insert a screwdriver (A) or similar tool wrapped in a cloth into...
Parking light See the section "Replacing Light Bulbs" " Rear combination light ". License plate light 1. Insert a screwdriver (A) or similar tool wrapped in a cloth into...

Parking lights, number plate lights and rear lights — removal and installation
Parking light See "Removal and installation" in the section " Rear combination light ". License plate light Removal 1. Remove the license plate light trim. See Chapter...
Parking light See "Removal and installation" in the section " Rear combination light ". License plate light Removal 1. Remove the license plate light trim. See Chapter...

Rear Combination Light — Replacing Bulbs
1. Remove the rear combination light. 2. Turn the bulb holder (1), (2), (3) counterclockwise and unlock it. 3. Remove the bulb (4), (5), (6). Brake light/tail light (5):...
1. Remove the rear combination light. 2. Turn the bulb holder (1), (2), (3) counterclockwise and unlock it. 3. Remove the bulb (4), (5), (6). Brake light/tail light (5):...

Rear combination light — removal and installation
Removal 1. Remove the rear pillar trim. See chapter Body . 2. Disconnect the connector from the rear combination light. 3. Remove the mounting bolts (A) of the rear...
Removal 1. Remove the rear pillar trim. See chapter Body . 2. Disconnect the connector from the rear combination light. 3. Remove the mounting bolts (A) of the rear...

Interior Light — Component and Connector Locations
1. BCM block M57, M59 (view with the top part of the dashboard removed) 2. Ignition switch MZZ (without smart key) 3. Ignition switch and ignition switch handle M34...
1. BCM block M57, M59 (view with the top part of the dashboard removed) 2. Ignition switch MZZ (without smart key) 3. Ignition switch and ignition switch handle M34...

Interior Lighting — Replacing Bulbs
Local, individual lighting plafond 1. Remove the lampshade diffuser. 2. Remove the light bulb. Local lighting lamp: 12 V - 5 W Individual lighting lamp: 12 V - 5 W...
Local, individual lighting plafond 1. Remove the lampshade diffuser. 2. Remove the light bulb. Local lighting lamp: 12 V - 5 W Individual lighting lamp: 12 V - 5 W...

Interior light — removal and installation
Local, individual lighting lampshade Removal 1. Insert a screwdriver (A) or similar tool wrapped in a cloth into the slot in the diffuser and remove the lamp shade...
Local, individual lighting lampshade Removal 1. Insert a screwdriver (A) or similar tool wrapped in a cloth into the slot in the diffuser and remove the lamp shade...
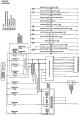

Light bulb specifications
Headlights Component Power (W) Low/high beam (halogen type) 60/55 (H4) Outdoor lighting lanterns Interior lights/backlighting Component Power (W) Local lighting plafond...
Headlights Component Power (W) Low/high beam (halogen type) 60/55 (H4) Outdoor lighting lanterns Interior lights/backlighting Component Power (W) Local lighting plafond...
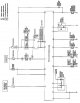
Interior light — wiring diagram
Models without individual lighting shade Models with individual lighting shade
Models without individual lighting shade Models with individual lighting shade
This section is available on: russian, bulgarian, belarusian, ukrainian, serbian, croatian, romanian, polish, slovak, hungarian
Similar information for other Nissan models
➜ Electrical equipment: Lighting and signaling Nissan Murano 1 (2002-2007, petrol)
➜ Electrical equipment: Lighting system Nissan Serena 2 (1999-2005)
➜ Electrical equipment: Lighting and signaling Nissan Patrol 4 (1987-1997, petrol)
➜ Electrical equipment: Lighting system Nissan X-Trail 2 (2007-2013, petrol)
Link in different formats to this section
TEXTHTMLBB Code
- User manual
- Control devices
- Preparing to move
- Starting engine and driving
- Maintenance
- Technical information
- Power unit
- Engine repair CR
- Engine repair HR
- Engine lubrication system
- Cooling system (CR)
- Cooling system (HR)
- Fuel and exhaust system
- Engine management (CR)
- Engine management (HR)
- Transmission
- Clutch
- Mechanical gearbox
- Automatic gearbox
- Drive shafts and axles
- Chassis
- Car suspension
- Brake system
- Steering
- Body
- Airbags (SRS)
- Doors, hood and locks
- Glasses and mirrors
- Exterior (external elements)
- Interior (internal elements)
- Air conditioning automatic
- Electrical equipment
- Equipment and devices
- Launch and charge system
- Headlights and lighting
- Windshield wipers and washers
- General information
- Introduction to guide
- Governing bodies
- Starting engine and driving
- Maintenance
- Power unit
- Engine repair
- Cooling system
- Heating and ventilation
- Power and exhaust system
- Ignition system
- Charge and launch systems
- Transmission
- Mechanical gearbox
- Automatic gearbox
- Clutch
- Drive shafts and hubs
- Chassis
- Brake system
- Car suspension
- Steering
- Body
- Exterior (external elements)
- Interior (internal elements)
- Electrical equipment
- Equipment and devices
- Electrical circuits
Cookies are used to improve the site's performance. 💻 Continue by agreeing to the terms.