


Table of contents: Removal ↓ Radiator ↓ Removal and installation ↓ Installation ↓ Disassembly and assembly ↓ Disassembly ↓ Assembly ↓ Post-assembly check ↓ Post-installation check ↓
Removal
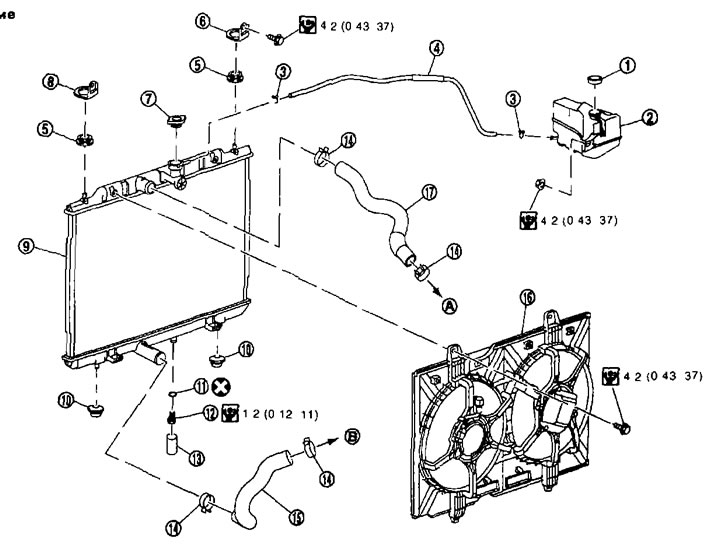
1. Tank lid; 2. Tank; 3. Clamp; 4. Tank hose; 5. Rubber cushion (upper); 6. Mounting bracket (right); 7. Radiator cap; 8. Mounting bracket (left); 9. Radiator; 10. Rubber cushion (lower); 11. O-ring seal; 12. Drain plug; 13. Drain hose; 14. Clamp; 15. Radiator hose (lower); 16. Cooling fan assembly; 17. Radiator hose (upper); A. To the outlet pipe; B. To the inlet pipe.
Radiator
1. Remove the engine protection from the bottom.
2. Drain the engine coolant from the radiator. See above.
Caution: Perform this operation when the engine is cold.
3. Remove the air duct (intake). See the chapter "Engine mechanical part".
4. Disconnect the connectors from the fan motors and move the wiring to the side.
5. Disconnect the hose (upper) from the radiator and the hose from the tank.
6. Remove the mounting brackets (right and left) and the rubber cushion (upper) and tilt the radiator forward.
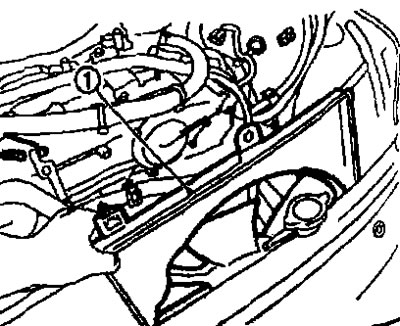
7. Remove the radiator cooling fan assembly (1). See below.
Caution: Be careful not to damage the radiator core when removing.
8. Disconnect the radiator hose (lower).
Removal and installation
Removal
Attention:
- Do not remove the radiator cap when the engine is hot. High-pressure coolant squirting out of the radiator can cause serious burns.
- Wrap the cap with a thick cloth. First unscrew the cap a quarter turn and release the pressure. Then unscrew the cap the rest of the way.
9. Remove the radiator.
Caution: Do not damage or scratch the radiator core.
Installation
Installation is carried out in the reverse order of removal.
Disassembly and assembly
Preparation
1. Place a shim on the cutting edge of the radiator pliers (special tool).
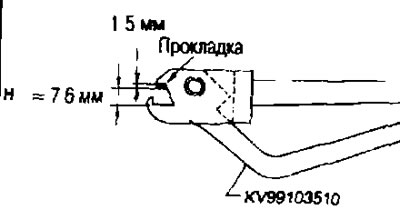
Gasket dimensions (width x length x thickness): 18 x 8.5 x 1.5 mm.
2. Make sure that when the pliers close, (special tools KV99103510) the size of "H" is about 7.6 mm.
3. If necessary, adjust the "H" size with a spacer.
Disassembly
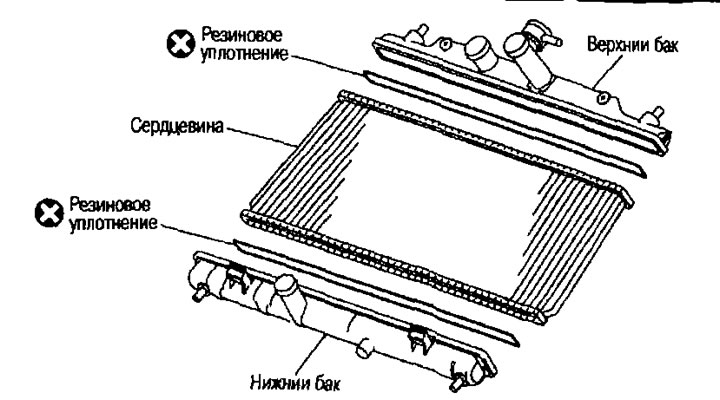
1. Remove the upper and lower tanks using radiator pliers (special tool).
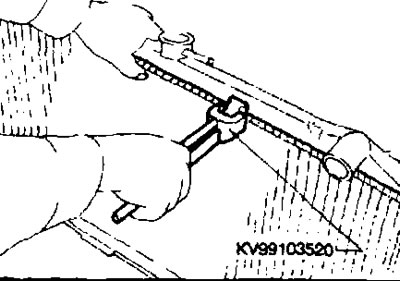
Grasp the crimped edge and bend it upwards so that the radiator pliers come loose (special tool KV991G3520).
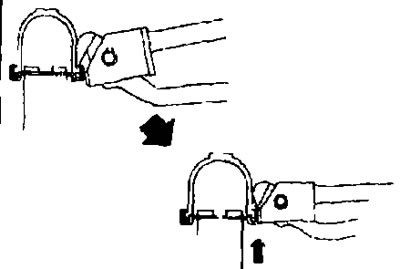
Caution: Do not bend excessively.
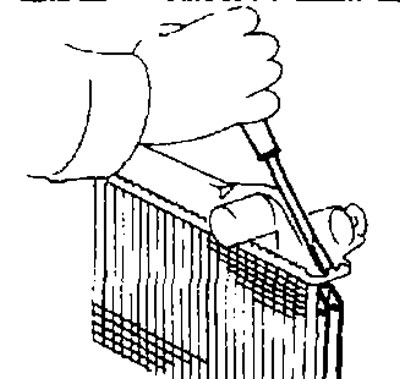
- In areas where there are radiator mites (special tool KV99103520) do not use, bend the edge with a screwdriver.
Caution: Do not damage the tank.
2. Remove the rubber seal.
3. Make sure the edges are folded vertically.
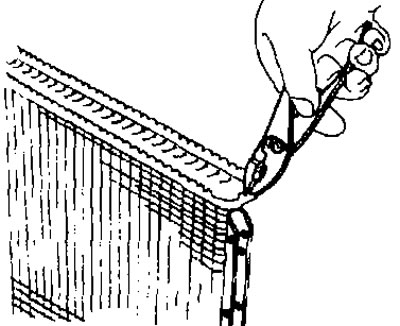
Assembly
1. Clean the contact area of the tank.
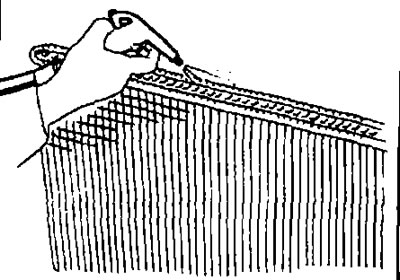
2. Install the new rubber seal by pressing it in with your fingers.
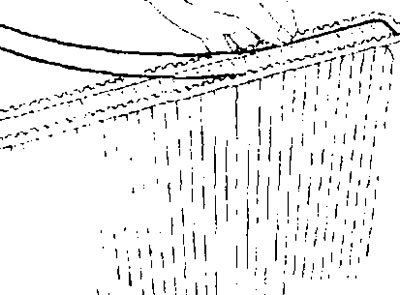
Caution: Do not twist the rubber seal.
3. Pin the tank in the order indicated by the numbers in the figure using radiator pliers (special tool).
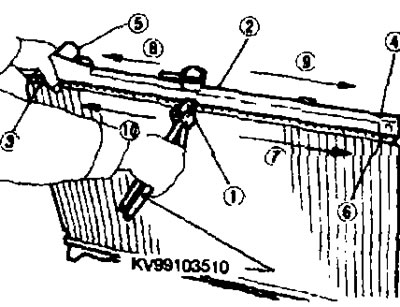
- In areas where radiator mites (special tool. KV99103510) cannot be used, use pliers.
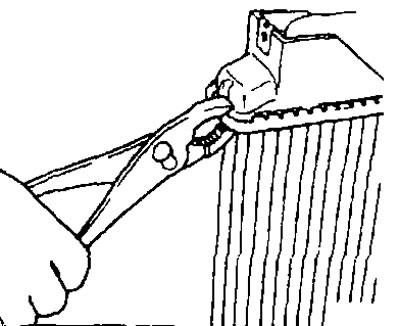
4. Make sure the flange is completely compressed.
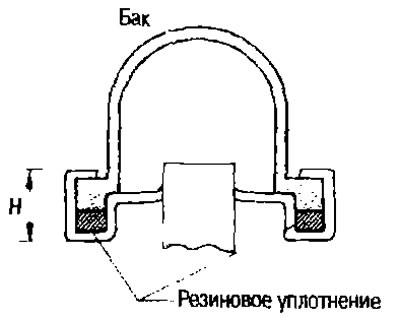
Height "H": 8.0-8.4 mm.
5. Make sure there are no leaks. See above.
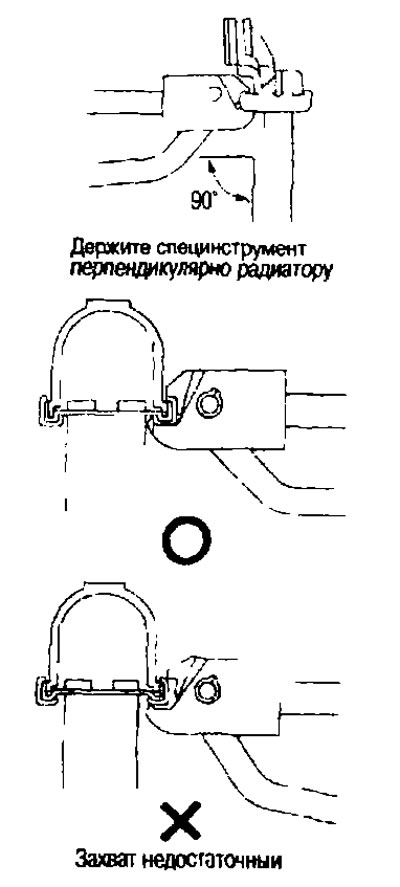
Post-assembly check
1. Create pressure using the adapter (suitable special tools.) (A) and the pump (suitable special tools,).
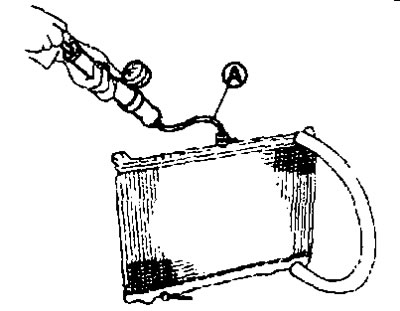
Test pressure. See below. "Technical data and specifications".
Caution: To prevent the hose from slipping off when pressurizing, secure it securely with a clamp.
2. Check for leaks by placing the radiator in a container of water and applying test pressure.
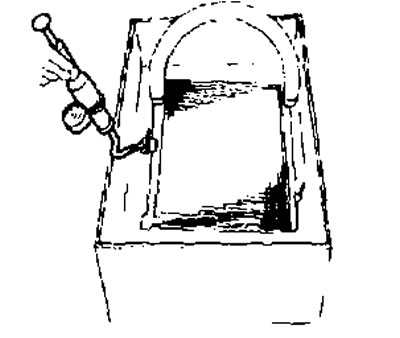
Post-installation check
- Check for coolant leaks by applying pressure using an adapter (suitable special tool) and the pump (suitable special tool). See above.
- Start the engine and warm it up. Conduct a visual inspection and make sure there are no coolant leaks.