


Table of contents: Engine coolant ↓ Flushing the cooling system ↓
Engine coolant
Checking the level
- Make sure the coolant level in the reservoir is between the "MIN" and "MAX" marks when the engine is cold.
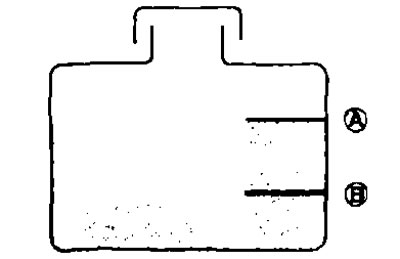
A. MAX; V. MIN
- If necessary, top up the coolant level to normal.
Checking for leaks
- To check for leaks, pressurize the cooling system using a pump (suitable special tool) (A) and adapter (suitable special tool) (IN).
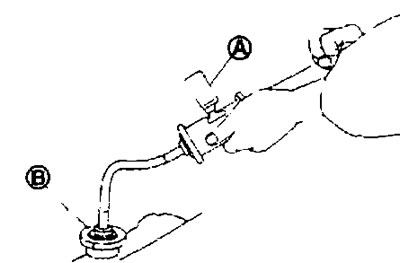
Test pressure. See below. "Technical data and specifications".
Attention:
- Do not remove the radiator cap when the engine is hot. High-pressure coolant squirting out of the radiator can cause serious burns.
- Pressures higher than specified may cause damage to the radiator.
Note:
- If the engine coolant level has dropped, add fluid to the radiator.
- If any deviations from the norm are detected, eliminate them or replace damaged components.
Drain
Attention:
- Do not remove the radiator cap when the engine is hot. High-pressure coolant squirting out of the radiator can cause serious burns.
- Wrap the cap with a thick cloth. First unscrew the cap a quarter turn and release the pressure. Then unscrew the cap the rest of the way.
1. Remove the engine protection from the bottom.
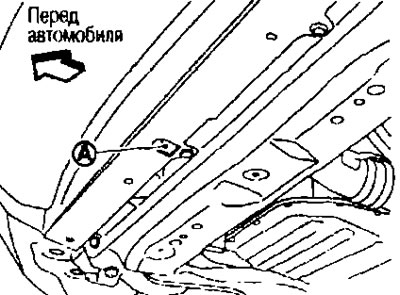
A. Radiator drain plug.
- When draining all the coolant from the system, remove the drain plugs from the cylinder block. See Chapter "Mechanical part of the engine".
3. If necessary, remove the reservoir, drain the coolant and clean the reservoir before installation.
- Move the tank (3) and remove it in the order indicated by the numbers in the figure.
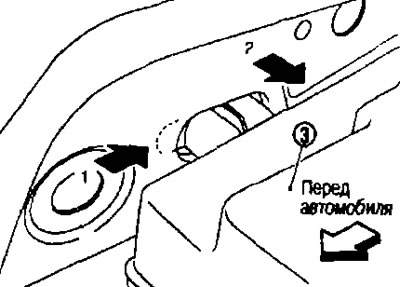
4. Check the drained coolant for contaminants such as rust, corrosion, and color changes.
- If there are traces of contamination, flush the engine cooling system. See below.
Refueling
1. If removed, install the tank and screw the plug into the radiator drain hole.
Caution: Clean the drain plug and screw it in, installing a new O-ring.
Radiator Drain Plug: See below.
- If the drain plugs in the cylinder block were removed, replace and tighten them. See Chapter "Mechanical part of the engine".
2. Make sure the hose clamps are tight.
3. Remove the air duct assembly and move the electric throttle actuator to the side. See Chapter "Mechanical part of the engine".
4. Disconnect the heater hose (1) at the location indicated by the arrow
 not in the picture.
- Raise the end of the heater hose approximately 100 mm higher than when installed.
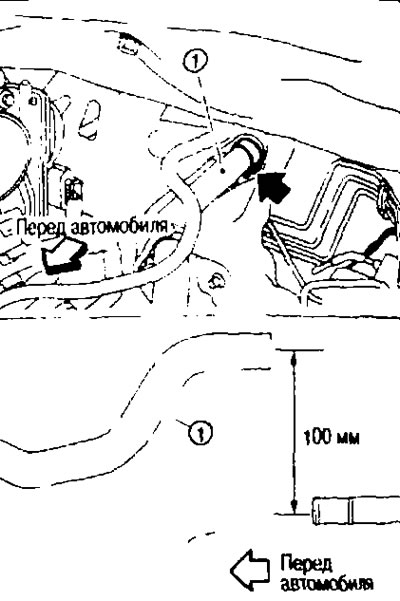
5. Fill the radiator (1) to the required level.
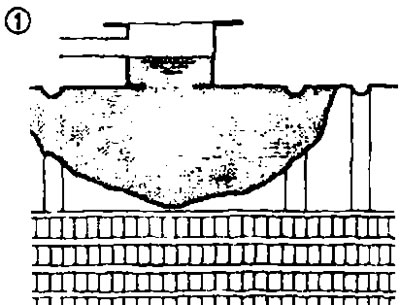
Caution: Do not allow coolant to come into contact with electronic components (generator, etc.).
- Pour the coolant slowly, at a rate of less than 2 liters per minute, to allow air to escape from the system.
- When coolant begins to flow out of the heater hose, reconnect the heater hose and continue filling.
- Use genuine Nissan antifreeze coolant or equivalent mixed with water (distilled or desalted). See chapter "Maintenance".
Engine coolant capacity (with reservoir at "MAX" level): See "Technical data and specifications" below.
6. Fill the tank with coolant up to the "MAX" mark.
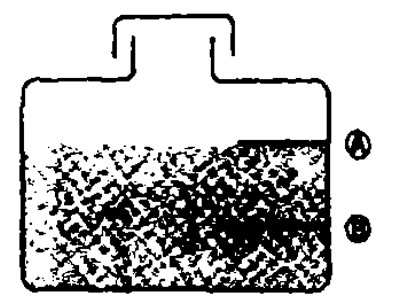
A: MAX; B: MIN
Tank filling capacity (at the "MAX" level): See below. "Technical data and specifications".
7. Screw the cap back on the radiator.
8. Install the air duct assembly and the electric throttle actuator. See Chapter "Mechanical part of the engine".
9. Warm up the engine until the thermostat opens. The standard warm-up time is about 10 minutes at an engine speed of 3000 rpm.
- To determine if the thermostat is opening, touch the lower radiator hose with your hand and make sure that warm fluid flows through it.
Caution: To avoid overheating the engine, watch the coolant temperature gauge.
The article was obtained from the portal: NISSANBOOK.RU
10. Stop the engine and cool down to below 50°C.
- To save time, cool with a fan.
- If necessary, fill the radiator with coolant up to the filler neck.
Caution: Do not allow coolant to come into contact with electronic components (generator, etc.).
11. Fill the tank with coolant up to the "MAX" mark.
12. Repeat steps 5-10 two or more times, tightening the radiator cap until the coolant level stops dropping.
13. Check for leaks in the cooling system with the engine running.
14. Warm up the engine and check for leaking coolant by increasing engine speed from idle to 3000 rpm and setting the heater temperature control to several positions between "COOL" and "WARM".
- A sound may be heard from the heater.
15. Repeat step 14 three times.
16. If a sound is heard, bleed the cooling system by repeating steps 5-10 until the coolant level stops dropping.
Flushing the cooling system
1. If removed, install the tank and screw the plug into the radiator drain hole.
Caution: Clean the drain plug and screw it in, installing a new O-ring.
Radiator Drain Plug: See below.
- If the drain plugs in the cylinder block were removed, replace and tighten them. See Chapter "Mechanical part of the engine".
2. Remove the air duct assembly and move the electric throttle actuator to the side. See Chapter "Mechanical part of the engine".
3. Disconnect the heater hose (1) at the location indicated by the arrow
 in the picture.
- Raise the end of the heater hose approximately 100 mm higher than when installed.
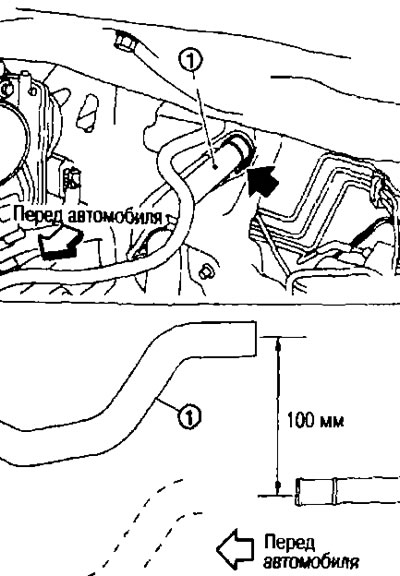
4. Fill the radiator and reservoir with engine coolant and tighten the radiator cap.
- When coolant begins to flow out of the heater hose, reconnect the heater hose and continue filling.
5. Install the air duct assembly and the electric throttle actuator. See Chapter "Mechanical part of the engine".
6. Start the engine and warm it up to normal operating temperature.
7. Press the accelerator pedal two or three times without load.
8. Turn off the engine and wait until it cools down.
9. Drain the water from the system. See above.
10. Repeat steps 1-9 until clean water starts flowing out of the radiator.