


Examination
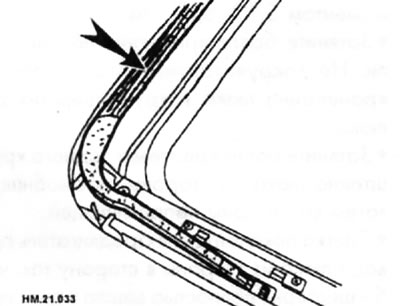
- Check that the fairing (arrow) lifts correctly by hand. If it is found that it is not working properly, remove the fairing and inspect it carefully. If the fairing is damaged, replace it with a new one. If no damage is found, install the fairing correctly.
- Check the rods and make sure that the protective film has not peeled off to the point that the parts of the rods located underneath are exposed. Also check to see if the rods are the source of the noise. If suspicions are confirmed, the rods must be replaced.
Caution: Before replacing a suspect part, make sure the source of the noise has been identified.
- Check that there is enough grease on the cables and in the guide grooves. If there is not enough lubricant, add more.
- Check the cables for damage or fraying. If damage is detected, the cables must be replaced.
Adjustment
- Tilt the glass lid upward.
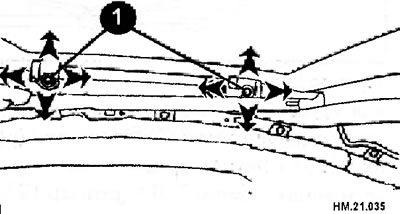
- After loosening the right and left TORX bolts (size T25), used to secure the glass lid, tilt the glass lid downwards.
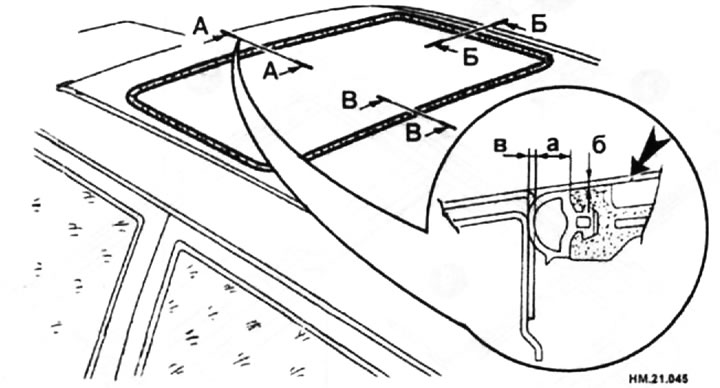
- Adjust the glass cover (arrow) from the outside so that the dimensions (A-A), (B-B) and (C-C) are as shown in the table.
| a | b | v | |
| A-A | 5,8 | -0,8±1,5 | 0,6-2,2 |
| B-B | 5,8 | -0,8±1,5 | 0,6-2,2 |
| B-B | 5,8 | -0,8±1,5 | 0,6-2,2 |
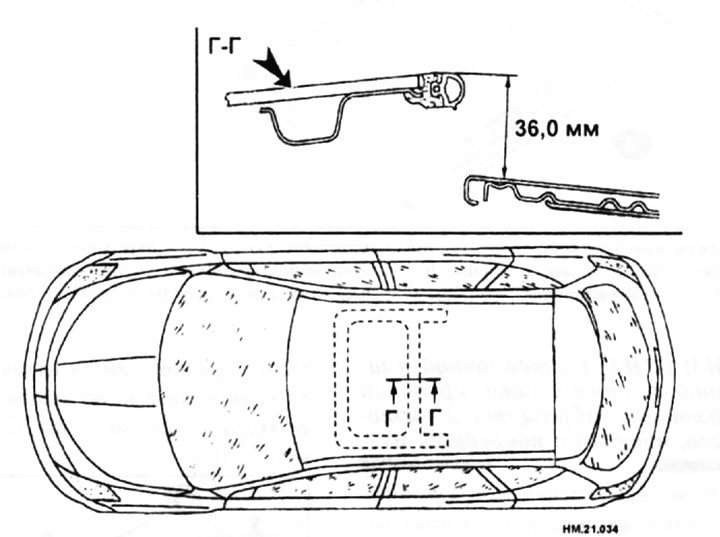
- Tilt the glass cover (arrow) upward and check that the dimension (G-G) corresponds to 36.0 mm.
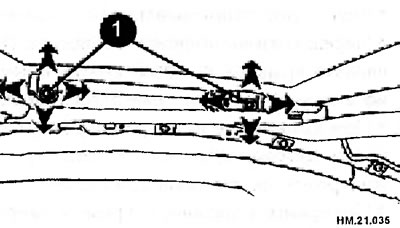
- To prevent the glass cover (1) from shifting after adjustment, first tighten the TORX bolts (arrows) (size T25) on the left front of the cover, and then the TORX bolts (size T25) on the right rear side of the lid.
- Tighten the remaining TORX bolts (size T25). Work carefully to avoid dislodging the glass lid.
- To check that the glass lid moves evenly, tilt it up and down several times.
- After making adjustments, always check the operation of the hatch and the alignment of the glass cover.
Roof hatch components
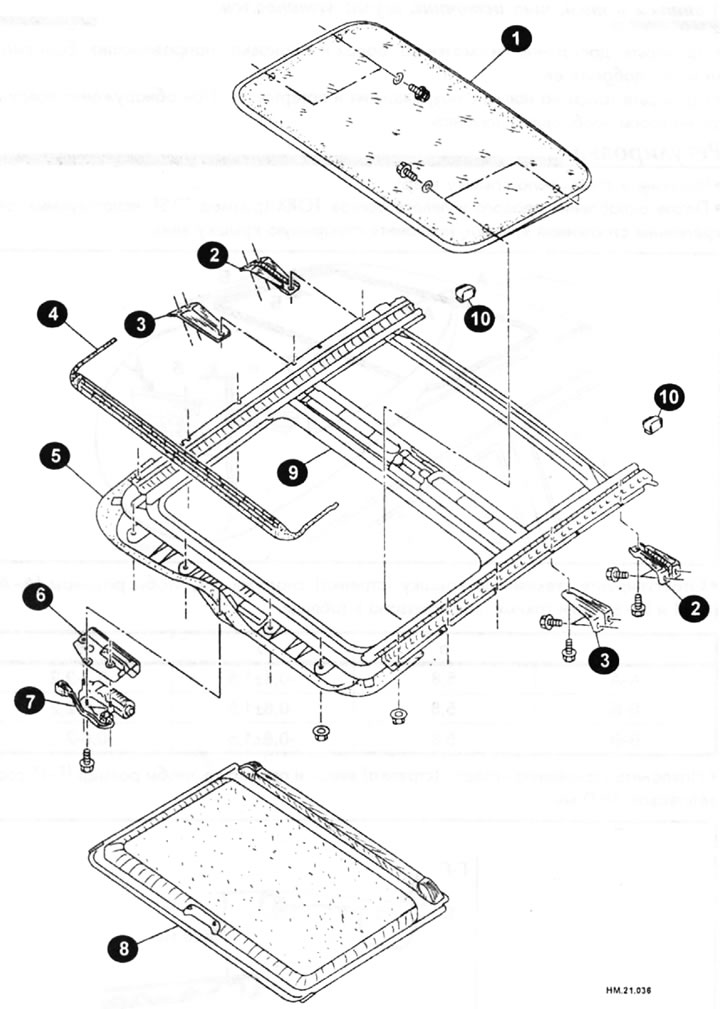
1 - glass lid; 2 - rear hatch bracket; 3 - front hatch bracket; 4 - fairing; 5 - sunroof; 6 - anti-noise cover; 7 — sunroof drive electric motor; 8 - sunshade; 9 - drain plate; 10 — sun blind stopper.
Caution: The finishing plate and glass lid must be handled with care to avoid damage.
- To facilitate subsequent installation, apply several alignment marks.
- Always work with an assistant.
- Before removing, close the glass cover completely, and after removing the cover, do not turn on the drive motor.
- When removing the hatch, cover the seats and trim with old blankets to protect them from damage.
- Tilt the glass lid upwards
- Remove the headliner.
- Disconnect the drain hoses.
- Remove the glass cover by tilting it upwards and unscrewing the TORX screws (1) (size T25).
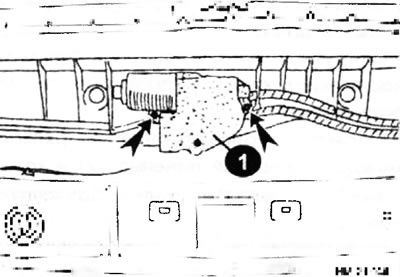
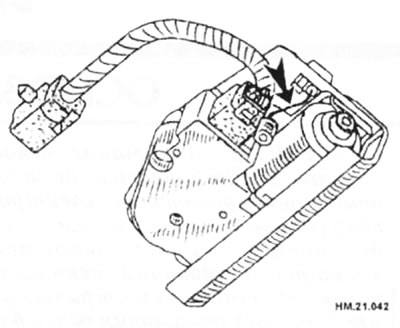
- Unscrew the mounting screws (arrows of the sunroof drive motor (1). Remove the motor and disconnect the wiring harness plug.
Caution: Before removing the sunroof motor, make sure the sunroof is completely closed. After removing the sunroof motor, do not attempt to rotate the motor.
- Disconnect the drain hoses.
- Remove the glass cover by tilting it upwards and unscrewing the TORX screws (1) (size T25).
- Unscrew the mounting screws (arrows of the sunroof drive motor (1). Remove the motor and disconnect the wiring harness plug.
- Unscrew the front nuts (arrows) and remove the side guides.
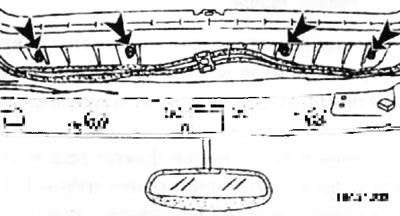
- Unscrew the bolts (arrows) securing the hatch bracket and remove the hatch from the cover panel.
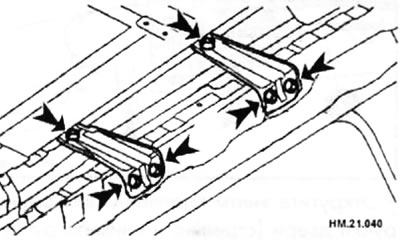
- Remove the hatch through the interior of the car. Be careful not to damage the seats and trim.
Installation
- Installation is carried out in the reverse order of removal, taking into account the following recommendations.
- Temporarily tighten the right and left sunroof bracket mounting bolts to a torque of 5.10-6.47 N·m.
- Bring the hatch into the passenger compartment and install the rear edge of the guide onto the hatch brackets.
- Tighten the front mounting nuts to a torque of 5.10-6.47 Nm.
- Tighten the mounting bolts diagonally. Do not tighten the sunroof bracket mounting bolts around the sunroof opening.
- Tighten the rear sunroof bracket mounting bolts on the vehicle side and then on the guide side.
- Gently rock the sunroof motor from side to side until the gear is fully engaged in the sunroof cable and the mounting surfaces are parallel. Then secure the electric motor with screws.
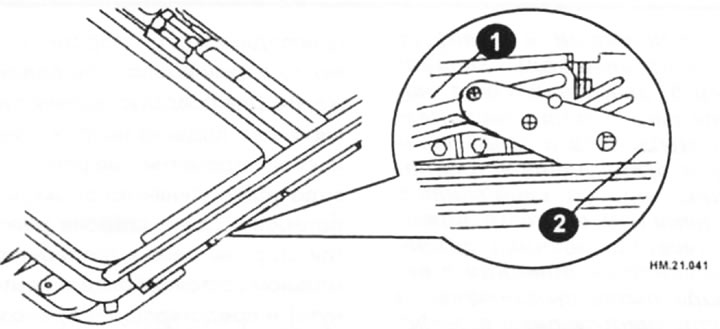
- Before installing the hatch drive motor, make sure that the rods and cables are positioned symmetrically and that their positions correspond to the closed hatch.
- Align the rod projections (2) with the opening of the linkage (1) in the fully closed position on the left and right.
- Make sure the ground wire (arrow) on the body is connected to the noise damper cover.
- After installing the sunroof drive motor, perform the start-up procedure.
- Tighten the glass cover mounting bolts diagonally to a torque of 4.0-5.0 N·m.
- After installing the hatch and glass cover, adjust the position of the cover, check for leaks and ensure that the hatch is working properly.