


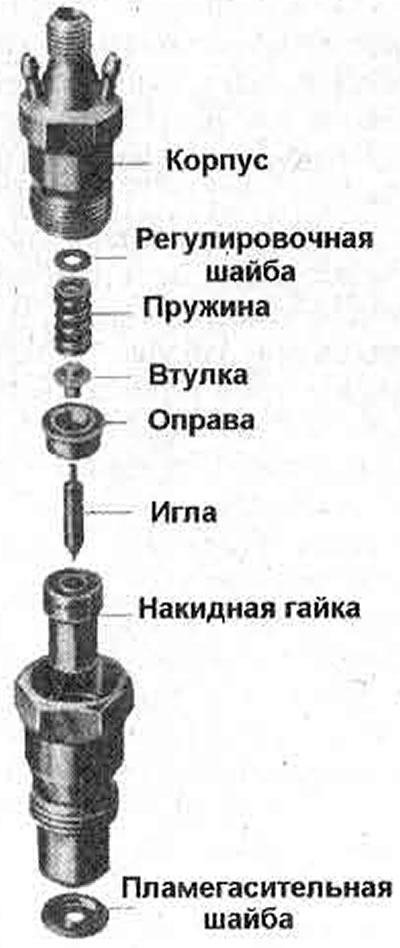
Figure 1.44. Fuel injector parts
The quality of the injector operation can be checked on a running engine. To do this, loosen the nut securing the high-pressure fuel line to the injector (figure 1.45). If the injector is working properly, when it is disconnected, the sound of the engine and the smoke of the exhaust will change. If the injector is faulty, when it is disconnected, nothing will change. To remove the injectors, disconnect the high-pressure fuel lines and the fuel drain pipe, then unscrew the injectors. To check the injection start pressure, connect the injector to the tester, create pressure by pumping, loosen the injector mounting nut and bleed the air (figure 1.47), then tighten the nut, raise the pressure until injection begins and determine the pressure on the tester pressure gauge at the moment the decrease begins. For the LD20 engine, the injection start pressure of a new injector is 135-143 kg/cm². The pressure of a working injector is usually lower than specified by about 10 kg/cm² (no more). The initial injection pressure is adjusted by installing a gasket (1) under the spring (figure 1.48). Increasing the thickness of the gasket increases the injection start pressure, decreasing it decreases it. Changing the gasket thickness by 0.04 mm changes the injection start pressure by 4.8 kg/cm². Check the quality of the spray: the spray torch should be uniform over the entire cross-section of the spray cone, and the spray should be foggy. In new injectors, injection is accompanied by a sharp sound. In working injectors, the absence of this sharp sound is not a sign on the basis of which the injector should be rejected.
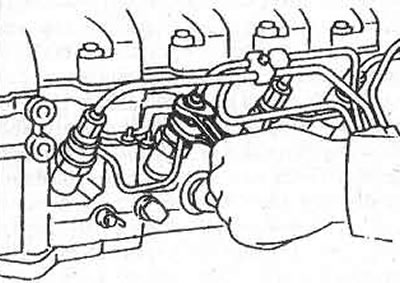
Figure 1.45. Unscrewing the injector from the cylinder head
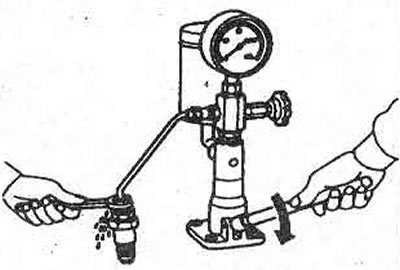
Figure 1.47. Checking the injection start pressure
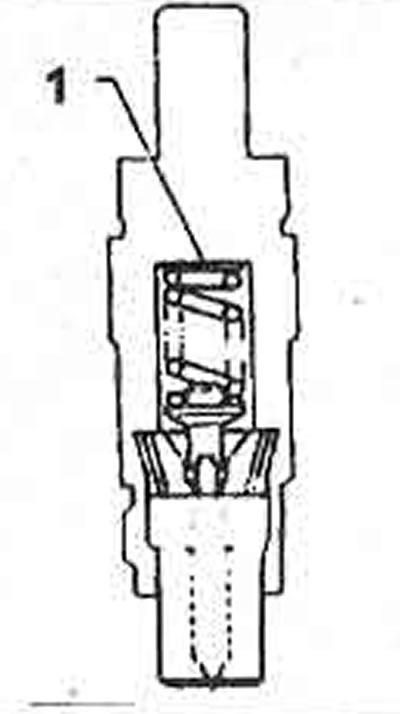
Figure 1.48. Injection start adjusting shim
To check the injector for leaks, connect it to the tester, bleed the air, and increase the pressure to a value 20 kg/cm² below the injection start pressure. No fuel leakage from the injector is allowed at the specified pressure. Injectors that do not meet the requirements must be replaced. It is permissible to use injectors if, after disassembling, cleaning, and then assembling them, they restore their functionality and pass the above tests.
If it is necessary to replace only the sprayer, then the nozzle body should be disassembled. The operation is carried out with the observance of cleanliness. Clamp the upper part of the body in a vice and unscrew the lower part of the body by the hexagon (Figure 1.46). After this, clamp the lower part of the housing in a vice and remove the parts shown in the figure one by one. Replace the sprayer and reassemble the nozzle in the reverse order. Tighten the upper and lower parts of the nozzle housing to a torque of 70 Nm.
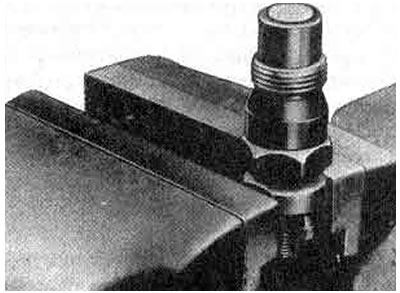
Figure 1.46. Method of securing the injector before disassembling
Wash the elements only in kerosene or a solvent that does not affect the material of the elements (for example, in white spirit). When cleaning, do not touch the surface of the working elements of the nozzle with your hands. Use only a wooden or soft metal tool for cleaning (brass brushes). After cleaning, rinse the elements in clean diesel fuel and dry. When disassembling, do not mix up the elements from different injectors; before assembling, check the compatibility of the needle and housing, as they are not interchangeable. Remove the needle from the housing by about half its length and lower it. It should go down smoothly without jamming. Check several times with different turns of the needle. After assembly, check the injection start pressure and the tightness of the injector.