1. O-ring (brown); 2. Clamp; 3. O-ring (black); 4.Fuel pipe; 5. Fuel hose; 6. Fuel injector
Removing
1. Relieve fuel pressure. See chapter Engine management system.
2. Remove the air duct and air cleaner assembly. See above section «Air cleaner and air duct».
3. Remove the upper intake manifold support bracket.
4. Disconnect the fuel hose from the side of the fuel tube.
Caution: Plug the fuel hose with a plug to prevent fuel from escaping after disconnection.
5. Disconnect the electrical wiring from the fuel injectors and move it to the side so that it does not interfere with work.
If it is difficult to disconnect, remove the fuel injector and fuel pipe assembly from the cylinder head and disconnect the wiring from the fuel injectors in a more convenient location.
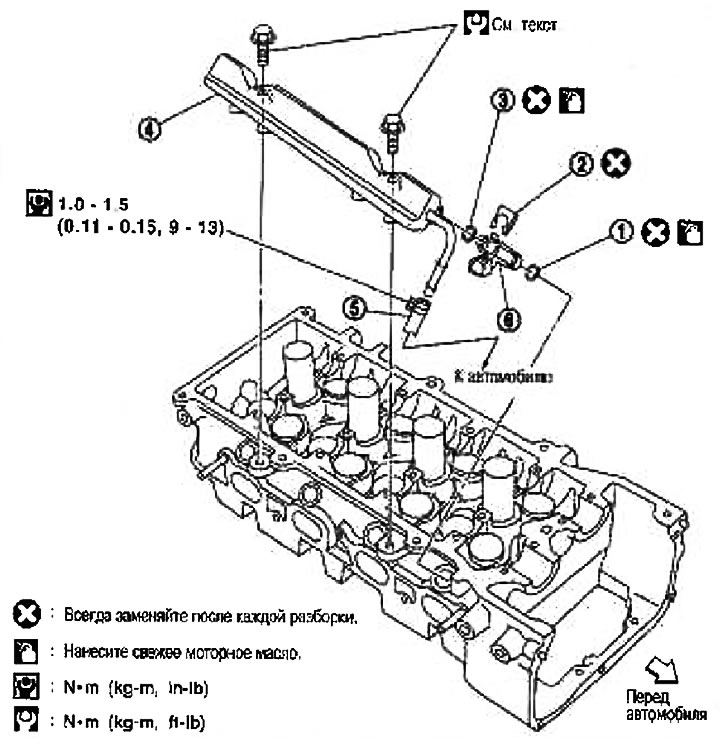
6. Loosen the mounting bolts in the reverse order of that shown in the figure and remove the fuel injector and fuel tube assembly.
Attention:
- Make sure the fuel injector nozzle does not come into contact with other components.
- Do not tilt it, otherwise the remaining fuel will pour out of the tubes.

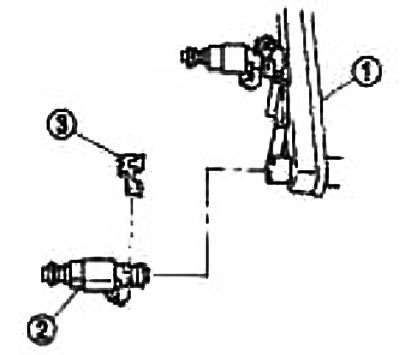
7. Remove fuel injector (2) from the fuel pipe (1), by doing the following:
- A. Release the clamp (3) and take it off.
- b. Remove the fuel injectors from the fuel tube at a right angle.
Attention:
- Do not damage the injector nozzle.
- Do not drop or hit top marvelous atomizers.
- Do not disassemble or adjust fuel injectors.
Installation
1. When installing new O-rings in the fuel injector, observe the following:
Attention:
- The top and bottom O-rings are different. Don't mix them up. From the side of the fuel pipe: black; From the nozzle atomizer: brown.
- Handle O-rings with bare hands. Do not wear gloves.
- Lubricate the O-rings with fresh engine oil.
- Do not clean O-rings with solvent.
- Make sure that there are no foreign particles on the O-ring and on the sealing surface.
- When installing, do not scratch the seals with a tool or fingernails. Also, do not twist or stretch the O-rings. If the O-ring is stretched during installation, do not immediately insert it into the fuel pipe.
2. Insert the fuel injector into the fuel tube as follows:
Insert clip (3) into a groove (2) at the fuel injector (1).
Insert the clamp so that the protrusion (4) on the fuel injector is aligned with the cutout (5) on the clamp.
Caution: Always replace clamps with new ones. Position the clamp so that it does not interfere with the O-ring. Otherwise, replace the O-ring.
Insert fuel injector (1) into the fuel line (6) with fixed clamp.
Insert it while maintaining centering.
Insert the fuel injector so that the protrusion (7) fuel pipe went into the cutout (8) on the clamp.
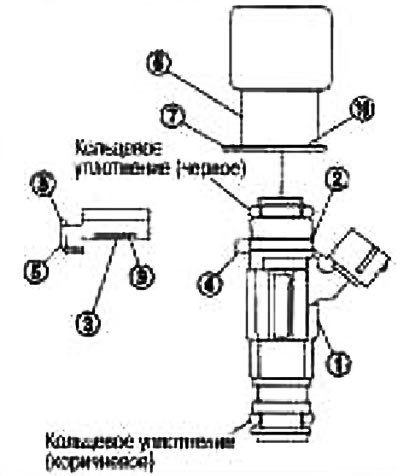
Make sure the flange (10) the fuel pipe is securely fixed in the mounting groove (9) on the clamp.
Check for proper installation by making sure the fuel injector does not spin or pop off.
3. Install the fuel pipe and fuel injector assembly to the cylinder head
Caution: Do not allow fuel injector nozzle tip to come into contact with other components.
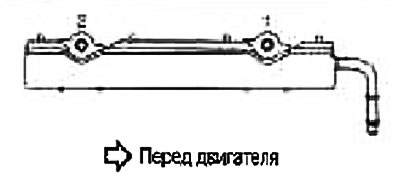
Tighten the mounting bolts in two passes in the order indicated by the numbers in the figure.
1st pass: 11.8-13.8 Nm (1.2-1.4 kg m)
2nd pass: 20.8-28.2 Nm (2.1-2.9 kg m)
4. Connect the fuel hose.
Caution: Tighten the hose clamp securely where it does not touch the bead.
5. Install the upper intake manifold support bracket.
Tighten the mounting bolts as follows:
- Tighten the bolts by hand in the order indicated by the numbers in the figure.
- Tighten the bolts to the required torque in the order indicated by the numbers in the figure.
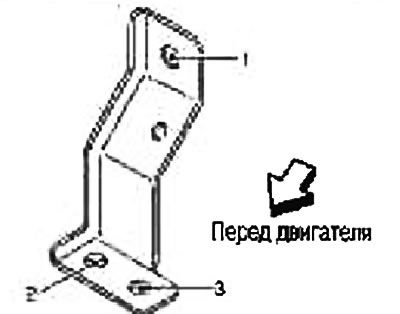
Bolt 1: 6.9-9.5 Nm (0.7-0.96 kg m)
Bolts 2 and 3: 8.4-10.8 Nm (0.86-1.1 kg m)
6. After this operation, installation is carried out in the reverse order of removal.
Check after installation
Checking for fuel leaks
1. Pressurize the fuel lines by turning the ignition key to the «ON» (without starting the engine). Then check for fuel leaks at the joints.
2. Start the engine. While increasing the engine speed, check again for fuel leaks at the fuel line joints.