


Table of contents: Removal ↓ Installation ↓
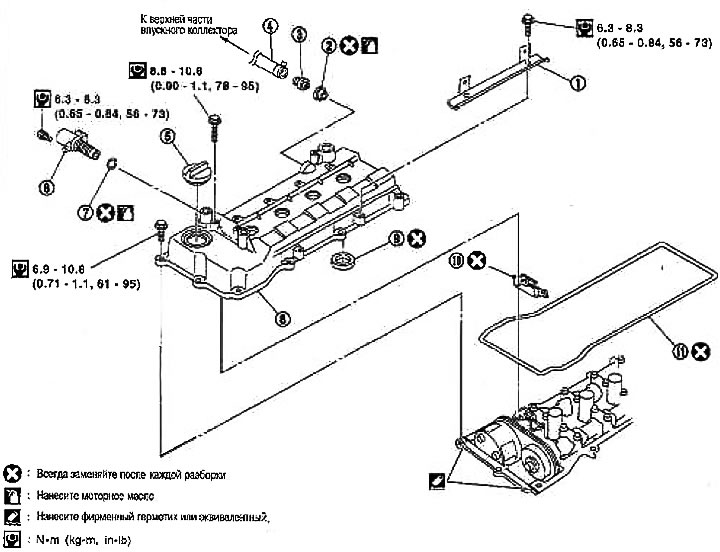
1. Wiring bracket; 2. Rubber bushing; 3. PCV valve; 4. PCV hose; 5. Oil filler cap; 6. Solenoid valve of the intake valve timing mechanism; 7. O-ring seal; 8. Valve cover; 9. Valve cover seal; 10. Gasket; 11. Gasket
Removal
1. Remove the air duct and air cleaner assembly See section above "Air purifier and air duct".
2. Remove the right engine mount strut. See section "Removal and installation".
Note: There is no need to support the engine with a jack.
3. Remove the ignition coil See above section "Ignition coil".
4. Remove the ignition coil wiring bracket.
5. Disconnect the PCV hose and connector from the intake valve timing solenoid valve.
6. Remove the PCV valve if necessary.
7. If necessary, remove the intake valve timing control solenoid valve.
Caution: Handle the solenoid valve with care. Avoid impact. Do not disassemble.
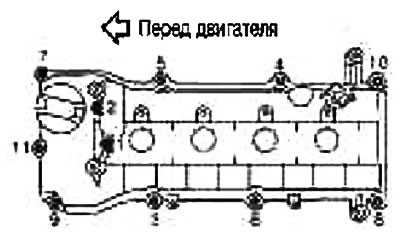
8. Loosen the mounting bolts in the reverse order shown in the figure and remove the valve cover.
9. Remove the valve cover seal using a screwdriver.
Caution: Do not damage the valve cover.
Installation
1. Install the oil seal into the valve cover
Press in the oil seal using a punch with an outer diameter of 97 mm and an inner diameter of 83-88 mm.
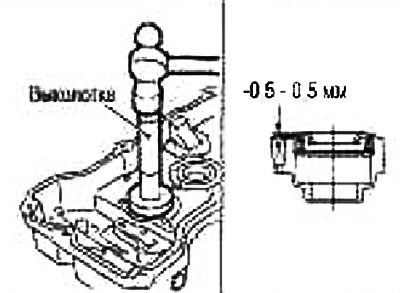
Press the seal evenly against the contact surface.
2. Install the valve cover as follows:
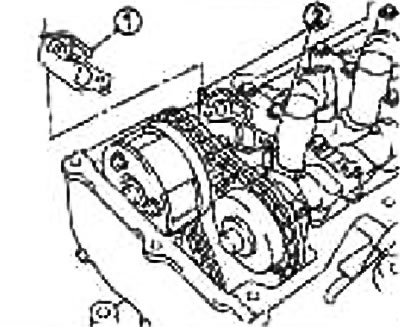
Install the gasket (1) on the upper surface of the camshaft bracket No.1.
When installing, align the dowel pins (2) and the holes in the gasket according to the shape of the camshaft bracket.
Tighten the bolts evenly in two passes to the specified torque in the order shown by the numbers in the illustration.
Install the gasket into the mounting groove in the valve cover.
Apply sealant to the areas shown in the figure.
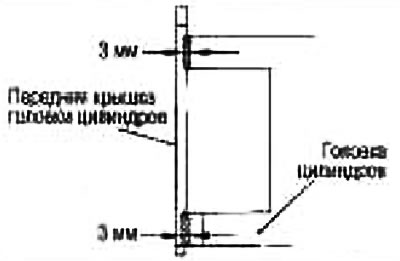
Use brand name sealant or equivalent.

The bolt installation locations are shown below:
- Length of the rod under the head 45 mm: 1, 2 (internal bolts)
- Length of the rod under the head 20 mm: except for those indicated above (external bolts)
3. Install the intake valve timing control solenoid valve.
Make sure that no foreign particles enter the flange, O-ring or mounting hole.
Tighten the mounting bolt, making sure the solenoid valve is fully seated in the mounting hole.
4. Install the PCV valve.
Insert until the flange is flush with the rubber bushing.
5. After this operation, installation is carried out in the reverse order of removal.