


Table of contents: Removal ↓ Installation ↓
Removal
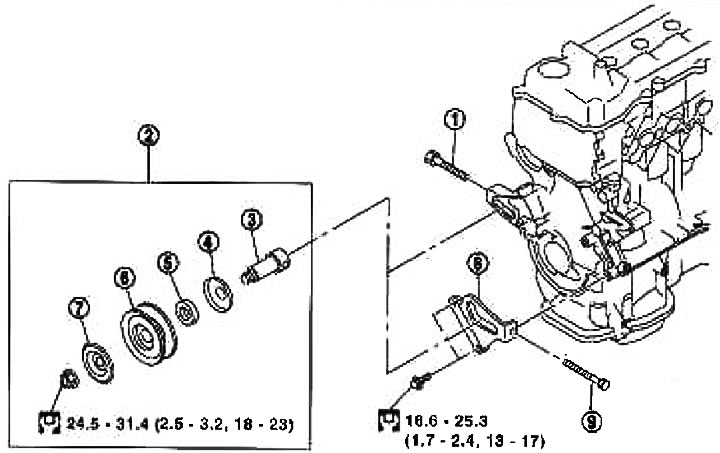
1. Adjusting bolt (for water pump belt); 2. Tensioner pulley assembly; 3. Axis; 4. Lid; 5. Spacer; 6. Tension pulley; 7. Lid; 8. Bracket; 9. Adjusting bolt (for alternator belt and air conditioning compressor)
1. Remove the drive belts. See section "Removal and installation".
2. Remove the adjusting bolt from the axle.
3. Slide the tension pulley assembly along the groove in the bracket and remove it by turning the end of the axle at the wide part of the groove (for alternator belt and air conditioning compressor).
4. Loosen the lock nut and remove the axle towards the rear of the engine (for water pump belt).
Installation
1. Place the belts on the pulleys in the reverse order of removal.
Attention:
- When installing the belt, make sure it is seated correctly in the pulley groove.
- Check to see if any engine oil or coolant has entered the pulley groove.
(Information obtained from the website NISSANBOOK.ru)
2. Adjust the belt tension. See section "Tension adjustment".
3. Tighten the adjusting bolts and nuts to the specified torque.
4. Make sure that the belt tension is within normal limits.