Attention. Avoid splashing fuel during removal. If fuel is splashed, remove it immediately.
2. Remove the fuel filter protection.
3. Remove the fuel filter.
4. Installation is made in an order, the return to removal. After installation, you must perform the procedure for pumping the system (see below).
Attention. Do not kink or twist fuel lines during removal and installation.
Draining
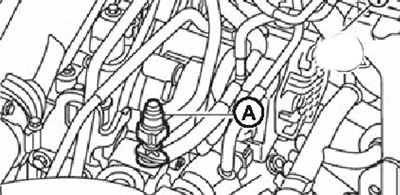
1. Connect a suitable hose to the drain socket (A).

2. Place a drip tray under the drain hose.
3. Unscrew the drain plug and, using a priming bulb, drain the water from the fuel filter.
Attention. The water from the film merges with the fuel. It is necessary to use a pan larger than the fuel filter volume. In addition, do not allow fuel from water to come into contact with the rubber parts (e.g. motor mounting insulators).
4. After draining, tighten the drain plug by hand.
Attention. If the fitting is overtightened, it may be damaged, resulting in fuel leaks. Do not use a tool to tighten the fitting.
5. Bleed the fuel system to remove air from it.
6. Start the engine and check for fuel leaks.
Bleeding the fuel system
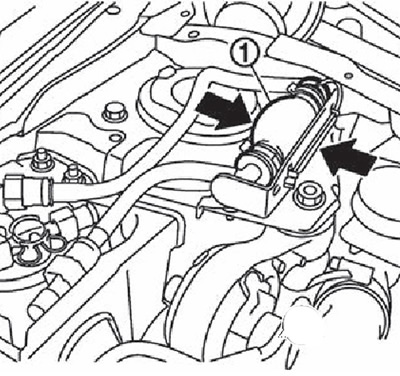
1. Bleed the system circuit with a pumping bulb (1).
2. Turn the engine over with the starter to start.
3. If the engine does not start, disconnect the quick connector (A) return fuel hose.
1. Fuel pump.
4. Once the system has been bled, connect the quick connector and check for fuel leaks.
Checks after installing the fuel filter
Start the engine and check for leaks at the connections.