


Table of contents: Removal ↓ Installation ↓
Warning! Remember that gasoline is a highly flammable liquid! When working with fuel system components, observe all fire safety precautions. Do not smoke, do not approach the work area with an open flame or unprotected portable equipment. Do not service the system in a room equipped with heating devices that operate on natural gas and are equipped with a pilot flame (such as water heaters and clothes dryers). Remember that gasoline is a carcinogen that can cause cancer. Avoid contact with exposed areas of the body - wear protective rubber gloves, and in case of accidental contact, wash your hands thoroughly with warm water and soap. Collect spilled fuel immediately and do not store fuel-soaked rags near open flames. Remember that the fuel system of fuel-injected models is constantly under pressure. Before disconnecting the fuel lines, relieve any residual pressure in the system (for more information, see Chapter Power and exhaust systems). Wear safety glasses when servicing fuel system components. Always keep a class B fire extinguisher on hand!
The air conditioning system line is also constantly under pressure, so before disconnecting the refrigeration lines, the system must be discharged in a specialized workshop.
The cars of the model in question are equipped with the SRS system, the main component of which is the airbags. Before starting any work near the location of the SRS directional overload sensors, in the area of the steering column or instrument panel, be sure to turn off the system to avoid accidental deployment of the airbags, which is fraught with serious injuries.
Removal
Note: Before proceeding with the procedure, carefully read the material in this Section. Manufacturers recommend removing the engine from the vehicle together with the transmission. Disassembly of the power unit can be done later on the workshop floor.
Information obtained from the website NissanBook.ru
1. Release the pressure in the fuel system (see Chapter Power and exhaust systems).
2. Disconnect the negative cable from the battery.
Warning! If the car stereo system is equipped with a security code, make sure you have the correct combination to activate the audio system before disconnecting the battery!
3. Cover the fenders and the air deflector under the windshield of the car with special protective covers, or just old blankets. Remove the hood (see Chapter Body).
4. Remove the air cleaner assembly (see Chapter Power and exhaust systems).
5. Jack up the vehicle and support it. Drain the cooling system, drain the engine oil and remove the accessory drive belts (see Chapter Settings and ongoing maintenance).
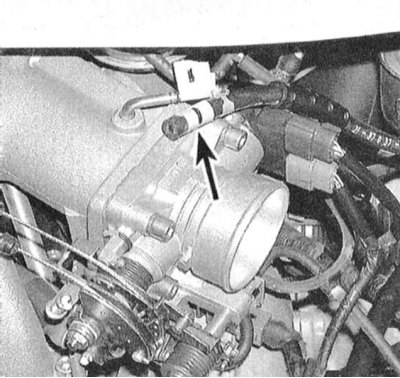
6. Clearly mark and disconnect all vacuum lines, cooling and emission control hoses, electrical connectors, ground straps, and fuel lines from the engine. It is best to mark the wiring, lines, and hoses with tape. It is also helpful to draw a diagram of the wiring or take a series of photographs.
7. Remove the cooling system fans, disconnect the radiator hoses and heating system hoses (see Chapter Cooling and heating systems).
8. Remove the filler cap to release any residual pressure in the fuel tank, then disconnect the fuel lines from the fuel line (see Chapter Power and exhaust systems). Immediately seal the open ends of the tubes and connecting fittings.
9. Loosen and move aside the air conditioner compressor without disconnecting the refrigeration lines from it.
10. Disconnect the accelerator rod from the engine, and if the vehicle is equipped with the appropriate equipment, also the cruise control cable (see Chapter Power and exhaust systems).
11. Unbolt the steering pump, move it to the side and tie it up without disconnecting the hydraulic lines (see Chapter Suspension and steering). Remove the generator (see Chapter Engine electrical equipment).
12. On SOHC engines, remove the ignition coil and distributor with the high-voltage wires connected to it (see Chapter Engine electrical equipment).
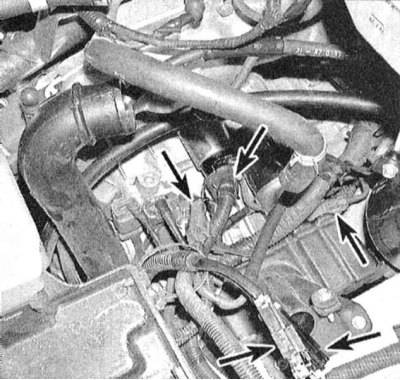
13. Label and disconnect the main wiring harnesses from both sides of the engine.
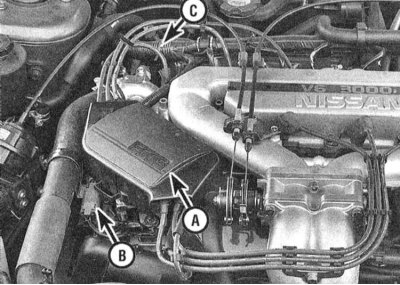 |
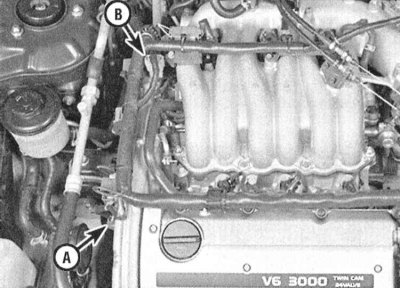 |
14. Remove the upper section of the intake manifold (see Part DOHC engines or SOHC engines of this Chapter), - do not forget to first mark all wires, hoses and grounding buses to be disconnected.
15. Disconnect the exhaust pipe from the engine exhaust manifolds and catalytic converter and remove it from the vehicle (see Chapter Power and exhaust systems).
16. Remove the drive shafts (see Chapter Clutch and drive shafts). Disconnect the electrical wiring and gear shift rods from the transmission (see Chapter Transmission).
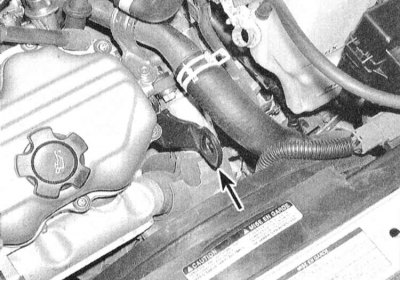
17. Connect the rigging slings to the lifting eyes of the power unit, turn on the winch, completely removing the slack from the slings.
Caution! If the power unit is not equipped with lifting eyes, place slings/chains behind both cylinder heads. Suspend the unit, completely unloading its suspension supports.
 |
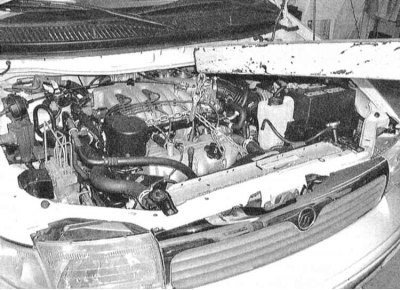 |
18. Make sure that nothing remains connected to the power unit and does not interfere with its removal from the vehicle.
19. Support the transmission with a trolley jack, placing a wooden block under its head to distribute the load. Unscrew the bolts securing the mounts to the engine and the load-bearing cross beam to the chassis (see Part DOHC engines or SOHC engines of this Chapter).
Attention! Make sure that the unit is securely fixed in the raised position.
20. Slowly lower the powertrain assembly to the floor beneath the vehicle's engine compartment.
21. Disconnect the lifting rigging from the unit, attach it to the vehicle body, lift the latter to a sufficient height and remove the engine assembly from under the vehicle.
Note: It would be wise to enlist the help of an assistant at this stage.
22. Separate the engine from the transmission (see Chapter Transmission).
23. Place the separated engine on the floor, or remove the flywheel/drive plate and secure the assembly to a mounting stand.
Installation
1. Check the condition of the powertrain suspension supports. Replace defective components.
2. On models with manual transmission, check the condition of the clutch components (it would be correct to replace the entire assembly) (See Chapter Clutch and drive shafts). On models with AT, assess the condition of the seals and bushings of the rotation converter. Lubricate the guide bearing with high-temperature grease (models with manual transmission)/converter nose (models with AT).
3. Carefully connect the transmission to the engine (see Chapter Transmission).
Caution! Never use the mounting bolts to force the transmission to the engine!
4. Install the engine to transmission mounting bolts and tighten them securely.
5. Place the power unit assembly under the vehicle, raising it with a jack to the required height, then lower the vehicle body, suspended on a winch.
6. Attach the rigging to the unit and carefully hang it in the engine compartment.
7. For reliability, support the engine with a jack, then move the cross beam into place. Screw in the appropriate mounting bolts (beams and supports) and tighten them to the required torque.
Note: The final tightening procedure for the powertrain suspension mount fasteners is described in the last Sections of the Parts SOHC engines and DOHC engines of this Chapter.
8. Installation of the remaining components is carried out in the reverse order of their dismantling.
9. If necessary, add coolant, engine oil, power steering fluid, etc. to the engine (see Chapter Settings and ongoing maintenance).
10. Start the engine and check it for proper operation and signs of leaks, then turn it off and check the fluid levels.