


Table of contents: Removal and installation ↓ Inner handle ↓ Removal and installation ↓ External handle ↓ Removal and installation ↓
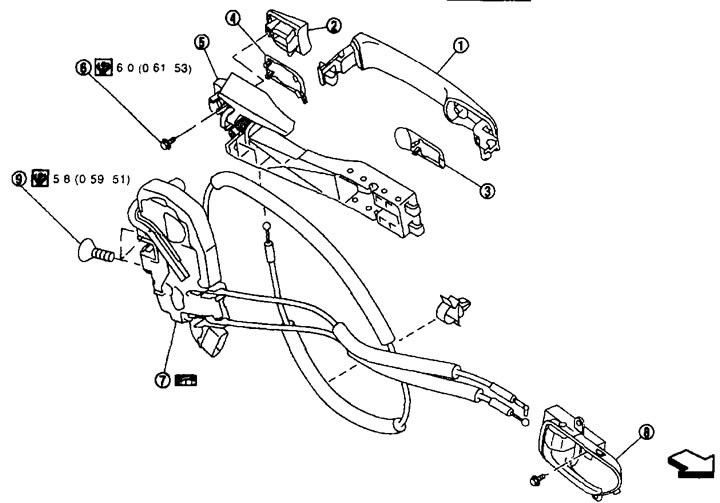
Door lock. 1. External handle assembly; 2. Outer handle cover; 3. Front gasket; 4. Back gasket; 5. External handle bracket; 6. TORX bolt; 7. Door lock assembly; 8. Inner handle; 9. TORX bolt.
Removal and installation
Removal
1. Remove the rear side door trim. See section above "Interior equipment".
2. Disconnect the inner handle button cable.
3. Remove the sealing mesh. See section below "Glass and window lifters".
4. Remove the lower guide partition. See the section below "Glass and window lifters".
5. Remove the corner cover assembly. See the section below "Glass and window lifters".
6. Remove the TORX bolts from the door lock assembly.
7. Disconnect the connector from the door lock actuator.
8. Slide the door lock assembly from the inside of the door panel until the outside handle escutcheon TORX bolt is visible.
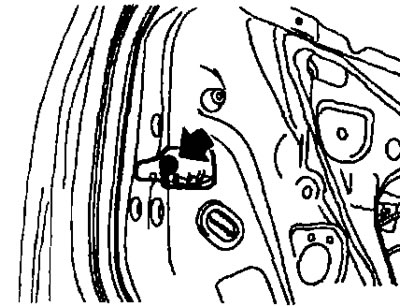
9. Pull the outer handle to remove the cover.
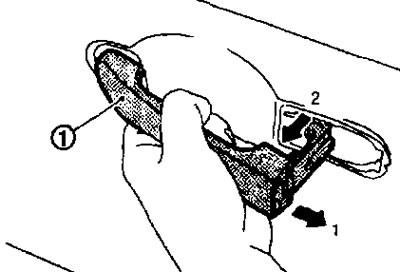
10. Pull the outer handle (1) towards the rear of the vehicle and remove it.
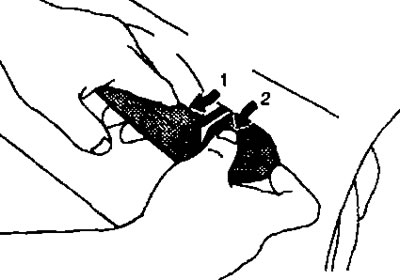
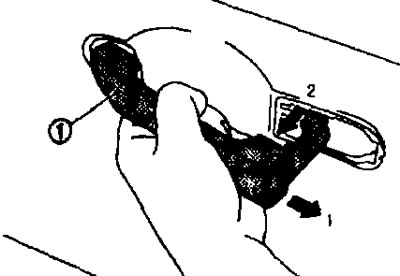
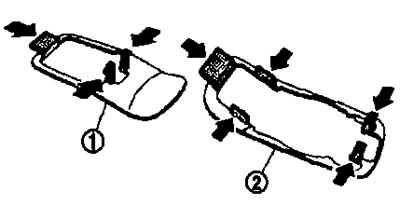
11. Remove the front (1) and rear (2) gaskets.
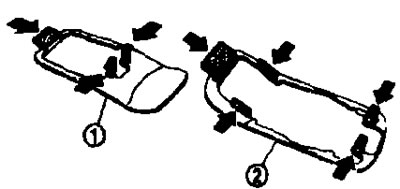
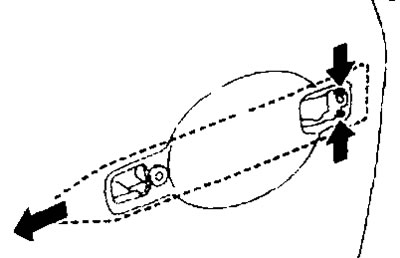
12. Pull the outer handle bracket towards the rear of the vehicle and remove the bracket.
13. Reach in and separate the outer handle cable at the joint.
14. Remove the door lock assembly.
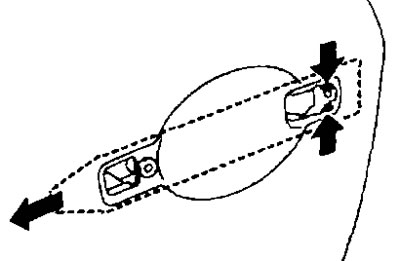
Installation
Installation is carried out in the reverse order of removal.
Attention:
- When connecting the rods, turn the rod holders until you feel a click.
- After installation, check how the rear side door locks/unlocks.
- After installation, check how the rear side door closes/opens.
Inner handle
See the picture above.
Removal and installation
Removal
1. Remove the rear side door trim. See section above "Interior equipment".
2. Unscrew the mounting screws of the inner handle.
3. Disconnect the inner handle button cable and remove the inner handle.
Installation
Installation is carried out in the reverse order of removal.
Attention:
- After installation, check how the rear side door locks/unlocks.
- After installation, check how the rear side door closes/opens.
External handle
See the picture above.
Removal and installation
Removal
1. Remove the rear side door trim. See section above "Interior equipment".
2. Disconnect the inner handle button cable.
3. Remove the sealing mesh. See section below "Glass and window lifters".
4. Remove the lower guide partition. See the section below "Glass and window lifters".
5. Remove the corner cover assembly. See the section below "Glass and window lifters".
6. Remove the TORX bolts from the door lock assembly.
7. Disconnect the connector from the door lock actuator.
8. Slide the door lock assembly from the inside of the door panel until the TORX bolt of the outside handle cover is visible.
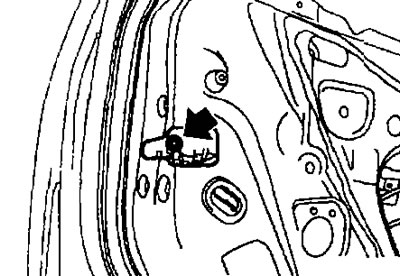
9. Pull the outer handle to remove the cover.
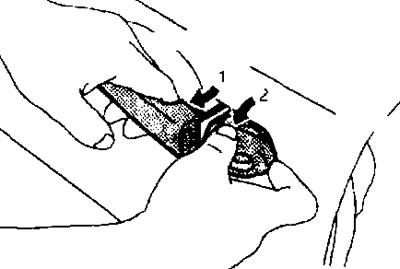
10. Pull the outer handle (1) and move it towards the rear of the vehicle and remove it.
11. Remove the front (1) and rear (2) gaskets.
12. Pull the outer handle bracket towards the rear of the vehicle and remove the bracket.
13. Reach in and separate the outer handle cable at the joint.
Installation
Installation is carried out in the reverse order of removal.
Attention:
- When connecting the rods, turn the rod holders until you feel a click.
- After installation, check how the rear side door locks/unlocks.
- After installation, check how the rear side door closes/opens.