


Table of contents: Removal ↓ Installation ↓ Rear liftgate ↓ Removal ↓ Installation ↓ Examination ↓ Removal and installation the rear…↓
Removal
- Remove the front door trim panel.
- Disconnect the inside door handle button cable and the door lock button cable from the rear of the front door trim panel.
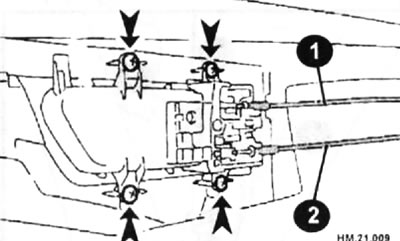
1 — cable of the lock button; 2 - inner door handle cable.
- Remove the front door glass and front door module.
- Remove the door sealing grommet and unscrew the bolts securing the lock cylinder on the driver's door or the outer door handle cover on the front passenger door (tORX T30 bolts) from the hole in the bushing (arrows).
Caution: Do not apply excessive force to TORX T30 bolts.
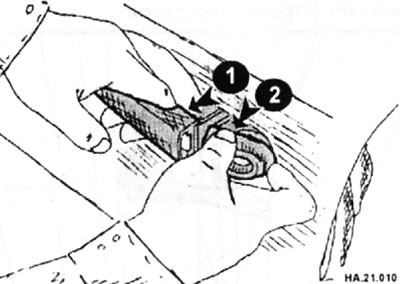
- Separate the door lock cylinder connecting rod from the handle. If you cannot find the door lock cylinder, proceed to the next step.
- Pull the outer door handle (1) to remove the door lock cylinder (2).
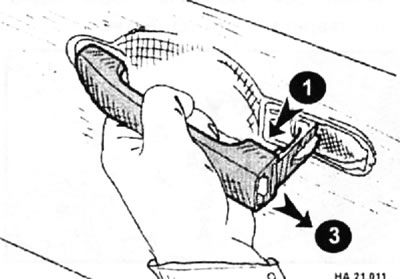
- To remove the outside door handle (1), pull it and pull the handle towards the rear of the vehicle (arrow 3 in figure HA.21.01 1).
- Remove the front and rear gaskets.
- Unscrew the TORX head bolts (T30) and remove the door lock.
- Remove the TORX head bolt (T30) on the outer door handle bracket.
- To remove the outside door handle bracket, press it down and slide it towards the rear of the vehicle.
- Disconnect the door lock actuator connector and remove the door lock.
- Separate the cable connection at the outside door handle.
Installation
Installation is carried out in the reverse order of removal.
Caution: When installing each tie rod, turn the tie rod lock until it snaps into place.
Rear liftgate
Adjusting the door position
Gaps between the door and the car body
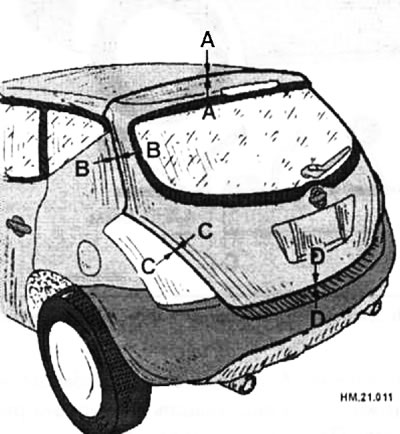
The gaps between the rear liftgate and the vehicle body must be as follows:
Gap A: 4.5-8.5 mm.
Gap B: 4.0-8.0 mm.
Gap C: 4.3-8.3 mm.
Gap D: 5.0-9.0 mm.
- To close the liftgate with the latch loosened, loosen the door hinge mounting bolts.
Caution: Do not loosen hinge mounting bolts 1 and 4.
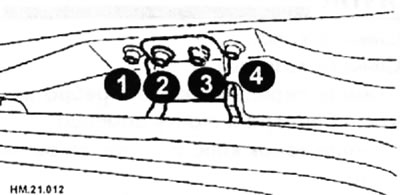
- Close the liftgate slightly and adjust its height, then open the liftgate and tighten the door lock retaining bolts to the specified torque.
Removal
Caution: Before working on the Supplemental Restraint System (SRS) components, turn off the ignition, disconnect both battery cables and wait at least 3 minutes.
- Remove the ceiling trim.
- Disconnect the rear liftgate wiring harness connector.
- Remove the cover of the additional (upper) brake light.
- Disconnect the windshield washer hose from its connection.
- Remove the adhesive tape that secures the liftgate wiring harness and the side (window) airbag wiring harness.
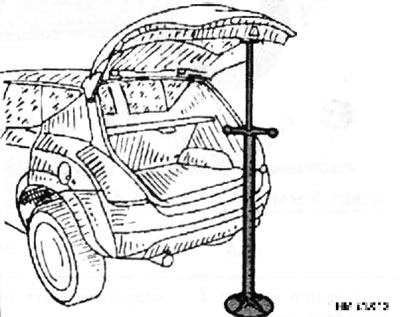
- Support the liftgate with a suitable object to prevent the latch from falling.
- Failure to support the open tailgate with a suitable support when removing the gas-filled analyzer may result in damage to body components.
The original can be read on the website nissanbook
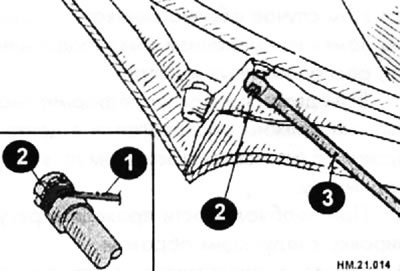
- Remove the tailgate gas strut. To do this, use a screwdriver (1) to lift the "dog" (2) and disconnect the shock absorber rod (3).
- Remove the hinge bolts from the rear liftgate and remove the door.
Caution: Do not loosen hinge mounting bolts 1 and 4, see figure HM.21.012 above.
Installation
Installation is carried out in the reverse order of removal. After installation, check the operation of the door and adjust the door position.
Examination
- Check if there are any unusual noises when trying to close and open the door.
- Check the parts for signs of wear or damage.
- Apply lubricant to the moving parts of the hinges.
Removal and installation the rear liftgate latch
- Remove the lower portion of the luggage compartment trim.
- Loosen the mounting screws and remove the retainer from the vehicle.
- Installation is carried out in the reverse order of removal.
- After installation, adjust the position of the retainer.