


Table of contents: Removal ↓ Installation ↓
Radiator mounting elements
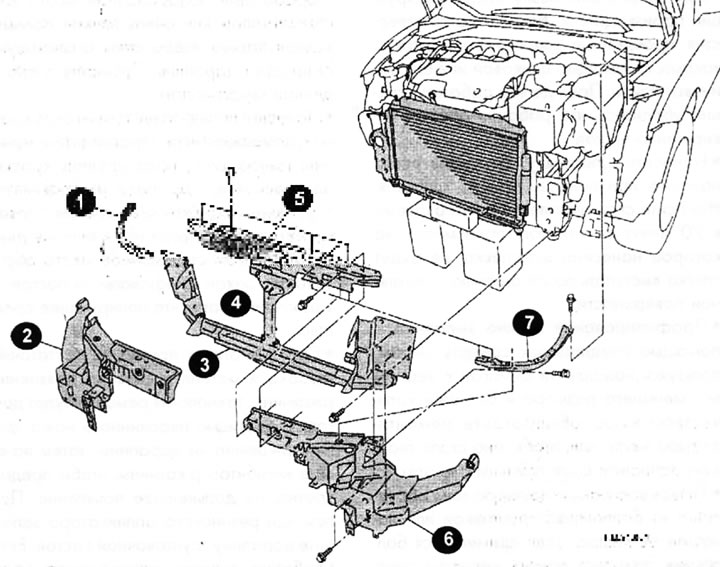
1 - right upper part of the radiator support; 2 - right side part of the radiator support; 3 - lower part of the radiator support; 4 - central part of the radiator support; 5 - upper central part of the radiator support; 6 - left side part of the radiator support; 7 - left upper part of the radiator support.
Removal
- Remove the hood.
- Remove the air duct.
- Remove the front bumper, bumper stiffener and bumper pillar.
- Remove the hood lock and hood release cable.
- Remove the left and right headlights.
- Remove the shock sensor.
- Remove the switch on the hood.
- Remove the lower casing.
- Remove the ambient air temperature sensor.
- Unscrew the bolt securing the windshield washer reservoir to the radiator support.
- Remove the wiring harness retaining clip located on the radiator support and release the wiring harness.
- Remove the upper part of the radiator support.
- To prevent the radiator from falling, place a wooden block under it, as shown in Figure HM.21.001
- Remove the center section of the radiator support.
- Remove the upper center portion of the radiator support.
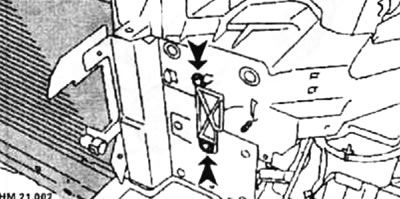
- Remove the side part of the radiator support by unscrewing the bolts (arrows).
- Remove the radiator support assembly.
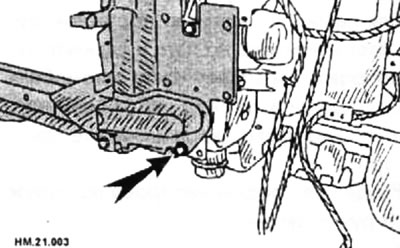
- After removing the radiator support, separate the lower part of the radiator support from it by unscrewing the bolt (arrow).
Installation
Installation is carried out in the reverse order of removal.