Attention! Do not proceed with the procedures until the engine has completely cooled down. See also the warnings at the beginning of the Section Antifreeze - general information.
Expansion tank
1. On 1993 and 1994 models. issue The expansion tank is located in the left corner of the engine compartment and is fixed near the battery. Since 1995, the tank has been moved to the opposite side of the engine compartment, to the right front corner.
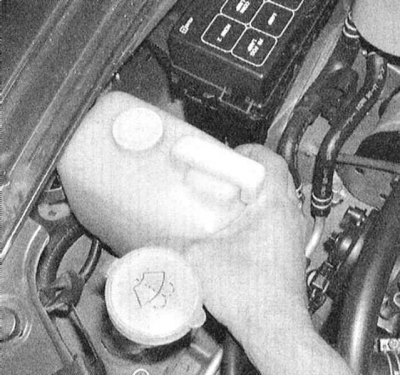
2. Disconnect the hose from the top of the radiator and pinch it. On models 1993 and 1994 issue unscrew the fixing bolt and remove the expansion tank. On models since 1995, no. the tank is simply vertically pulled out of the support bracket.
3. Drain the coolant into a specially prepared container.
4. Using a bottle brush, rinse the tank from the outside and inside, then carefully inspect it for cracks and other mechanical damage. In case of defects, as well as if it is impossible to read the liquid level through the translucent walls, the tank must be replaced.
Note. Never use the brush used to clean the expansion tank for washing drinking dishes!
5. Installation is carried out in the reverse order.
Radiator
1. Disconnect the negative cable from the battery.
Attention! If the stereo system installed in the car is equipped with a security code, before disconnecting the battery, make sure that you have the correct combination to activate the audio system!
2. Apply the parking brake and chock the rear wheels. Jack up the front of the car and place it on jack stands.
3. Empty the cooling system (see chapter Settings and ongoing maintenance). If the coolant was recently changed, keep it for future reference (see warning in Section Antifreeze - general information).
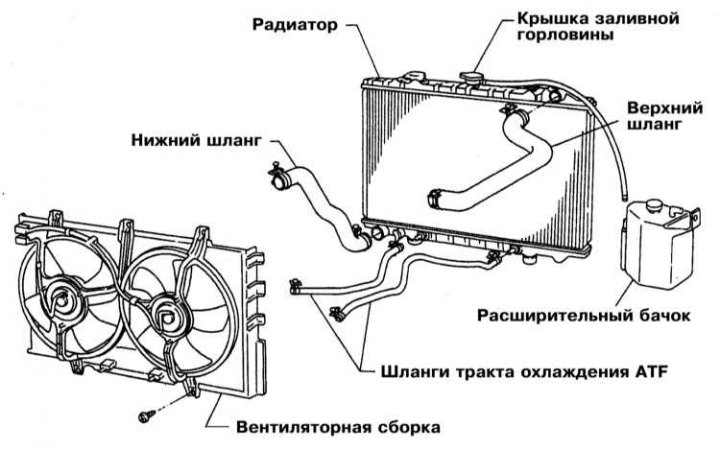
4. The diagram of the radiator installation in the engine compartment is shown in the illustration.
5. On models with АТ disconnect from a radiator of a line of a path of cooling ATF. Prepare to collect spillage by capping open ends of tubing and fittings immediately.
6. Release the clamps and disconnect both (upper and lower) hoses. If the hoses "stuck" to the connecting pipes, use tongs or a knife (with the subsequent replacement of hoses). Take care not to damage the connecting pipes. Also disconnect from the radiator a thin overflow hose going to the expansion tank.
7. Remove the fan (s) cooling systems (see Section Checking the condition of the cooling system fans and their switching circuits; component replacement).
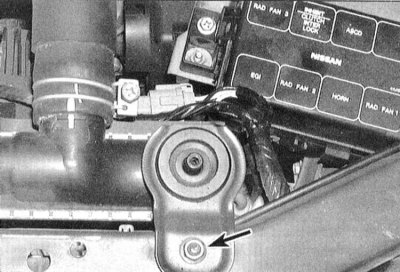
8. Loosen the small brackets securing the radiator to the top support beam.
9. Remove the radiator assembly from the engine compartment. Be careful - do not cut your fingers on the sharp edges of the heat exchanger plates, try not to spill coolant on the painted body surfaces.
10. Once removed from the vehicle, the radiator can be inspected for signs of leaks, damage, or abnormalities in the internal patency of the heat exchanger. Any repairs should be carried out only in a specialized workshop using the necessary equipment.
11. The remains of insects and vegetation can be removed from the space between the heat exchanger plates by blowing with compressed air (don't forget to wear safety goggles!), or scrubbing with a soft brush. Take care not to bend the thin heat exchanger plates or cut your fingers on them. Before installation, the radiator must be flushed by introducing water into the interior with a garden hose.
12. Check up a condition of rubber support of a radiator, in case of need make replacement of the failed components.
13. Installation is carried out in the reverse order. Make sure the radiator is properly positioned on its supports.
14. Upon completion of installation, fill the system with coolant of the required composition, release air plugs from the tract (see chapter Settings and ongoing maintenance).
15. Start the engine and check it for signs of leaks. Warm up the engine to normal operating temperature (both radiator hoses should feel hot to the touch). Check the coolant level, if necessary add the appropriate amount of the mixture of the required composition.
16. On models with AT, check the ATF level, if necessary, make the appropriate adjustment.