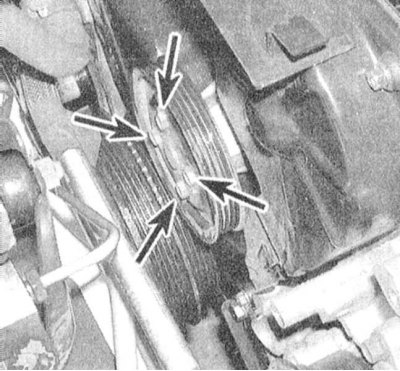
2. There are two ways to test the water pump for proper operation without removing it from the engine. A defective pump must be replaced. The first is the simplest: with the engine running, warmed up to normal operating temperature, squeeze the upper radiator hose. With a properly functioning water pump, fluid pulsations should be clearly visible inside the hose.
Attention! Try not to touch the blades of the impellers of the cooling fans!

3. The water pump is equipped with an inspection/vent hole. In the event of a seal failure, coolant begins to ooze out of the hole. On SOHC engines, remove the timing cover. Prepare a pocket flashlight and a small mirror - the hole is located on the bottom of the pump housing. The presence of deposits of a brownish color around the hole indicates a malfunction of the stuffing box, - slight discoloration of the surface (light gray ring) should not cause concern. On DOHC engines, an inspection port leads coolant to the outside between the timing cover and engine block.
4. If the pump shaft bearings fail while the engine is running, a howling sound may occur in the front of the pump, which should not be confused with the whistle emitted by the drive belt when the tension is loosened. On SOHC motors, bearing wear can be detected by the presence of play when the pump pulley is wiggled (do not forget to turn off the engine and remove the belt from the pulley before). On DOHC engines, loosen the main timing chain and remove the special pump access cover - an access hole is provided in the front timing cover. Bearing wear is determined by the presence of shaft play when the pump drive sprocket is rocked
5. Even in the absence of external signs of wear, the final conclusion about the condition of the water pump can only be made after it has been removed and studied in more detail - often the blades on the reverse side of the rotor are severely destroyed as a result of corrosion, which leads to a significant decrease in pump performance.
Replacement
Attention! Proceed with the procedure only after the engine has completely cooled down! See also the warnings at the beginning of the Section Antifreeze - general information.
1. Disconnect the negative cable from the battery.
Attention! If the stereo system installed in the car is equipped with a security code, before disconnecting the battery, make sure that you have the correct combination to activate the audio system!
2. Empty the cooling system (see chapter Settings and ongoing maintenance). If the coolant was recently changed, keep it for future reference (see warning in Section Antifreeze - general information).
3. Remove drive belts (see chapter Settings and ongoing maintenance).
4. On SOHC engines, block the water pump pulley from turning with a strap wrench and remove the four mounting bolts. Remove the pulley and timing belt covers.
5. On DOHC engines, remove the drive belt idler bracket and right powertrain mount assembly with their brackets. Also remove the main timing chain tensioner cover from the front timing cover. Press the chain tensioner piston inward and insert a pin of suitable diameter into the chain tensioner blocking hole. Rotate the crankshaft 20°counterclockwise to loosen the chain on the water pump sprockets.
6. Turn out fixing bolts and remove the pump from the engine. Check the impeller blades on the back of the rotor for signs of corrosion and deterioration.
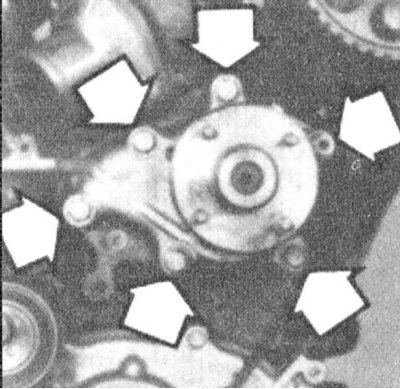 |  |
7. Clean the threads of the mounting bolts and bolt holes, completely removing traces of corrosion and old sealant and restoring damaged turns.
8. Make sure that the sizes of the new and old pumps are identical.
9. Scrape off any old sealant from the mating surface of the engine block.
10. Thoroughly wipe the mating surfaces of the new pump with a rag soaked in acetone.
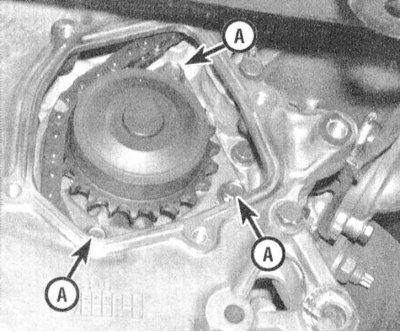
11. On SOHC engines, apply a light coat of RTV Sealant to the mating surface of the new pump, then gently press in the new gasket. On DOHC engines, install a new o-ring on the pump, then lightly lubricate it with grease to help seat the assembly in the engine block.
12. Carefully seat the pump in its original place, screw in the mounting bolts and tighten them by hand.
Note. Lubricate the threaded part with RTV sealant before screwing in the bolts. Ensure that all provided guide pins are in place.
13. In several steps (1/4 turn per approach) tighten fasteners to the required torque. Be aware that overtightening the bolts can damage the pump. On DOHC engines, rotate the crankshaft 20°clockwise to tighten the main chain on the pump sprocket, remove the lock pin from the tensioner, and reinstall the tensioner and pump access covers.
Note. Caps should be seated on RTV sealant.
14. Install all other components removed for access.
15. Fill the cooling system and remove air pockets from it (see chapter Settings and ongoing maintenance). Start the engine and check for signs of coolant leaks.
Note. On DOHC engines, at first, before the high pressure chamber is completely bled, there may be an increased noise level emitted by the gas distribution chain. To eliminate noise, let the engine run for a while at 3000 rpm.