Warning! The vehicles covered in this manual are equipped with the SRS Supplemental Safety System, better known as the airbag. Before doing any work near the cushion or steering column assembly, be sure to turn off the system to avoid injury from accidental operation (see chapter Onboard electrical equipment). The insulation and connectors of the SRS wiring harness are bright yellow. Do not connect any diagnostic devices to this circuit!
The air conditioning system is constantly under high pressure. Never disconnect refrigeration lines or remove any system components without first discharging the system. The discharge of the air conditioning system must be carried out by an experienced specialist in a car service workshop. Always wear safety goggles when disconnecting refrigerant lines!
Do not allow antifreeze to come into contact with exposed areas of the body and painted surfaces of the car. Accidental splashes should be washed off immediately with plenty of water. Remember that antifreeze is a highly toxic liquid and getting it into the body, even in small quantities, is fraught with the most serious consequences (up to death). Never leave antifreeze stored in a loosely sealed container and clean up spilled coolant on the floor without delay. Remember that the sweet smell of antifreeze can attract the attention of children and animals. Consult any car service station about ways to dispose of used coolant. In many regions of the world, special points have been set up to receive various types of detention. Never drain old coolant down the drain and onto the ground!
Note. Recently, non-toxic grades of antifreeze have been developed, but they must also be disposed of in an organized manner.
Wait until the engine has completely cooled down before proceeding with the procedure.
It would be wise to entrust the procedure for replacing the heat exchanger to car service specialists.
1. With the appropriate vehicle configuration, discharge the air conditioning system at a service station.
2. Move the heater operation control knob to the maximum heating position (NOT). Empty the cooling system (see chapter Settings and ongoing maintenance). If the coolant was changed recently, save it for future use.
3. Disconnect the negative cable from the battery.
Attention! If the stereo system installed in the car is equipped with a security code, before disconnecting the battery, make sure that you have the correct combination to activate the audio system!

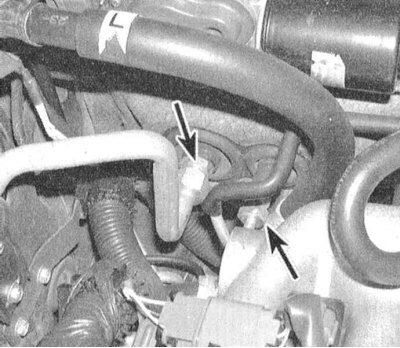
4. In the engine compartment, disconnect the engine cooling path hoses from the inlet and outlet pipes of the heater heat exchanger on the rear bulkhead of the engine compartment.
Note. "Sticky" it would be wiser to cut the hoses to avoid accidental damage to the nozzles.
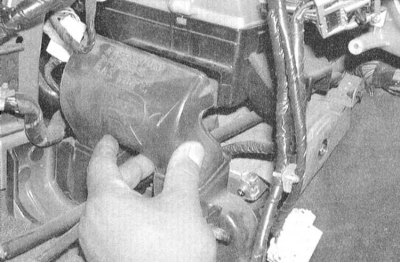
5. Release from the bulkhead of the engine compartment rubber through pipes of the pipes of the heater heat exchanger.
6. If the car is equipped with the appropriate equipment, disconnect the refrigeration lines from the air conditioner evaporator heat exchanger, remove the rubber bushing.
Attention! When disconnecting the refrigeration lines, be sure to wear protective goggles!
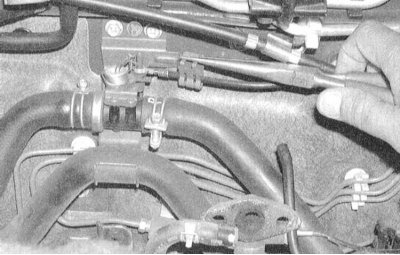
7. Release a fixing collar and disconnect a drive cable of a gate of management of giving of a cooling liquid in the heat exchanger of a heater. Release the cable from the bulkhead of the engine compartment so that it can be removed complete with the heater casing.
8. Lower the steering column. And remove the dashboard (see chapter Body). Remove the instrument panel reinforcement bar.
Note. Before proceeding with the removal of the heat exchanger, make sure that all latches are released.
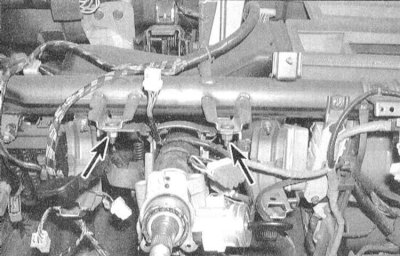 | 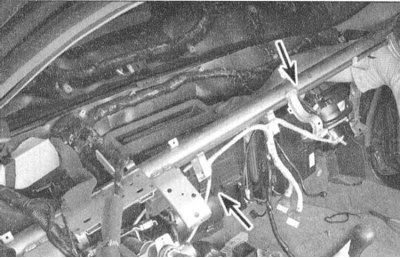 |
9. Remove the floor duct with steel reinforcing rods, disconnect the associated wiring, then remove the onboard processor assembly (RSM).
 | 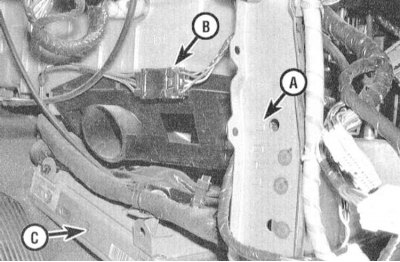 |
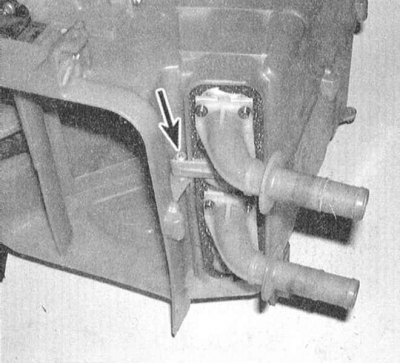
10. Disconnect a sleeve of an air duct from the bottom part of a casing of the heat exchanger of a heater.
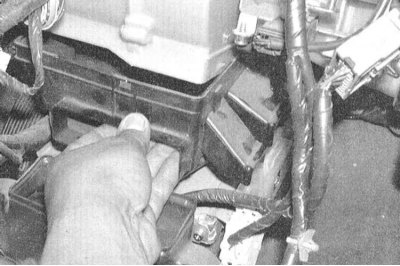
11. With the corresponding vehicle equipment, remove the evaporator heat exchanger casing assembly, or the air duct located on the passenger side (models without A/C).
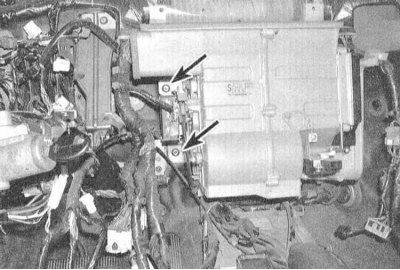
12. Give bolts/nuts of fastening of assembly of a heater to a bulkhead of an impellent compartment. Disconnect control cables.
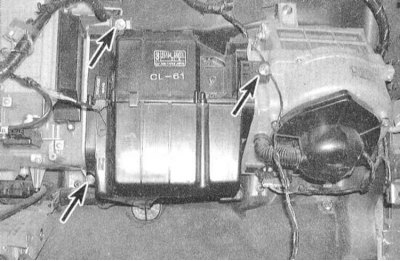
13. Pull the heat exchanger assembly down and back - make sure that all latches are released. If necessary, rotate the gather slightly to separate it from the upper sleeves.
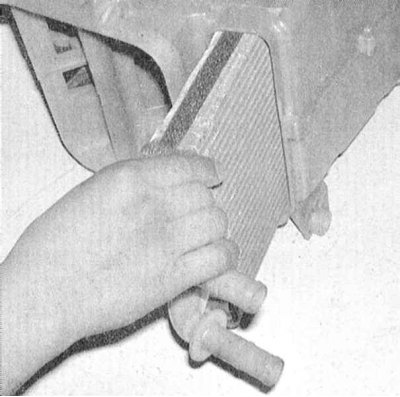
14. Remove the heat exchanger from the heater assembly.
 |  |
15. Collect a heater and check up serviceability of functioning of all gates. Make the necessary corrections.
16. Installation of components is carried out in the reverse order of their dismantling. Tighten fasteners (bolts/nuts) steering column to the support bracket with a force of 5 ÷ 18 Nm.
17. Fill the cooling system and remove air pockets from it (see chapter Settings and ongoing maintenance). Connect the battery and start the engine. Check heating system components for signs of leaks and proper operation. Recharge the air conditioning system.