Attention! The air conditioning system is constantly under high pressure. Never disconnect refrigeration lines or remove any system components without first discharging the system. The discharge of the air conditioning system must be carried out by an experienced specialist in a car service workshop. Always wear safety goggles when disconnecting refrigerant lines!
When replacing air conditioning system components, a certain amount of replacement refrigerant oil will be required to fill the volume of the new assembly. Use only oil suitable for use in R-134a systems (read the label on the container carefully).
Removing
Structure of ATSUGI NVR 140S Compressor
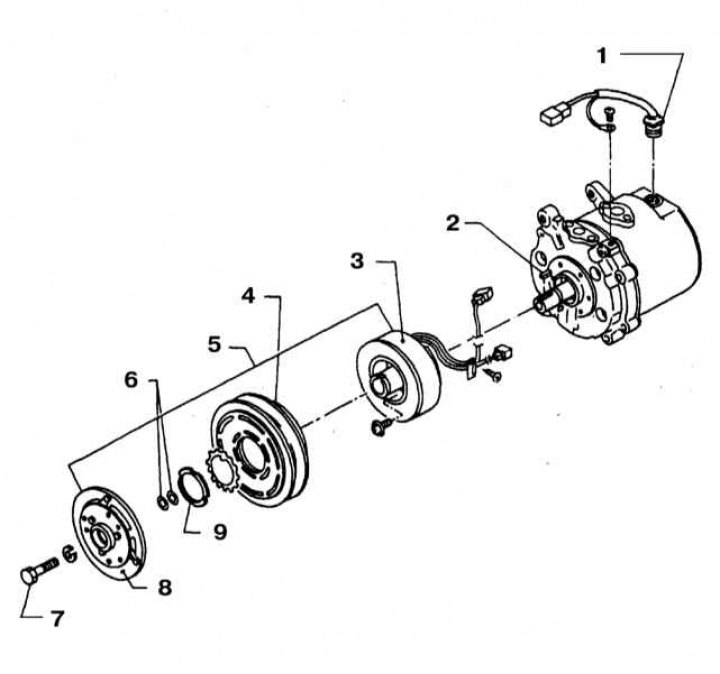
1 - Thermal fuse (10 ÷ 15 Nm); 2 - Key; 3 - Electromagnetic winding; 4 - Pulley; 5 - clutch; 6 - Adjusting washers; 7 - Central bolt (9.1 ÷ 11.8 Nm); 8 - Clutch disc; 9 - Locknut (29÷39 Nm)
The design of the V-6 compressor manufactured by CALSONIC
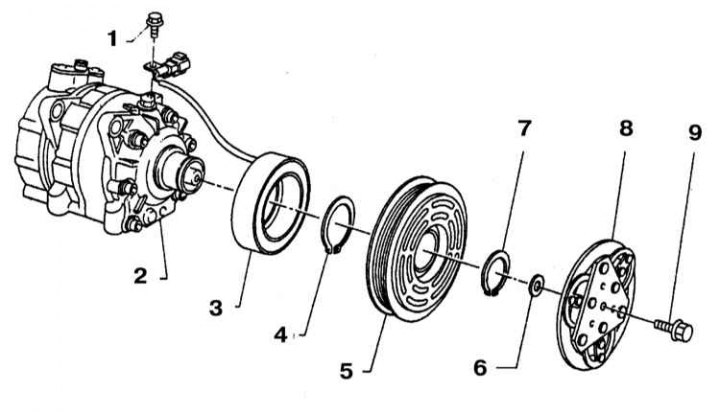
1 - Screw; 2 - Compressor block; 3 - Field winding; 4 - Thrust ring; 5 - Pulley; 6 - Gasket; 7 - Thrust ring; 8 - Clutch disc; 9 - Central bolt (14 Nm)
The design of the compressor DKS-16H manufactured by ZEXEL
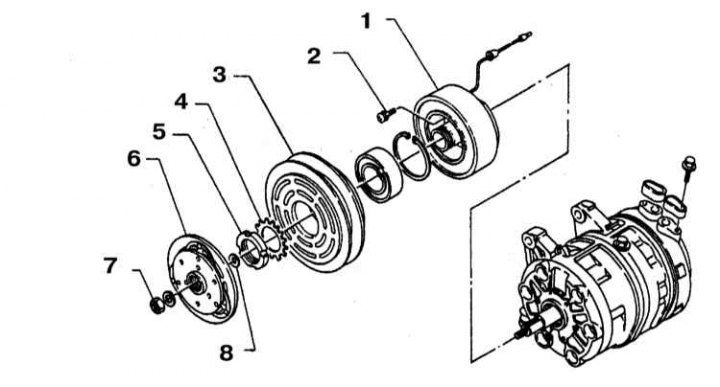
1 - Electromagnetic winding; 2 - Screw (5÷6 Nm); 3 - Pulley; 4 - lock washer; 5 - Locknut (34÷39 Nm); 6 - Clutch disc; 7 - Shaft nut (14÷16 Nm); 8 - Adjusting washer
1. Discharge the air conditioning system in a specialized workshop.
2. Disconnect the negative cable from the battery.
Attention! If the stereo system installed in the car is equipped with a security code, before disconnecting the battery, make sure that you have the correct combination to activate the audio system!
3. Apply the parking brake, chock the rear wheels, then jack up the front of the vehicle and place it on jack stands.
4. Remove compressor drive belt (see chapter Settings and ongoing maintenance).
5. Disconnect the refrigeration lines from the compressor. Seal open ends of tubing and fittings immediately to prevent dirt and moisture from entering the system.
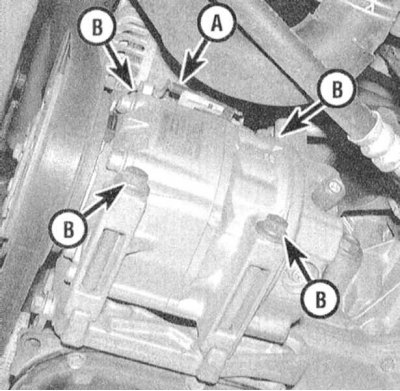
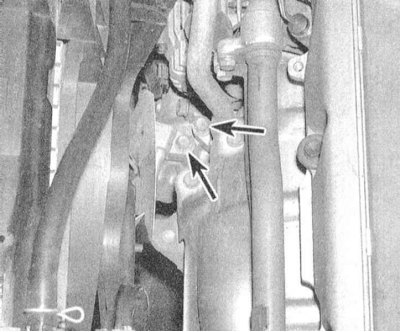
6. Disconnect from the compressor electroconducting, then give fixing bolts and remove assembly from a basic arm.
Note. The top mounting bolts may not be completely removed and left in the compressor assembly until it is removed from the vehicle.
Service
On the car models under consideration, one of three types of A/C compressors is used.
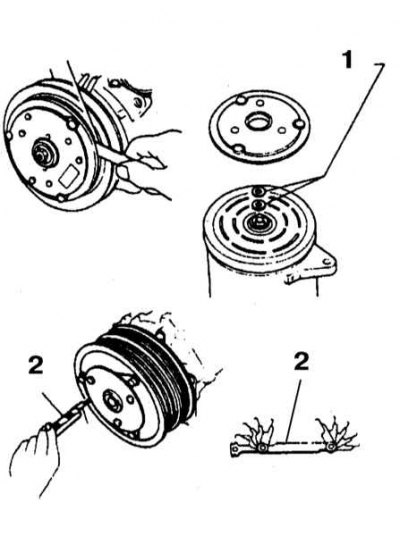
Compressor Clutch Replacement
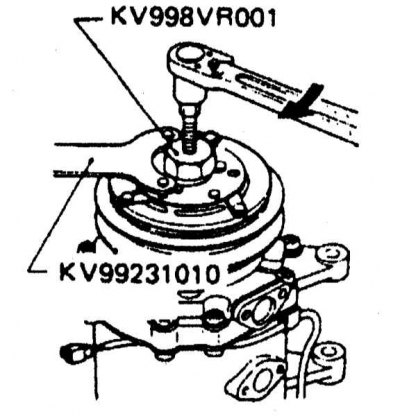
1. Remove the center bolt by locking the clutch disc with a wrench. The coupling can be removed using a special extractor.
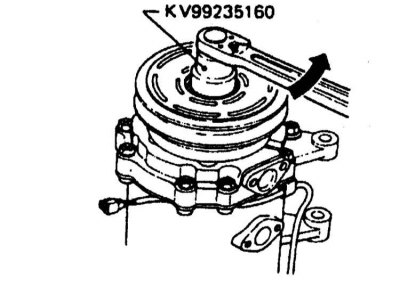
2. Bend down the flag of the lock washer, give the lock nut and remove the pulley.
3. If the mating surface shows signs of damage or signs of overheating, the clutch drive plate and pulley must be replaced.
4. Wipe the pulley mating surface with solvent before installation.
5. Check the condition of the coil - look for signs of loose contact and damage to the insulation.
6. When installing, adjust the gap between the disk and the pulley by selecting shims - use a gap meter between the spark plug electrodes.
7. When replacing the compressor clutch, do not forget to break it in - the compressor must be turned on at least 30 times.
8. During the running-in process, the clutch torque is increased. Do not allow foreign material to enter the compressor.
Installation
1. Don't forget to transfer the clutch from the old compressor to the new one.
2. Add the required amount of fresh refrigerant oil to the system, based on the following data:
- a) Drain the refrigerant from the compressor removed from the car and measure its volume;
- b) Drain the refrigerant present in the new assembly;
- c) If the amount of oil drained from the old unit was 90 ÷ 150 ml, fill the new compressor with the same amount of fresh refrigerant;
- d) If less than 90 ml of oil was drained from the old compressor, pour 90 ml into the new one;
- e) If the amount of oil drained from the old block exceeded 150 ml, 150 ml of refrigerant should be poured into the new assembly.
3. Installation is carried out in the reverse order. Don't forget to replace the O-rings on the refrigeration line fittings. Before installing the rings should be lubricated with refrigerant oil. Note: Be sure to install the top two mounting bolts into the compressor before the new assembly is placed on the vehicle.
4. Have the system charged and checked for leaks at a specialist workshop.