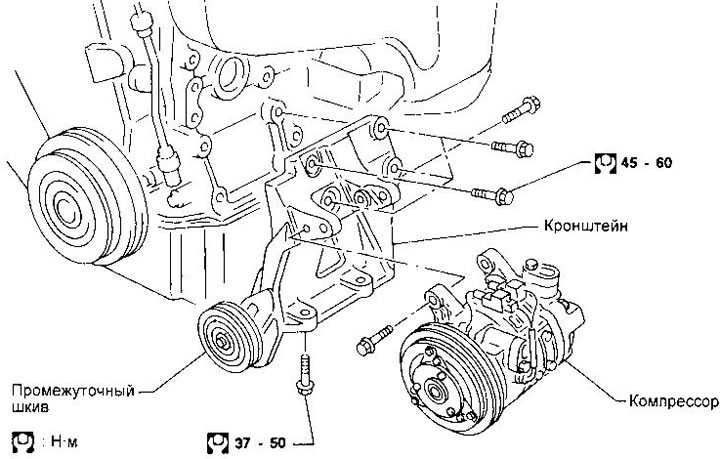
GA engines

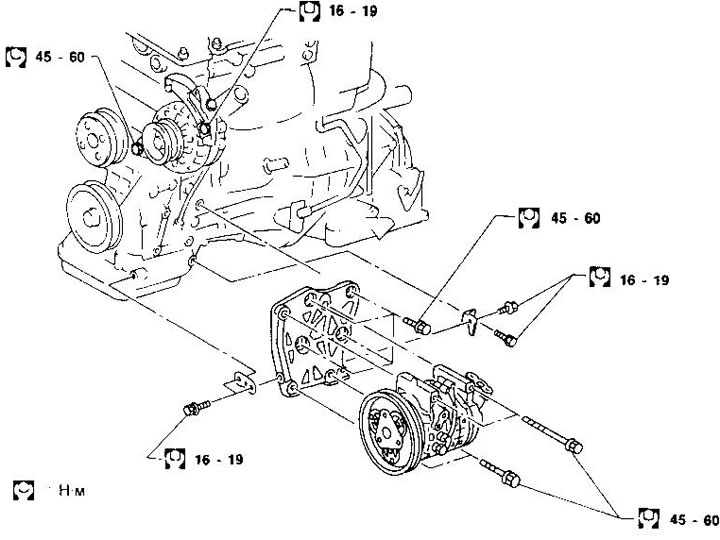
CD engines
SR engine
Removal and installation of electromagnetic clutch
When loosening the central bolt, hold the clutch disc with a special wrench (KV99231260 for DKV-11D/14D or KV99106700 for CR-14).
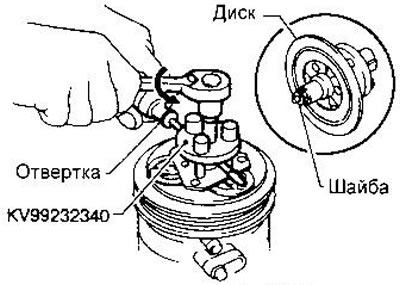
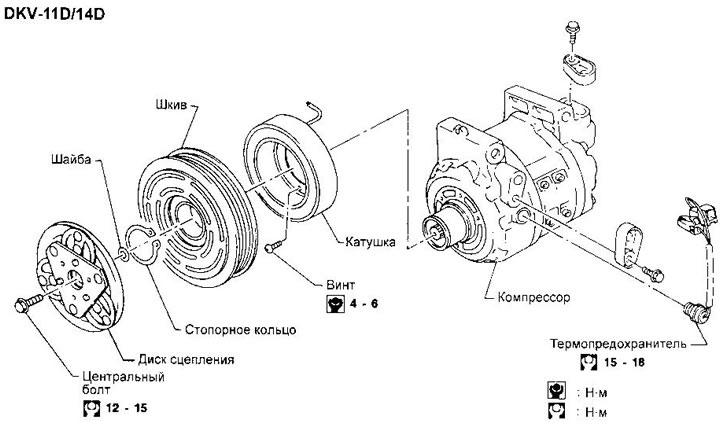
DKV-11D/14D compressors require special tool KV99232340 to remove the clutch disc. Insert the tool pins into the clutch disc and turn the tool clockwise to lock onto the disc. Then tighten the bolt by inserting a screwdriver between the two pins to prevent the disc from turning. After removing the disc, remove the washers from the shaft or disc.
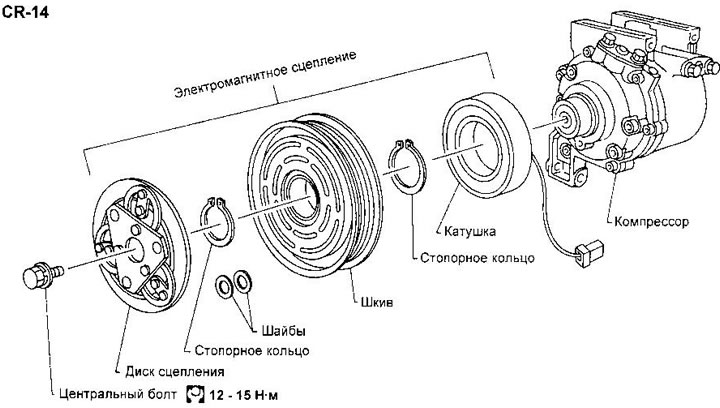
In the CR-14 compressor, the disc is removed without special tools.
Any suitable puller can be used to remove the pulley.
To prevent deformation of the pulley groove, the grips of the puller must be installed in the groove (for single pulley) or under the edge of the pulley (for multi-ribbed pulley).
Before installing, clean the mating surfaces of the clutch disc and pulley with solvent.
When installing the coil, its pins must be aligned with the holes in the compressor housing.
The pulley is installed using a mandrel (KV99234330 for DKV-11D/14D or KV99106800 for CR-14) and press (for DKV-11D/14D) or plastic mallet (for CR-14).
After assembly, measure the clearance between the clutch disc and the pulley around the entire circumference. It should lie within 0.3-0.6 mm. If necessary, adjust the gap by selecting washers.
Running in clutch
After replacing the compressor clutch, it is necessary to run it in by turning it on and off about thirty times. This increases the transmitted torque.