


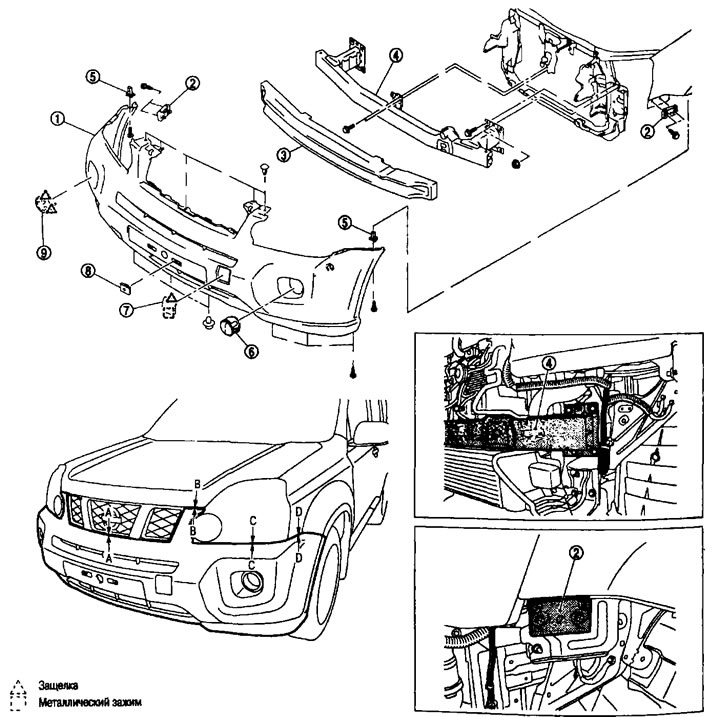
Front bumper. 1. Bumper cornice assembly; 2. Side bumper bracket; 3. Energy absorber; 4. Stiffener; 5. Rubber bushing; 6. Fog lamp assembly; 7. Tow hook cover; 8. J-nut; 9. Front bumper trim (without fog lights).
Removal and installation
Removal
Caution: The bumper cornice is made of plastic. Do not apply too much force to it and do not allow oil to come into contact with it.
1. Open the hood completely.
2. Remove the radiator grille. See below.
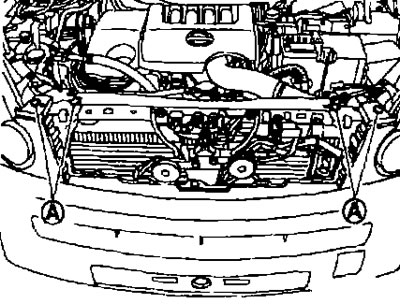
3. Remove the clips (A) from the top of the front bumper cornice.
4. Remove the front corner molding (left/right). See below.
Note: Remove only the section that contacts the bumper cornice.
5. Remove the mudguard and fender protector. See below.
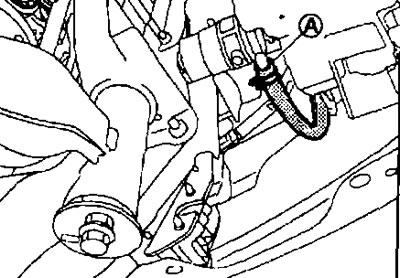
6. Disconnect the hose from the headlight washer pipe (A) (if any).
7. Disconnect the connectors from the fog lights (if any). See chapter "Driver controlled instruments".
8. Remove the engine protection from the bottom. See below.
9. Remove the retaining clips (A) from the bottom of the front bumper cornice.
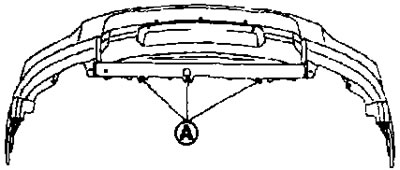
10. Remove the mounting screws (A) from the front bumper cornice (left/right).
11. Remove the front bumper cornice.
Caution: Remove the bumper cornice with a partner so as not to drop it.
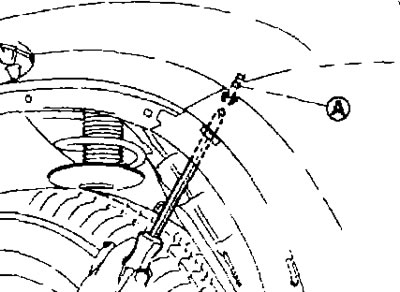
2. After removing the bumper cornice, remove the following components:
- J-nut;
- side bumper bracket (left/right);
- front bumper trim;
- fog lights assembly, see chapter "Driver controlled instruments".
13. Remove the energy absorber.
14. Remove the mounting bolts and nuts from the bumper stiffener, then remove the stiffener.
Installation
Installation is carried out in the reverse order of removal.
(Data copied from web resource: «nissanbook.ru»)
Note: Please adjust the fit after installation.
| Plot | Gap | |
| Front bumper-radiator grille | A-A | 0.2-2.8 mm |
| Front bumper-hood assembly | B-B | 4.0-8.0 mm |
| Front bumper headlight | S-S | 0.5-2.5 mm |
| Front bumper front wing | D-D | 0.0-0.7 mm |