


Table of contents: Models produced in 1993 and 1994. ↓ Models since 1995. ↓
Models produced in 1993 and 1994.
Examination
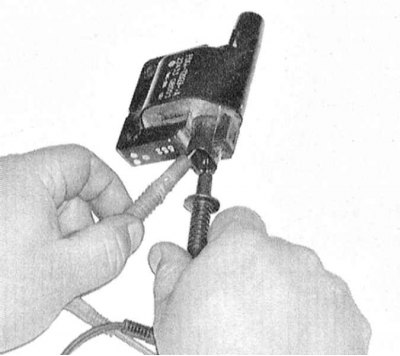
1. With the ignition off, disconnect the wiring from the coil. Connect an ohmmeter between the terminals of the primary circuit of the connector. Compare the measurement results with the requirements of the Specifications. A faulty coil must be replaced.
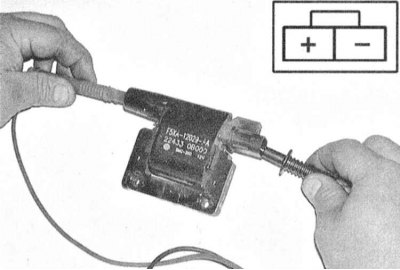
2. Without turning on the ignition, connect an ohmmeter between the high voltage (to which the wire coming from the distributor cap is connected) and the positive terminals of the coil. Compare the measurement results with the requirements of the Specifications. A faulty coil must be replaced.
Replacement
1. Disconnect the negative cable from the battery.
Warning! If the car stereo system is equipped with a security code, make sure you have the correct combination to activate the audio system before disconnecting the battery!
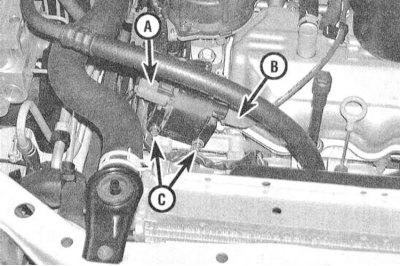
2. Disconnect the wiring from the coil.
3. Disconnect the high-voltage cable coming from the distributor cap.
(For more information, see the website NissanBook.ru)
4. Remove the mounting bolts and remove the coil from the engine.
5. Installation is carried out in reverse order.
Note: The spark plug wiring connector must be connected to the coil before installation (lubricate the inner walls of the protective cover with dielectric silicone grease).
Models since 1995.
Examination
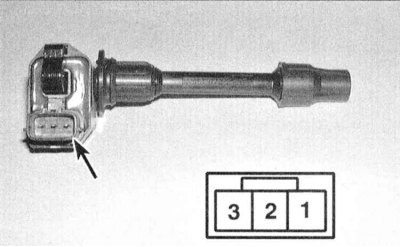
1. With the ignition off, disconnect the wiring from the coil. Connect the positive probe of the ohmmeter to terminal #1, the negative probe to terminal #2 of the coil connector. The device should show infinity. Change the polarity of the meter connection - this time there should be conductivity (but not zero resistance). If the test results are negative, replace the coil.
2. Connect an ohmmeter between the high voltage wire terminal (going to the spark plug) and terminal No.1. The meter should register infinite resistance, otherwise replace the coil.
3. In a similar manner, check the condition of the coils of the remaining spark plugs. Replace defective components.
Replacement
1. Disconnect the negative cable from the battery.
Warning! If the car stereo system is equipped with a security code, make sure you have the correct combination to activate the audio system before disconnecting the battery!
2. Disconnect the wiring from the coil.
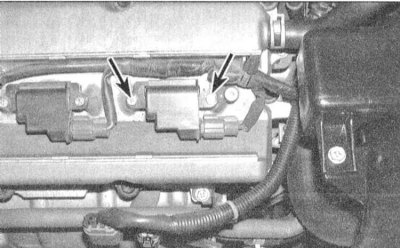
3. Loosen the mounting screws and remove the coil by pulling it upwards with a rotating motion.
4. Installation is carried out in reverse order.
Note: Before installation, lubricate the inner walls of the protective cover with dielectric silicone grease.