Attention! The negative cable must always be disconnected from the battery first and connected last!
When the battery is disconnected, the operating parameters entered in the PCM memory are lost, which can lead to a certain violation of the stability of the idle speed in the first minutes after starting the engine.
Examination
Note. The test only makes sense if the battery is fully, or almost fully charged. Disconnect both wires from the battery (first negative).
The negative wire should always be disconnected first and connected last.
1. If the stereo system installed in the car is equipped with a security code, before disconnecting the battery, make sure that you have the correct combination to activate the equipment!
a. Checking the battery level. Visually assess the brightness of the color spot of the indicator mounted on the top of the battery (if provided). If the spot is dark, recharge the battery (see chapter Settings and routine maintenance). On batteries to be serviced, special covers should be removed and the electrolyte level in the cans checked - the liquid should completely hide the upper edges of the lamellae. If necessary, add the required amount of distilled water to the appropriate jars. Try not to add more liquid than is really necessary, as this can lead to electrolyte displacement under increased engine loads. Use a hydrometer to determine the density of the electrolyte poured into the jars. Remove the caps and suck the electrolyte sample into the measuring container of the device. By the position of the float of the measuring chamber, determine the specific gravity of the electrolyte in each of the battery cans (follow the manufacturer's instructions). The density of the electrolyte of a fully charged battery should be 1.270 units (green zone of the measuring scale). With an excessively low specific gravity (red zone of the scale) battery needs to be recharged (see chapter Settings and routine maintenance).
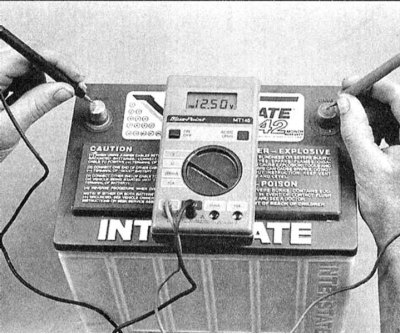
b. Open circuit voltage test. Get your digital voltmeter ready.
Note. Before starting to measure the voltage, it is necessary to remove the surface charge from the battery, for which you should turn on the high beam for 10 seconds, then turn off the headlights and wait for about two more minutes.
With the engine off and consumers disconnected, connect the negative voltmeter probe to the negative pole of the battery, then the positive one to the positive pole. With a good battery, the device must register a reading of at least 12 V, otherwise, before proceeding to further checks, the battery should be recharged (see chapter Settings and ongoing maintenance).
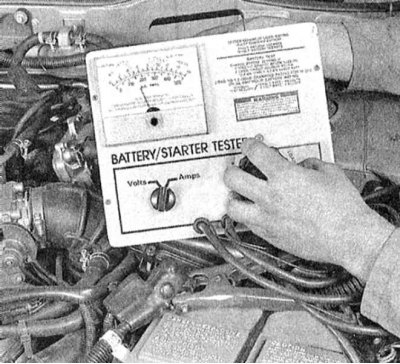
c. Checking the voltage generated by the battery under load. It is impossible to adequately assess the condition of the battery without this test. Prepare a special universal meter (see accompanying illustration). The device allows you to evaluate the ability of the battery to crank the starter and generate the necessary energy at increased engine loads. Connect the meter to the battery terminals and follow the meter manufacturer's instructions. The load is simulated by means of a carbon rod built into the meter. After withstanding the load for about 15 seconds, read the reading of the device - the voltage should not fall below 9.6 V.
Note. The voltage generated by the battery is directly proportional to temperature. The results are corrected using a special state map, usually supplied with the device. The minimum allowable value at 0°C is approximately 9.1 V.
d. Check for leakage currents. Make sure. That all onboard electrical consumers are turned off. If the vehicle is equipped with an engine compartment light, check that it is working properly, then turn off the light. Disconnect the negative cable from the battery and connect one of the probe lamp terminals instead. Connect the second terminal to the tip of the negative wire - turning on the lamp indicates the presence of a leakage current leading to battery discharge.
Note. On models equipped with a powertrain health processor, digital clock, power seat adjustment with memory module, or other devices that consume electricity when the ignition is off, a faint glow of the probe lamp is acceptable. If there are suspicions of current leakage, replace the probe lamp with an ammeter - the measurement result should not be more than 50 mA.
 |  |
 |  |
Replacement
Attention! The negative cable must always be disconnected from the battery first and connected last!
1. Disconnect both wires from the battery (first negative).
Attention! The negative wire should always be disconnected first and connected last. If the stereo system installed in the car is equipped with a security code, before disconnecting the battery, make sure that you have the correct combination to activate the equipment!
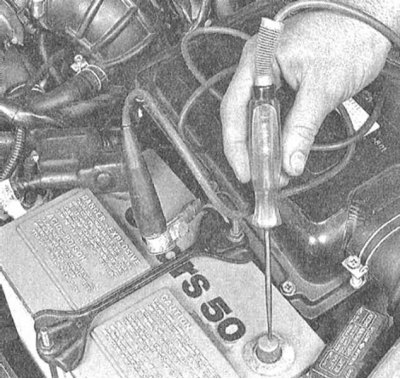
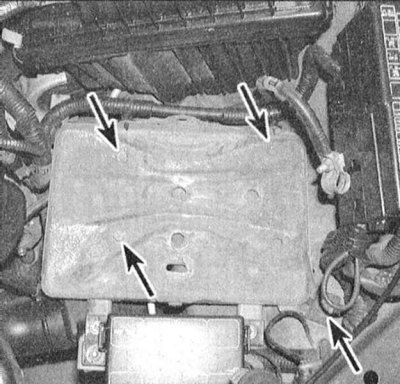
2. Loosen the tie nuts and remove the battery retaining plate on the pallet.
3. Remove the battery from the tray.
Note. Special brackets with handles are produced. The use of such brackets greatly simplifies the procedure for removing the battery from the engine compartment.
4. Carefully inspect the sump for signs of corrosion.
5. If necessary, give the fasteners and remove the pan from the engine compartment in order to remove corrosion products from it and carry out the appropriate protective treatment of the metal (use zinc based primers).
6. When replacing, ensure that the replacement battery matches the performance requirements of your vehicle.
7. Installation is carried out in the reverse order.