


Table of contents: Models produced in 1993 and 1994. ↓ Models since 1995. ↓
Generator design (models produced in 1993 and 1994.)
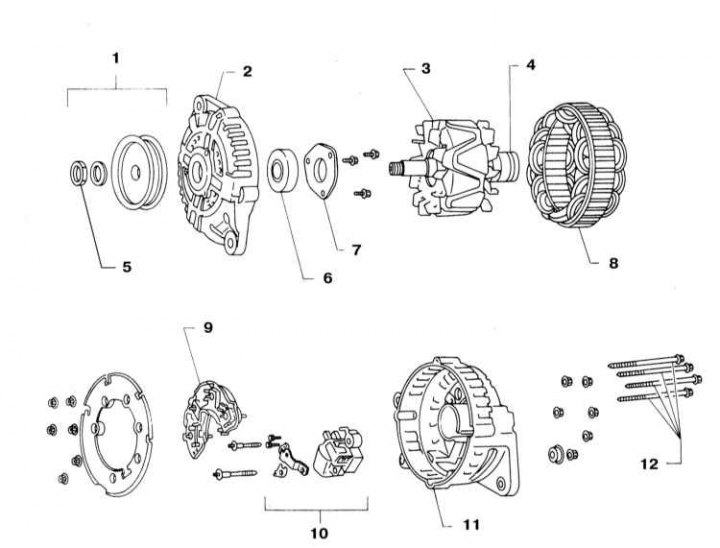
1 - Pulley; 2 - Front cover; 3 - Rotor; 4 - Rear bearing; 5 - Nut (39÷59 Nm); 6 - Front bearing; 7 - Bearing holder; 8 - Stator; 10 - Brush assembly; 11 - Back cover; 12 - Tie bolts (3.1÷3.9 Nm)
Generator design (models since 1995.)
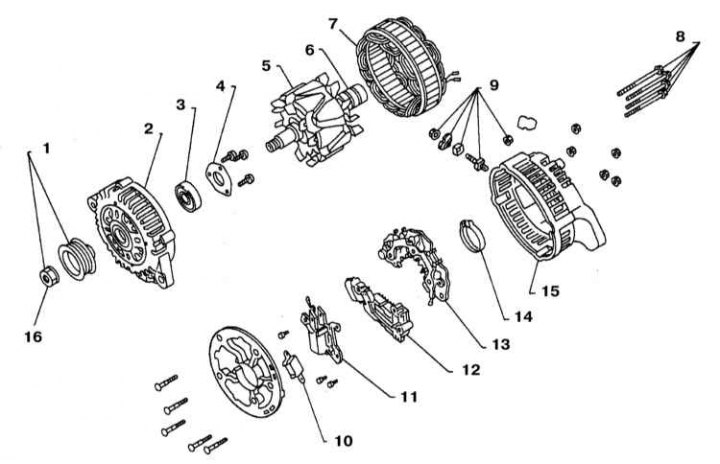
1 - Pulley; 2 - Front cover; 3 - Front bearing; 4 - Bearing holder; 5 - Rotor; 6 - Slip ring; 7 - Stator; 8 - Tie bolts (3.1÷3.9 Nm); 9 - Contact installation details; 10 - Capacitor; 11 - Brush holder; 12 - Regulator; 13 - Diode assembly; 14 - Gasket; 15 - Back cover
Models produced in 1993 and 1994.
1. The design of the generator is shown in the illustration.
2. Disconnect the negative cable from the battery.
Warning! If the car stereo system is equipped with a security code, make sure you have the correct combination to activate the audio system before disconnecting the battery!
3. Jack up the vehicle and place it on supports. If equipped, remove the crankcase guard.
4. Remove the drive belt (see Chapter Settings and ongoing maintenance).
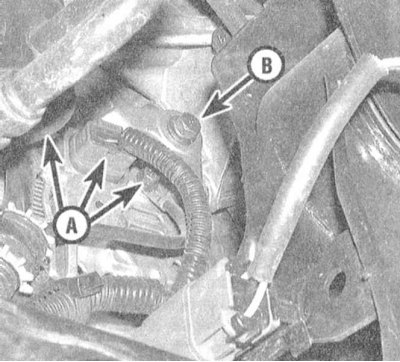
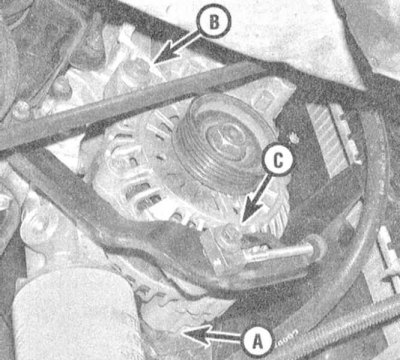
5. Disconnect the electrical wiring and exhaust wire from the generator.
6. Remove the mounting bolts and separate the generator from the engine block.
 |
 |
7. Installation is carried out in reverse order.
8. Finally, do not forget to install the drive belt and connect the negative cable to the battery. Adjust the belt tension (see Chapter Settings and ongoing maintenance).
Models since 1995.
1. The design of the generator is shown in the illustration.
2. Disconnect the negative cable from the battery.
Warning! If the car stereo system is equipped with a security code, make sure you have the correct combination to activate the audio system before disconnecting the battery!
Jack up the car and place it on supports. If equipped, remove the crankcase guard and the right front wheel arch protector.
3. Remove the drive belt (see Chapter Settings and ongoing maintenance).
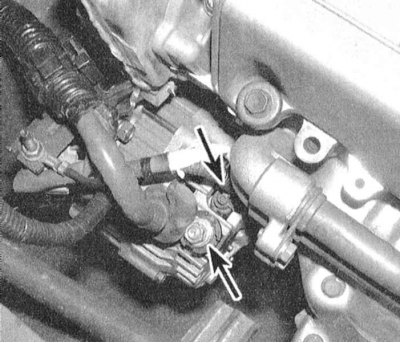
4. Disconnect the electrical wiring and exhaust wire from the generator.
5. Remove the cooling fan assembly with the shroud (see Chapter Cooling and heating systems).
6. Remove the A/C compressor and, without disconnecting the hydraulic lines, move it to the side.
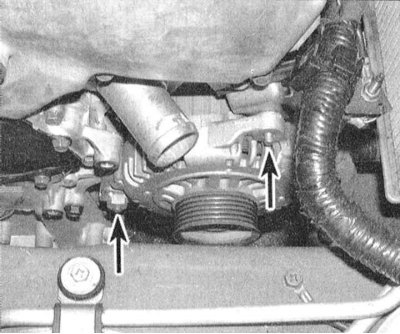
7. Remove the mounting bolts and separate the generator from the engine block.
8. Installation is carried out in reverse order.
9. Finally, do not forget to install the drive belt and connect the negative cable to the battery. Adjust the belt tension (see Chapter Settings and ongoing maintenance).