


Table of contents: Side body molding ↓ Roof Drainage Channel - Sedan ↓ Roof Drainage Channel - Hatchback ↓ Ventilation system outlets ↓ Anti-vibration strips of the wheel…↓ Side skirts - special models ↓ Filler neck flap ↓
Side body molding
1. Molding sections (where it is equipped) attached to the front and rear fenders and doors with double-sided tape and sealant.
2. The replaceable sections are attached with double-sided adhesive tape.
3. Removal and installation require that the moulding and body panels be heated to a temperature of 30 to 40°C using a hot air injector.
4. Heat the sections along the entire length to be removed, then concentrate on one end. Lift the end of the section, trim it if necessary, then remove the entire length.
5. When assembling, remove all parts of the old molding and thoroughly clean the contact surface of the body panel. Heat the panel and molding to the specified temperature and press them together.
Roof Drainage Channel - Sedan
6. Open the doors and remove the three screws securing the strips on the front and rear doors.
[The full article is available on the resource: www.NISSANBOOK.ru]
7. Assembly is carried out in reverse order.
Roof Drainage Channel - Hatchback
8. Open the front door and remove the three screws securing the door strip.
9. Remove the door pillar strip, marking where it attaches, and carefully remove the center strip and brackets from the roof edge.
10. When assembling, place the staples evenly along the center of the strip (there should be about seven of them), then insert the strip into the window moulding at a distance of approximately 10 mm.
Ventilation system outlets
11. Open the trunk lid or tailgate and remove the trim panels to access the exit mountings.
12. Unscrew the four nuts from the inside of the luggage compartment and remove the air duct. Pull it out, noting the position of the single gasket (only in later models), reflector (only for Sedans) and rubber seal.
13. Assembly is carried out in reverse order.
Anti-vibration strips of the wheel arch
14. Protective strips are attached to the rear edge of each front wheel arch and to the front edge of each rear wheel arch.
15. Each front wheel arch strip is secured with four screws, and each rear wheel arch strip is secured with seven screws.
Side skirts - special models
16. Apart from the three screws installed in each wheel arch, there is no information regarding the side skirt fastenings of the special models.
Filler neck flap
17. Open the fuel flap and unscrew the two screws securing the hinge. Remove it.
18. Where necessary, unscrew the lock nut and push the flap cover into the luggage compartment (see photo).
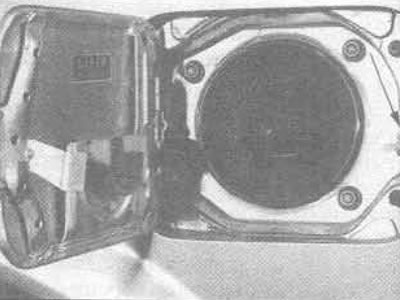
15.18. Fuel tank flap lock nut
19. Unscrew the four lock nuts, then remove the flap mounting plugs from inside the wheel arch. Pay attention to the filler neck sealing ring and the closing cap.
20. Assembly is carried out in reverse order.