


2. Check the reference marks between the output shaft, housing cover and pinion housing. These should be present on all later models (photo) and should be aligned when the steering gear is exactly in neutral. If there are no marks, make your own marks, especially between the cover and housing. Note that on some models the lower joint and steering pinion may have a wide drive slot to ensure accurate alignment.
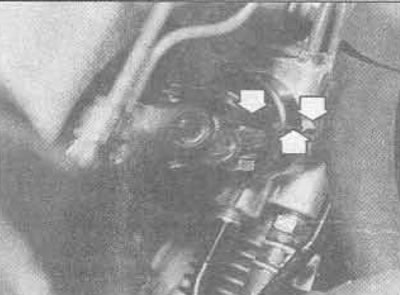
24.2 On later models, the steering gear is in neutral when the lower joint cut, gear cover mark and gear housing marks are aligned (marked with arrows)
3. Loosen and remove both lower connection bolts.
4. Lift the link up out of the gear slots, then pull it down out of the steering column slots.
5. Check the condition of the connection, replace it and the tie bolts if necessary.
6. When installing, first check that the steering wheel is aligned correctly on the steering column and that the wheel is in the neutral position.
7. Install the lower connection (longer part - up) on the steering column so that the holes for the bolt are exactly perpendicular to the cut of the groove in the grooves of the column; the tie rod should slide easily into the joint. On later models, the guide groove should automatically find the correct position, and on earlier models, use the paint marks made during removal to ensure proper installation.
8. Check that the steering gear is exactly in neutral position and that the marks between the output shaft, the housing cover and the gear housing (marked or made when removed) were precisely aligned.
9. Install the lower joint onto the output shaft, the cut should be exactly aligned with the marks on the housing cover (photo). On later models, the guide groove should automatically find the correct position, and on earlier models, use the paint marks made during removal to ensure correct installation.
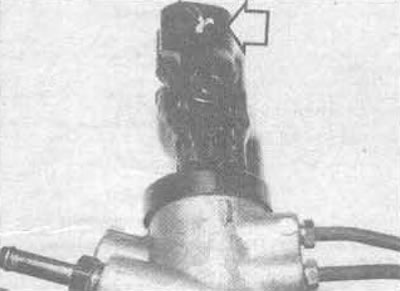
24.9 When establishing a connection, the longer part (marked with an arrow) should be on top and the cut should be aligned as shown
10. Check that the steering wheel and steering gear are in their respective neutral positions, then check that both lower pinch bolts fit easily.
(See the original on the resource: NissanBook)
11 Install the lower tie bolts and tighten them to the specified tightening torque Specification.