


Removal and installation
Removal
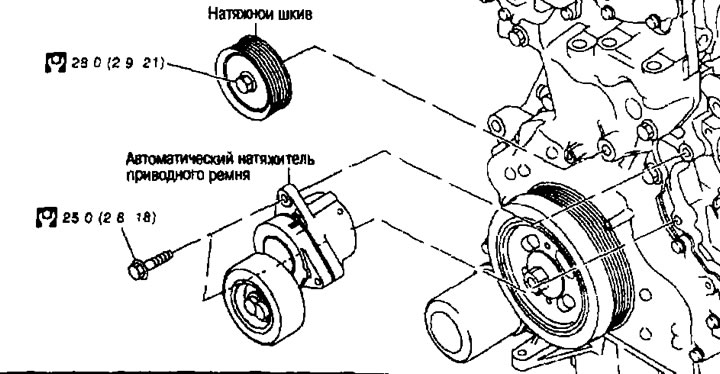
Attention: The automatic drive belt tensioner is replaced together with the pulley.
1. Remove the front right wheel.
2. Remove the protective cover from the right front fender.
3. Remove the drive belt. See above.
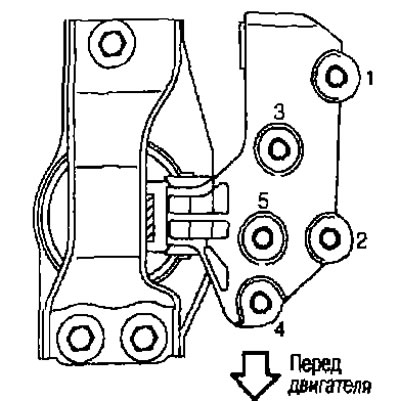
4. Support the bottom of the engine with a telescopic strut and loosen the right engine mount insulator bolts. See below.
Caution: Do not unscrew bolts No.4, 5 shown in the figure.
5. Remove the tension pulley.
6. Release the locked tensioner pulley.
7. Remove the automatic drive belt tensioner.
Caution: Do not loosen the hexagonal part in the center of the auto tensioner pulley (do not turn it counterclockwise). Otherwise, the automatic drive belt tensioner will have to be replaced along with the pulley.
Installation
Installation is carried out in the reverse order of removal, taking into account the following.
Attention:
- When installing the automatic tensioner, be careful not to touch or damage the water pump pulley.
- If you have caused damage that is more severe than peeling paint, replace the automatic drive belt tensioner.
- Do not transfer the pulley from the old automatic tensioner to the new one.