


Table of contents: Removal ↓ Adjustment ↓
Removal
1. Disconnect the battery from ground. Remove the tray for small items (if provided).
2. Disconnect the cables from the fan and the heater. It is recommended to move the thermostat lever to the Cold position.
3. Remove the handles from the levers (photo) and remove the control panel.
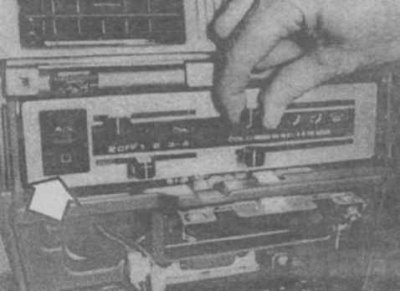
19.3 To remove the handles, push them straight towards you.
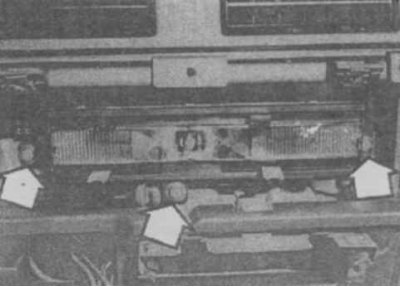
19.3 Remove the handles from the levers and remove the control panel.
4. Loosen the screws (photo), remove the panel and disconnect the connectors.
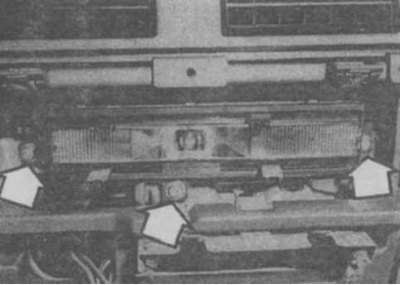
19.4 Loosen the screws, remove the panel and disconnect the connectors.
5. If necessary, remove and check the fan switch. The switch is disconnected from the panel.
6. Installation is carried out in the reverse order. Adjust the damper control rods.
Adjustment
7. To adjust the divider flap and defrost nozzle flap rods, first disconnect the side rod cable and adjust the divider flap rod. Reconnect the cable and adjust.
8. To adjust the ventilation duct flap control rod, move the side rod in the direction of the arrow (photo). Holding the upper and lower levers in the lower position, attach rods 1 and 2 to the corresponding levers in order.
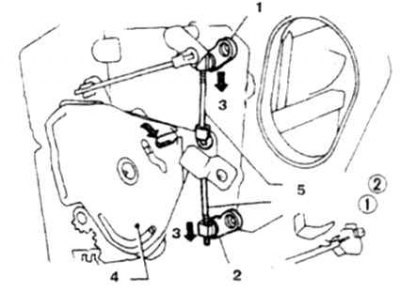
19.8 Adjusting the ventilation duct damper control rod
1. Upper throttle lever; 2. Lower throttle lever; 3. Submit in this direction; 4. Lateral pull; 5. Dampers 1 and 2
9. To adjust the defrost nozzle flap control rod, move the side rod in the direction of the arrow (photo). After moving the defrost nozzle flap lever in the direction of the arrow, attach the rod to the side rod.
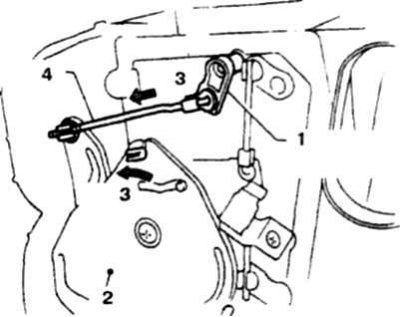
19.9 Adjusting the control rod of the defrost nozzle flap
1. Throttle lever; 2. Lateral pull; 3. Submit in this direction; 4. Rod
10. To adjust the air intake control cable, move the cable housing and the side rod in the direction of the arrow. Secure the housing with a clamp in this position.
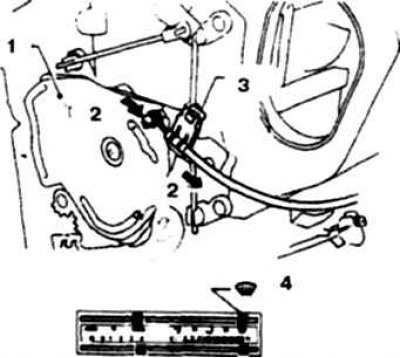
19.10 Adjusting the air intake control cable
1. Lateral pull; 2. Submit in this direction; 3. Clamp; 4. Extreme position
11. To adjust the heater tap rod, disconnect the thermostat cable from the mixing flap lever and adjust the rod. Attach the cable and adjust. Move the mixing flap lever in the direction of the arrow (photo). Move the heater tap rod in the direction of the arrow so that there is about 2 mm between the rod and the lever and attach the rod to the flap lever.
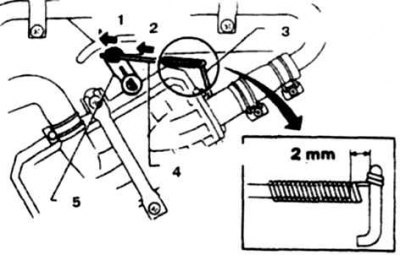
19.11 Adjusting the heater tap draft
1. Submit; 2. Pull; 3. Crane control rod lever; 4. Traction; 5. Mixing flap lever
(The text was copied from the portal www.nissanbook.ru)
12. To adjust the thermostat cable, move the lever to the left (photo), move the cable casing and the damper lever in the direction of the arrow and secure the casing with a clamp.
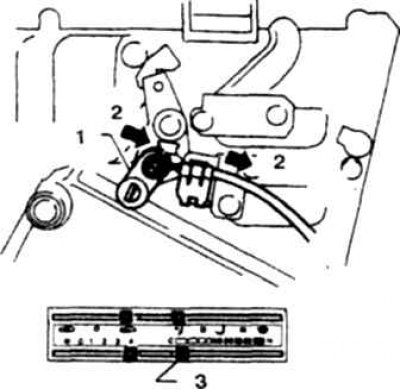
19.12 Adjusting the thermostat cable
1. Mixing valve; 2. Submit; 3. Maximum cooling position
13. To adjust the air intake flap cable, move the lever all the way to the left (photo), move the cable casing and flap lever in the direction of the arrow and secure the casing with a clamp.
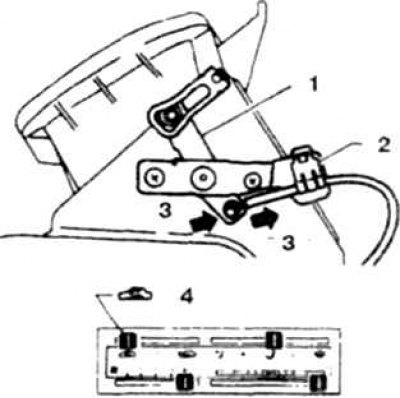
19.13 Adjusting the air intake flap cable
1. Air intake flap lever; 2. Clamp; 3. Submit in this direction; 4. Position of the control lever