Removing traces of small scratches
If the scratch is superficial and does not affect the metal of the panel, it is extremely easy to repair.
1. Lightly rub the scratched area with fine sanding paste to remove loose paint particles and wax.
2. Rinse the treated surface with clean water.
3. Using a small brush, paint over the scratch with the paint used for the outer coating of the surrounding body panels. Continue applying the paint layer by layer until the surface of the paint inside the scratch reaches the level of the surrounding surface of the panel.
4. Allow the new paint to cure for at least two weeks, then sand the transition surface flush with the rest of the panel using a very fine sanding paste. Finally, coat the treated surface with wax.
5. If it has penetrated the paint, reaching the metal of the panel and causing it to corrode, another repair technique should be used. Use a penknife to scrape off powdered rust from the scratch, then treat the surface with inhibitor paint to prevent future corrosion.
6. With a rubber or nylon applicator, cover the treated damaged area with a gloss type putty. If necessary - which is especially useful when filling narrow scratches - the putty can be thinned with a solvent to form a very fine paste.
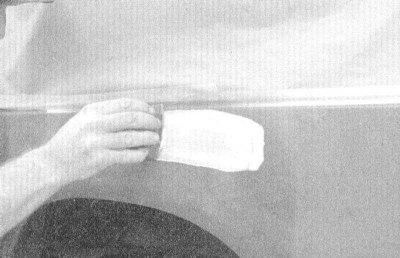
7. Before the gloss putty hardens inside the scratch, wrap your fingertip with a smooth cotton cloth.
8. Then, after wetting your finger in the solvent, quickly run it along the puttied surface of the scratch. This will make the surface slightly concave.
9. Now, after the putty has hardened, the treated scratch can be painted in accordance with the instructions in p.3 and 4.
Dent Repair
When repairing dents, the first task is to stretch the deformed surface in order to bring it to the level of the original. It makes no sense to try to achieve a 100% match with the original - it is still impossible due to the violation of the internal structure of the panel metal upon impact. It is optimal to bring the level of the indented surface to a level approximately 3 mm below the surface of the surrounding undamaged area of the body panel. If the dent is very shallow, pulling it out does not make sense at all.
In the case when the concave area can be reached from the back of the panel, you should try to straighten the dent from the inside with blows from a soft-faced hammer. When tapping a dent, press a wooden mallet firmly against the face of the dent to dampen the momentum of the blow to avoid excessive buckling of the deformed panel metal.
If the indentation occurs in the two-ply section of the panel, or if it cannot be accessed from the back for any other reason, a different pulling technique must be used. Drill a few small holes into the concave section of the panel, making sure that they are in the deepest areas of the dent. Then screw long self-tapping screws into the holes, leaving their heads sticking out just enough to grab onto with tongs. Now start pulling out the dent with tongs behind the screws.
In the next stage of treatment, the dents should be removed from the damaged surface and in an area approximately 3 cm wide around it. This work is best done with a wire nozzle or a sanding disc installed in an electric drill chuck, but manual sanding is no less effective. The final step in preparing for puttying is to scratch the exposed metal of the dent with a screwdriver or a piece of file, or drill small holes in it to ensure maximum adhesion of the putty to the metal surface. Then you can proceed to the implementation of the procedures of puttying and painting.
Repair of rusted holes and holes
1. Using a sander or a wire attachment clamped into the chuck of an electric drill, remove all traces of paint from the damaged area and in an area about 3 cm wide around it. In the absence of the possibility of using an electric drill, the work can be done no less efficiently by hand with sandpaper.
2. After removing the paint, you can assess the degree of damage to the metal by corrosion and decide whether it makes sense to start repairing or whether it would be more reasonable to replace the entire panel (if it is possible in principle). New panels can be purchased not as expensive as many motorists think. It is often much faster and even more economical to install a new panel than to repair extensive damage to the body.
3. Remove all body trim from the damaged panel, with the exception of those that can serve as a guide to recreate the original shape of the deformed areas (such as headlight trim, etc.). Using metal shears or a hacksaw blade, remove all freely dangling, loosely fixed and hopelessly corroded pieces of metal, then bend the edges of the hole inward with a hammer to form a recess for putting putty material into it.
4. Use a wire brush to remove powdered rust from damaged metal. If there is access to the reverse side of the damaged area, treat it with a corrosion inhibitor.
5. Before starting puttying, the hole must be plugged. This can be done by riveting or screwing a piece of tin to the damaged area on the reverse side of it, or by covering the hole with wire mesh.
6. After blocking the hole, the damaged area can be puttied and painted (see next subsection).
Puttying and painting
Many types of body fillers are produced, however, it should be noted that for this type of work, the putty paste supplied with the body panel repair kits with a hardener placed in a tube is best suited for this type of work. In order to achieve a smooth and regular contour of the puttied surface, the paste must be applied with a flexible plastic or nylon applicator.
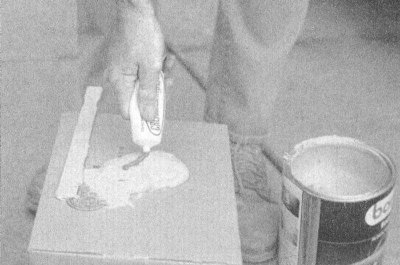
1. Strictly following the manufacturers instructions (violation of them can lead to improper hardening of the putty mass), knead a small amount of putty on a clean wooden or cardboard surface (use hardener carefully).
2. Use the applicator to apply putty to the properly prepared surface of the damaged area of the body panel. To achieve the desired surface contour and putty level, each stroke of the applicator should go through the entire surface to be repaired.
3. As soon as the contour of the putty surface is close to the original, immediately stop applying the putty, as it, while curing, will begin to stick to the applicator, forming lumps and leaving scratches on the treated surface.
4. Continue applying coats of paste at intervals of about 20 minutes until the level of the putty surface is slightly above the surrounding metal of the panel.
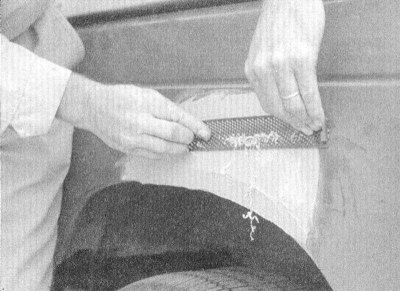
5. After the putty has hardened, the excess can be removed with a file.
6. Next, the stage of sanding and grinding the puttied surface begins. Imported waterproof sandpaper is best suited for this purpose (since it maintains a uniform grain size of the abrasive and its good adhesion to the base). You should start with coarse paper No. 180 and, progressively reducing the graininess, you can finish with No. 600. In order to achieve adequate flatness of the treated surface, the paper should first be wrapped around a block of dense rubber (wood or foam) or stick on it. During processing, the paper must be regularly and frequently wetted with water. This technology allows you to achieve absolute smoothness and evenness of the treated surface at the final stage.
7. At this point, the treated damaged surface should be surrounded by a ring of clean, bare metal, ending in a gradually fading edge of good paint. Rinse the treated surface with clean water, washing off all the abrasive formed during grinding.
8. From an aerosol can, spray the treated surface with a thin layer of a light primer. This will reveal all the defects made during grinding, which can be eliminated by covering them with a layer of fresh putty. Repeat the sanding and sanding step. Repeat alternating puttying, treatment and priming of the surface until a satisfactory result is obtained. When finished, rinse the treated surface with water and dry it.
9. The surface is now ready for painting. Painting a car with an aerosol should be carried out in still, dry, warm, and dust-free air. The conditions of a volumetric closed and heated room most fully meet these requirements. If circumstances force you to paint the body outdoors, you should be very serious about choosing the right weather conditions. When working indoors, beat down the dust by spraying the floor with water. If only a single body panel of the vehicle is being painted, cover the undamaged panels surrounding it. This precaution will minimize the effect of slight differences in tones between old and fresh paint. Finishing elements such as chrome decorative strips, door handles, etc. should also be covered (better to take it off). To protect non-paintable surfaces, use adhesive tape and old newspapers, which should be applied in several layers.
10. Shake the can thoroughly before using the spray, then spray paint on a test surface, practicing the staining technique. Cover the surface prepared for painting with a thick layer of primer. The thickness is achieved by repeatedly applying the primer in thin layers. Sparing no water, use moisture-resistant sandpaper No. 600 to process the primed surface, achieving its absolute smoothness. Allow the primer to dry completely before proceeding with the final painting.
11. Apply a layer of decorative paint, again achieving thickness by applying it repeatedly. Start painting from the center of the area to be repaired, making circular movements with a spray can, expanding their radius in a spiral until the entire damaged area is covered, plus another ring of the surrounding good about five centimeters wide. After 10-15 minutes (better not later, so as not to damage the edge of the fresh paint starting to harden) after applying the last coat of paint, peel off the newspapers and adhesive tape that covered the surrounding body panels. The paint cures completely within about two weeks, after which, to smooth the transition of fresh paint, treat the restored surface with a very fine sanding paste. Finally, apply a layer of wax to the panel.
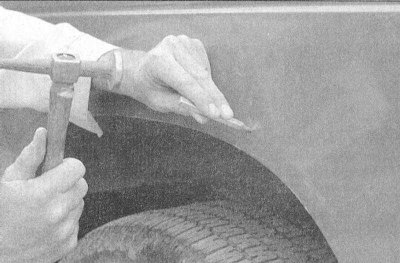
1. If you can't get to the back of the dent removal panel with the power of a hammer, use a hammer-like tool to straighten out the dent. At the deepest point of the dent or along the dent, drill or punch a hole at least 25mm apart...
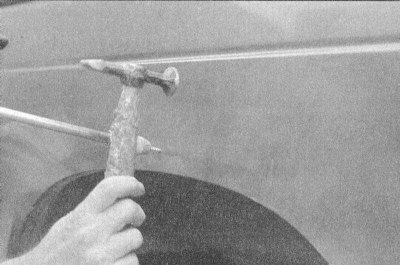
2....then screw the tool into the hole and straighten out the dent. Place the base of the hammer near the edge of the dent and pull the crumpled metal out. Make sure that the surface shape matches the original and is about 3mm below the surrounding metal.
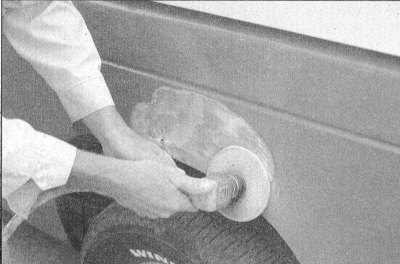
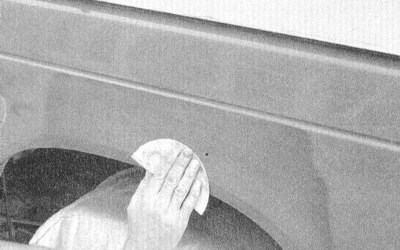
3. Using coarse sandpaper, remove paint from damaged metal. Sandpaper works well for this, but a sanding disc makes the job go faster. Use thin (N grain about 320) sandpaper to strip the paint at a distance of approximately 25 mm around the damaged area.
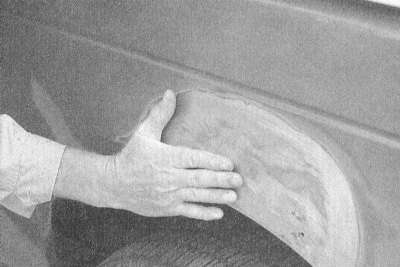
4. When the paint is removed, it is easier to determine the bumps by touch than by eye. Smooth out unevenness as much as possible. Clean the repair area with a special cleaner.
5. According to the instructions for use, mix some compound and hardener. The ratio of compound to hardener is quite significant and if you mix it in the wrong proportion it will either not harden or it will harden too quickly (You will not have time, at the same time, to give it the desired shape).
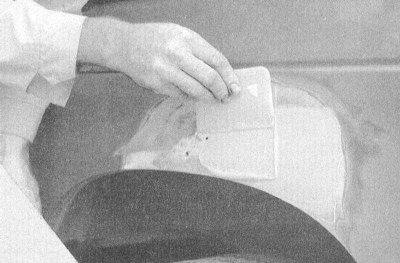
6. Working quickly so that the compound does not have time to harden, apply the compound to the metal with a plastic spatula after it has been mixed. Work until the applied material is in its original shape, but slightly higher than the surrounding metal.
7. Allow the material to harden by checking with your fingernail. Using the compound remover, give it the desired shape.

8. With coarse sandpaper, on a sanding board, process the compound so that it takes the desired shape and is smooth. Work by changing the sandpaper to the finest, up to size 360 or 400.
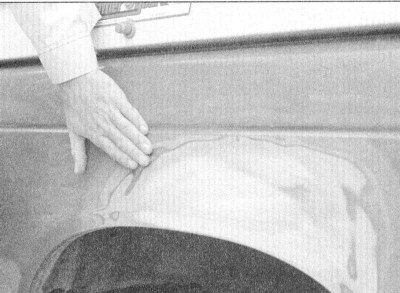
9. You should not feel any transition from compound to bare metal or from metal to old paint. Once the repair area is smooth and uniform, remove dust and mask adjacent panels and cladding.
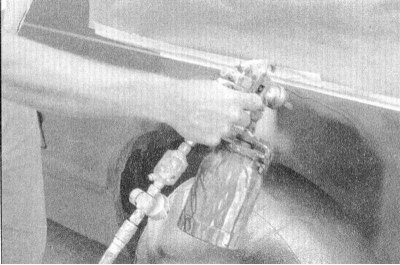
10. Apply several coats of primer to the repair area. Do not apply a lot of primer at once, because it will drain and collect in drops and apply the next layer only after making sure that the previous one is dry. The photo shows a professional sprayer, but you can also use an aerosol sprayer, which is available and inexpensive.
11. The applied primer will help to detect bumps and scratches. Seal them with compound. Follow the instructions and sand with N 360-400 sandpaper until smooth. Repeat this operation until a perfect surface is obtained.
12. Polish the primer with very fine sandpaper (400 or 600) to remove drops of primer. Wash the repair area with water and dry. Remove dust with a soft cloth, then apply the final coat. Do not attempt to polish or apply a protective coat until the paint is completely dry (approximately two weeks).