


Table of contents: Checking the ignition timing angle ↓ Checking spark plugs ↓ Replacing the spark plug ↓ Checking the distributor cap and…↓
1. With the frequency given in Section "Maintenance" at the beginning of this manual, perform the following maintenance steps.
Checking the ignition timing angle
2. Be guided Chapter 5 from this Section.
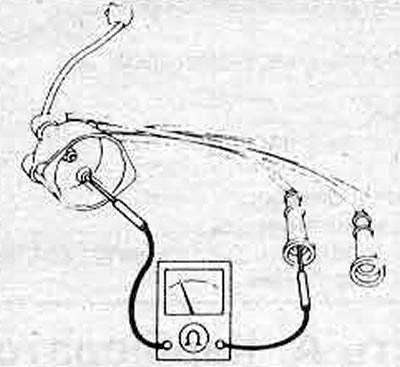
Figure 4.2. Measuring the resistance of high voltage wires
Checking spark plugs
3. Remove the air filter or intake manifold from the carburetor (Section 3).
4. Mark the position of the spark plug wires, then disconnect them from the spark plugs by pulling on the caps.
5. Clean any dirt from the area around the spark plugs in the cylinder head.
6. Unscrew and remove the spark plugs.
7. The spark plug gap is of great importance, if it is too large or too small, the spark size and efficiency will be greatly weakened. For better performance, the spark plug gaps should be set according to Specifications at the beginning of this Section.
8. To set the gap, first measure it with a feeler gauge, then bend the exposed outer electrode until the correct gap is set. The central electrode must not be bent, as this may crack the insulation and cause the spark plug to fail.
9. A special tool for setting the spark plug gap can be purchased at a spare parts store.
10. Before installing spark plugs, wash them, then apply grease to the threads.
11. Tighten the spark plugs by hand until they touch the gaskets.
12. Tighten with the specified tightening force Specification. If you don't have a torque wrench, tighten the Champion spark plugs 1/4 turn (no more). Do not overtighten the spark plugs.
13. When connecting the high-voltage wiring to the spark plugs, make sure that they are installed in the correct order, 1-3-4-2. Cylinder #1 is the first from the timing belt; the distributor rotor rotates counterclockwise when viewed from the left side of the engine compartment.
Replacing the spark plug
14. Spark plugs must be replaced at the specified intervals, regardless of their condition, to maintain engine performance and reduce contamination.
15. Remove the old spark plugs as described above, noting their condition, then disconnect them.
16. New spark plugs must be of the correct type as specified in this manual or Nissan, adjust the gap (points 8-10 above) and install them into the engine.
Checking the distributor cap and spark plug wiring
17. Unscrew the screws and remove the distributor cover from the distributor. Disconnect the power wire from the ignition coil.
18. Wipe the wiring and distributor cover.
19. Use an ohmmeter to check that there is good contact between the segments inside the distributor cap and the spark plugs. If the resistance is greater than 30 kOhm, clean the outer terminals of the distributor cap and recheck the resistance. If there is no improvement, replace the wiring (only as a set) and/or the cover of the breaker-distributor.
20. Finally, remove the rubber cover from the ignition coil (where is it used), wipe the coil clamps and check the reliability of the ignition coil fastening and connection (photo).
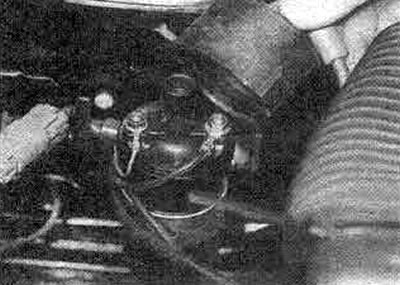
2.20. Remove the rubber cover (where is it used), to check the ignition coil connectors
21. Install the removed parts.