


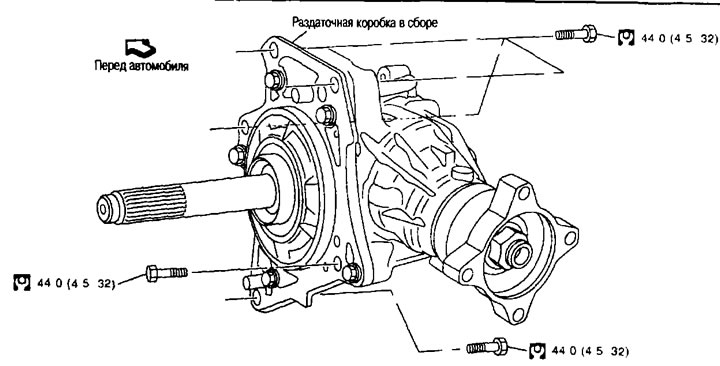
Removal and installation
Removal
1. Remove the following components:
- front exhaust pipe, see chapter "Accelerator, fuel system and exhaust system";
- intake manifold, see glory "Engine Mechanical Part (MR20DE)";
- central exhaust pipe, see chapter "Accelerator, Fuel System and Exhaust System (QR2SDE)".
2. Separate the rear driveshaft. See below.
3. Remove the right drive shaft and remove the support bearing bracket. See Chapter "Front axle and suspension".
4. Unscrew the mounting bolts (
 ) from the gearbox and transfer case.
Caution: Do not loosen the mounting bolts () crankcase restrout.
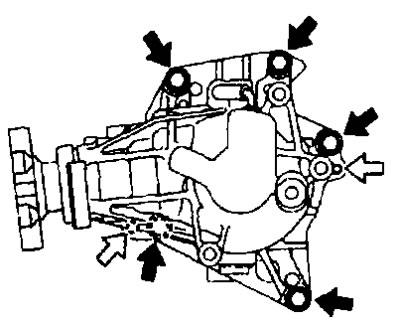
5. Remove the transfer case assembly from the vehicle.
Attention:
- Do not damage the driven gear shaft.
- Do not damage the breather hose.
Installation
Installation is carried out in the reverse order of removal, taking into account the following:
- When connecting the transfer case to the transmission, install the mounting bolts in the following order:
| Bolt designation | A | B |
| Installation direction | Transfer case → gearbox | Gearbox → transfer case |
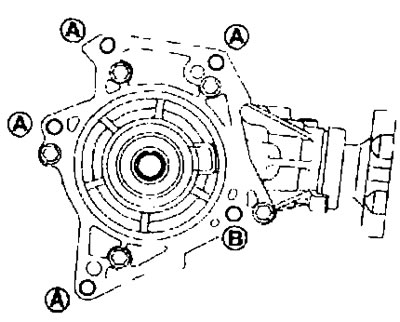
Attention:
- When installing the transfer case on the gearbox, replace the axle shaft seal (at the junction with the transfer case) from the gearbox side. See chapter "Continuously variable automatic transmission (CVT)".
- Do not damage the seal (at the junction with the transfer case) and the gearbox dust cover assembly.
- After installation, check the oil level and make sure there are no leaks. See above.