Stubborn dirt can be removed from carpets with household or special car shampoos, which are available in aerosol form for convenience - follow the manufacturer's instructions. Finally, vacuum the treated area and "ruffle" pile with a stiff brush.
Warning! Do not leave any electric heaters inside the passenger compartment to dry the cleaned upholstery!
Leather upholstery requires special care. Stains should be removed with a very mild soapy solution of warm water. The solution is applied with a soft cloth, then the surface is wiped dry. Never use alcohol, gasoline or other solvents to clean leather upholstery.
Avoid prolonged exposure to direct sunlight on the leather upholstery. Try to park in the shade, use sun shades, etc.
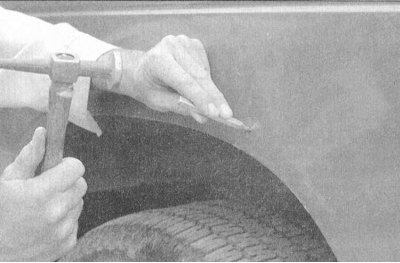
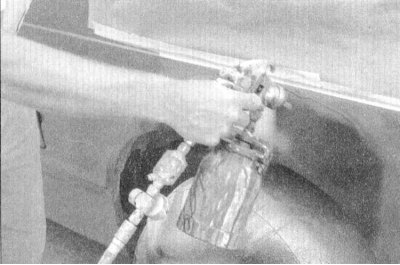
1. If there is no access to the rear side of the body panel to knock out the dent, it should be pulled out with a sliding hammer. At the deepest point of the dent, or along its border, drill or hammer small holes at least 2.5 cm apart..

2....then screw the hammer shaft into the hole and actuate it. Tap the edge of the dent with a mallet to help the metal return to its original shape. After the end of this procedure, the surface of the dent should approach its original contour and protrude approximately 0.3 cm above the surface of the surrounding metal.
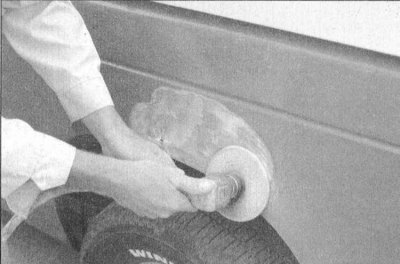
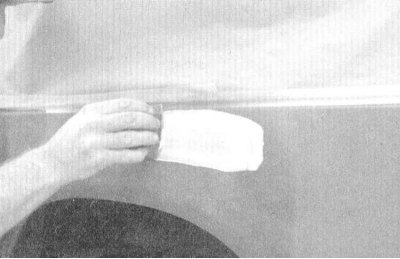
3. Using coarse sandpaper, remove the paint to bare metal. You can do it by hand, but the tool shown in the photo will help you speed up the process. Using a finer, approx. 320 grit sandpaper, wipe away the paint within a radius of at least 2.5 cm around the dent area.
4. After removing the paint, it is better to check by touch than by sight whether the metal surface is sufficiently even. Hammer out the bulges and/or pull out the cavities where necessary. Clean the surface to be restored with a wax or silicone stain remover.
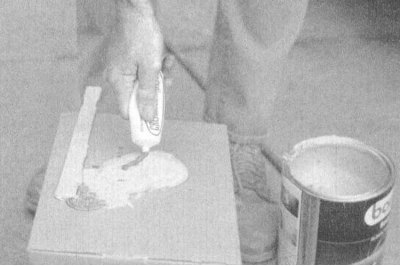
5. Following the instructions on the package, mix the pack of plastic putty with the hardener. The mixing ratio is critical, and if you break it, the putty will harden too slowly or too quickly (and you will not have time to apply it and give the desired shape).
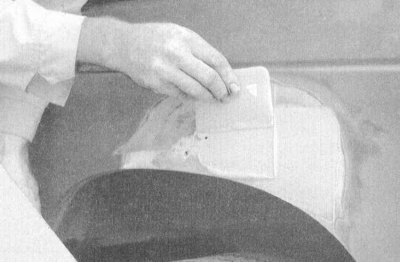
6. Working quickly to prevent the putty from setting, use the plastic applicator to apply pressure to the surface of the metal, making sure it fully engages with the metal. Treat the putty so that it takes a shape close to the original shape of the site and slightly rises above the surrounding surface.
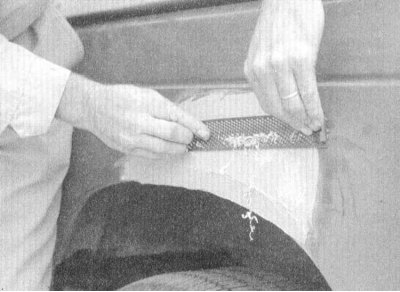
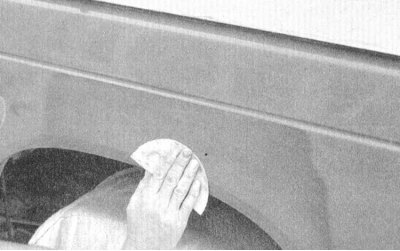
7. Let the putty harden to such a state that it can only be pushed through with a fingernail. Using a file or the tool shown in the photo, roughen the putty.
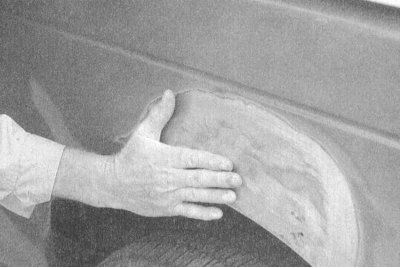
8. Using coarse sandpaper, mounted on a plank or bar, process the putty so that it becomes smooth and even. Gradually move to thinner and thinner grades of paper, always using a plank or block, and finish with number 360 or 400.
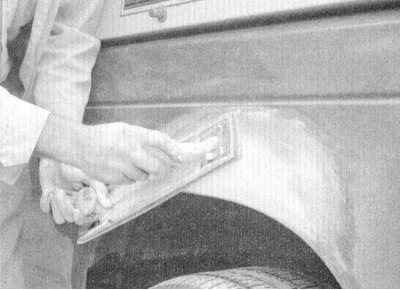
9. As a result of processing, the hand should not feel the boundaries of the transition from putty to bare metal and from bare metal to old paint. If this goal is achieved, remove dust and cover adjacent panels and trim.
10. Apply several coats of primer to the surface to be treated. Don't overspray the primer so it doesn't run off, and after applying each coat, let the previous one dry. Usually a professional spray gun is used here, but auto parts stores have a primer in an inexpensive aerosol can.
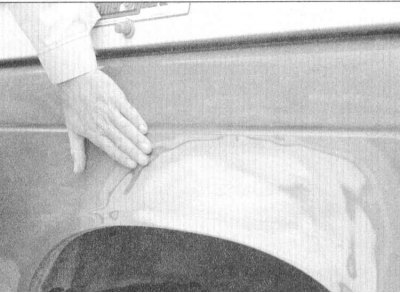
11. The primer will help to reveal defects or scratches. Fill them with polishing paste. Following the instructions on the package, process it with a thin (No. 360 or 400) sandpaper until smooth. Repeat polishing by applying polishing paste and sanding until the primed surface is completely smooth.
12. Finish sanding with very thin paper (No. 400 or 600), to remove excess primer. Wash the treated area with water and let it dry. Use a sticky cloth to completely remove dust, then apply a coat of exterior paint. Do not attempt to wipe or wax the area until the paint is completely dry (at least two weeks).