


Table of contents: Removal ↓ Installation ↓
Caution: Gasoline is extremely flammable, so extreme caution must be exercised when working on any part of the fuel system. Do not smoke or allow open flames in the work area. If gasoline comes into contact with your skin, wash it off immediately with plenty of soap and water. When working with any element of the fuel system, you must wear safety glasses and have a fire extinguisher on hand.
Removal
- After disconnecting the wires from the battery, remove the battery.
- Cover the car fenders; there are special covers for this, but regular bedspreads or blankets will do.
- Remove the hood.
- Label all vacuum hoses, electrical wiring, ground wires, and fuel lines to ensure proper installation later, then disconnect them. Pieces of electrical tape with numbers printed on them are suitable for marking.
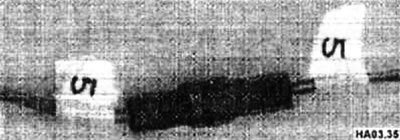
- If there is a possibility of hoses and/or wires getting mixed up, you can draw a diagram of the engine compartment and clearly label all lines, hoses and wires.
- Raise the vehicle and securely support it on stands. Drain all coolant from the cooling system.
- Remove the wheels.
- Tag and disconnect all coolant hoses from the engine.
- After unscrewing the mounting bolts, remove the mudguards and lower casing, radiator and fans.
- Remove the air intake duct, air duct and upper part of the air cleaner housing together with the air flow meter.
- Disconnect the engine compartment wiring harness at the engine control module (ECM) side.
- Remove the front wiper arms and the covers of the panel in front of the windshield.
- Disconnect the gear shift control cable from the CVT (gearboxes).
- Remove the drive shafts.
- Disconnect the fuel lines from the engine to the chassis. Close or clamp open fittings/hoses.
- Remove the drive belts.
- Drain the oil from the engine and remove the oil filter.
- Remove the generator, compressor and steering oil pump by unscrewing the mounting nuts.
- Disconnect the power steering gear from the lower steering shaft joint.
- Disconnect the stabilizer bar link.
- Remove the driveshaft (aWD models).
- Remove the crankshaft position sensor.
- Disconnect the exhaust system from the engine.
- Support the weight of the transmission with a jack. Place a block of wood between the jack and the transmission to prevent damage.
- If the engine is removed using a winch, it is necessary to attach a special cable or chain to the engine manifolds.
Engine mounting elements
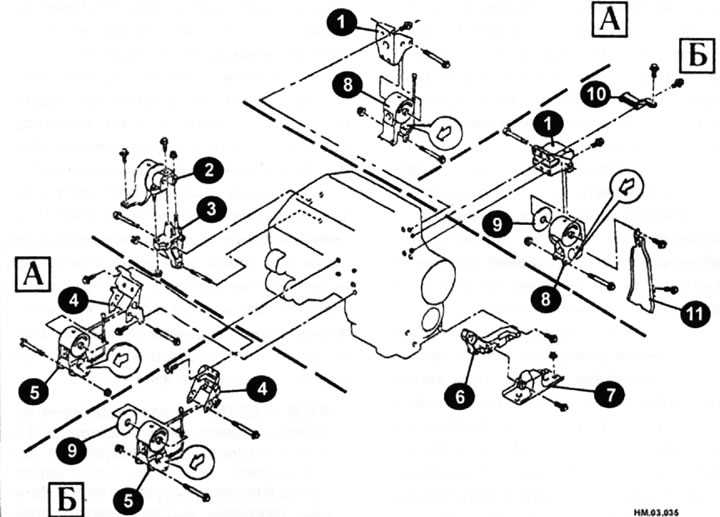
1 — rear engine support bracket; 2 - right engine mount; 3 — right engine support bracket; 4 — front engine support bracket; 5 — front engine mount; 6 — left engine support bracket; 7 — left engine support; 8 — rear engine mount; 9 - insulator; 10 — bracket; 11 — engine mount fairing; A - for AWD models; B - for 2WD models.
- Place the winch in the working position and attach the rope/chain to it. Tighten the rope/chain, but do not lift the engine yet.
Caution: Do not stand under the engine if its weight is supported only by a jack or winch.
- Loosen the support bolts that secure the engine to the body.
- Remove the bolts securing the unit to the cross beam, and then remove the cross beam itself.
- Check again that nothing else secures the engine and gearbox to the body. If you find anything, disconnect it.
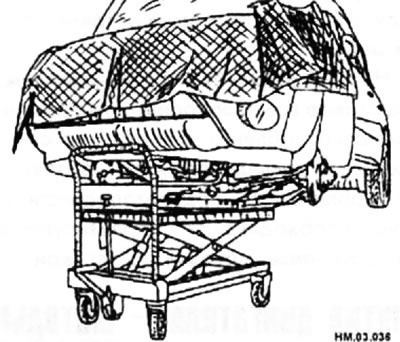
- Slowly lower the engine from the vehicle. Make sure nothing is hanging from the engine as you lower the winch or jack.
Caution: When removing the engine, the center of gravity of the car will shift to the rear, so to prevent the car from falling, it is necessary to support it with jacks at the rear of the car.
- Lower the engine to the ground and support it with wooden blocks.
- Separate the engine from the gearbox (CVT) with the drive axle and transfer case (aWD models).
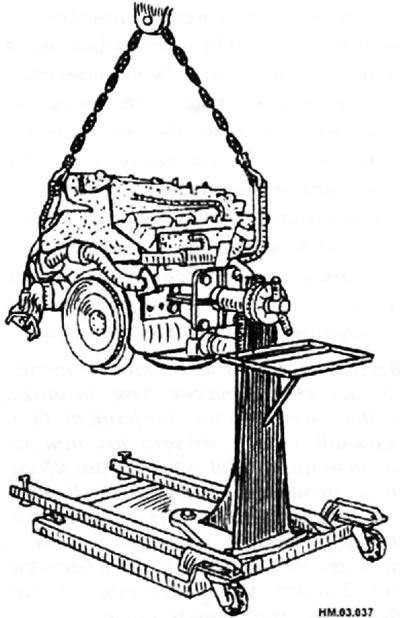
- Install and secure the engine on the stand for subsequent development.
Installation
- Check engine and gearbox mounts. If they are worn or damaged, replace them.
- Connect the gearbox (variator) to the engine with the drive axle and transfer case (aWD models).
- Carefully lift the engine into the engine compartment.
- Align the holes in the engine mounts with the holes in the frame, insert the bolts, tightening them securely.
- Reconnect all disconnected engine/transmission components.
- Before starting the engine, check the levels of coolant, engine oil and other operating fluids. If necessary, bring operating fluid levels back to normal.
- Check for leaks as follows:
♦ turn on the ignition (without starting the engine). Once pressure is built up in the fuel lines, check for fuel leaks at the fuel line connections.
♦ start the engine. After increasing the engine speed, check again for fuel leaks at the fuel line connections.
- With the engine running, listen for any unusual noises or vibrations.
- Warm up the engine completely and check for coolant, engine oil, other operating fluids, fuel and exhaust leaks.
- Remove air from the lines, particularly from the cooling system lines.
- After the engine has cooled down, check the levels of coolant, engine oil and other operating fluids again. Add operating fluids if necessary.
- Start the engine and check for leaks and that all components are functioning properly. Install the hood and test drive the vehicle.