


2. Disconnect the upper hose from the thermostat housing cover, unscrew the bolt, remove the cover (photo).
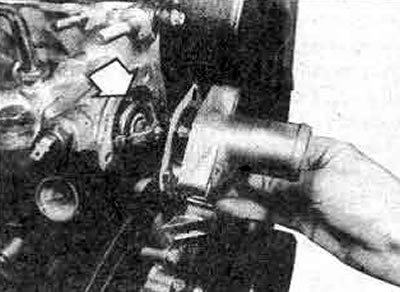
11.3 Remove the thermostat housing cover. When installing, make sure that the thermostat is positioned as shown
3. Discard the gasket and remove the thermostat.
4. The thermostat can be easily tested. But note that if it remains open at room temperature, it is faulty and should be replaced.
5. Boil water and lower the thermostat on a rope into it (Figure 2.12). Remove the thermostat from the water, after a while it should close. This is an elementary check. You can check the correct opening temperature and the maximum lifting height of the thermostat valve (see Specifications). Note that the opening temperature is printed on the housing protrusion, on the output side (to the radiator). The thermostat should close when the temperature drops by 5°C from the nominal opening temperature.
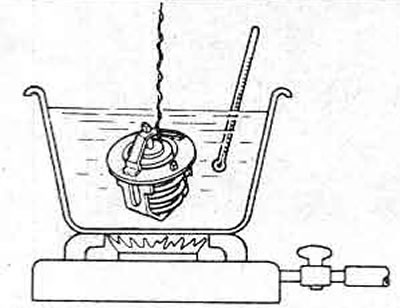
Figure 2.12. Thermostat testing
6. If the thermostat does not open, or does not open fully within the specified temperature range (see Specifications) or if it does not close when removed from the water, it must be replaced.
7. When replacing the thermostat, make sure the new thermostat will fit your vehicle, as thermostats are made for different models and a wide range of temperatures.
8. Clean the surface of the thermostat housing and cover and install a new gasket.
9. Position the thermostat so that the vent hole is facing upward.
10. Tighten the bolts to the torque specified in Specifications, install the upper hose, add coolant to the radiator and expansion tank (see Chapter 5).