


2. Lay out the connecting rod and piston assemblies with ring sets on the work surface of the workbench. From this point on, each ring set will be rigidly "tied" to its piston. Now you can start measuring the gaps in the ring locks.
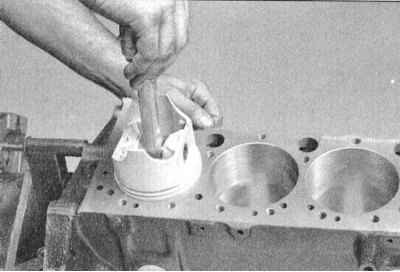
3. Insert the upper (No. 1) compression ring into the first cylinder of the engine and align it perpendicularly by pushing it down with the piston crown. The ring should be in the area of the lower limit of the working stroke of the rings in the cylinder.
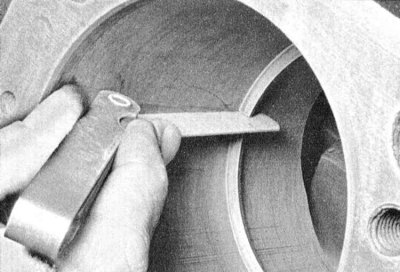
4. Determine the ring gap using a blade type feeler gauge. The blade(s) of the feeler gauge should slide tightly in the ring gap. Compare the measurement with the Specifications. If the gap is outside the acceptable range in either direction, double check that the rings are not mixed up before taking any corrective action (see below).
5. If the gap is too small, it can be widened by boring with a fine-tooth file. Clamp a rectangular file in a vice, then put the ring on the file with the lock so that the end of the file is inside the circle. Slowly pull the ring towards you, removing excess metal from its ends in the lock. When you reach the end of the file, remove the ring, check the gap again, and repeat the procedure if necessary.
Attention! Never push the ring away from you onto the file, as this will cause the edges of the lock to converge and there is a high risk of damaging the metal.
6. Excessive clearance is not a crime if it does not exceed 1.02 mm. Once again, make sure that the purchased ring sets meet the characteristics of the needs of your car engine.
7. Repeat the procedure for the remaining rings (second compression and oil scraper) piston of the first cylinder, then for the rings of all other pistons. Remember that now each set of rings is definitely "tied" to its piston, on which it should be installed.
8. Having checked and adjusted the gaps in the ring locks properly, you can begin to put them on your pistons.
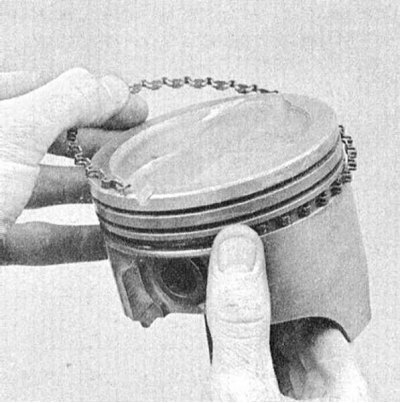
9. The oil scraper (lower) ring is put on the piston first. The oil scraper ring consists of three separate sections. First, insert the spring expander into the lower groove of the piston. If the expander is equipped with an anti-rotation tongue, make sure that the latter gets into the counter-drilling in the piston groove. Now install the lower working section of the ring into the groove. To avoid accidental damage to the working sections of the oil scraper ring, do not use any tool to install them - just insert one end of the section into the groove under/above the expander, press it firmly with your finger and, moving along the perimeter of the ring, insert the remaining part. Lastly, install the upper working section of the ring.
 |
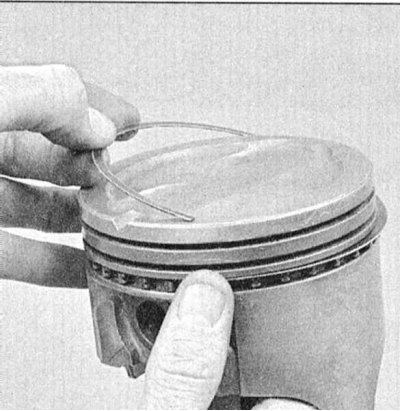 |
10. After seating all three components of the oil scraper ring in the lower groove of the piston, check for freedom of rotation (sliding in a groove) upper and lower working sections.
11. The second (lower) compression ring is installed next. The ring should be installed with the marking facing up (to the piston bottom).
Note: Follow the ring manufacturers' instructions carefully, which are usually printed on the kit packaging. Do not confuse the second compression ring with the first (upper) one - they have different cross-sections.
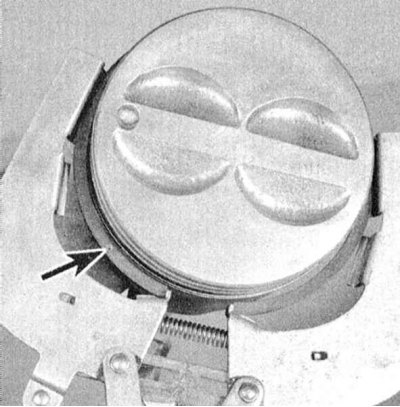
12. Using a special expander and making sure that the ring is turned with the marking facing up, place it in the middle groove on the piston. Try not to spread the ring lock more than is really necessary for its smooth installation on the piston.
13. Proceeding in a similar manner, install the first (upper) compression ring (marking up). Try not to confuse the top ring with the second one.
14. Proceeding in a similar manner, fit rings to all remaining pistons one by one.