


Table of contents: Removal ↓ Installation ↓
Removal
1. Disconnect the negative cable from the battery.
2. Remove the steering wheel.
Note: Do not hit the end of the steering shaft with a hammer to avoid damaging the steering column.
3. Loosen the screws that secure the two halves of the steering column cover to each other. Remove the covers from the column.
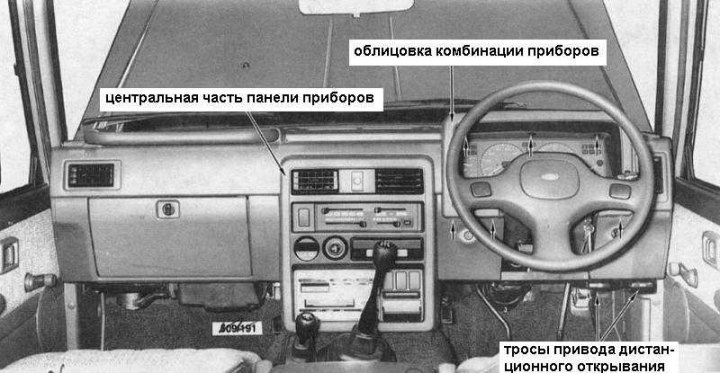
4. Loosen the mounting screws and pull the instrument cluster trim back slightly (the screws are shown by arrows in the accompanying illustration). Release the electrical connectors of the switches and potentiometers and remove the trim completely.
5. Loosen the mounting screws, partially remove the combination from the instrument panel and disconnect the electrical wiring from its rear part. Remove the combination, making sure not to damage the protective glass.
[The original can be read on the website: Nissanbook.ru]
6. Loosen the screws securing the fuel filler flap, hood and drive cables to the support bracket (if provided) disabling the anti-roll bar.
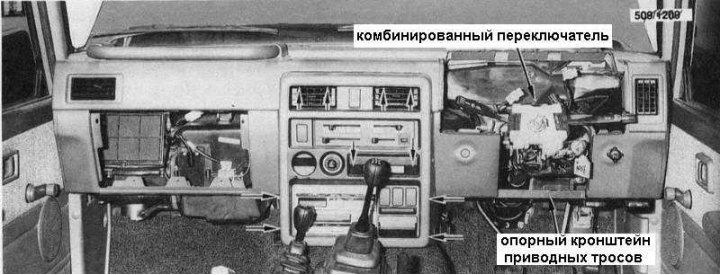
7. Loosen the screws securing the drive cable support bracket (see accompanying illustration), slide the bracket back and remove it from the car.
8. Disconnect the manual throttle cable from the gas pedal and bracket.
9. Open the glove box cover and remove the screws securing the latter. Remove the glove box from the car.
10. Remove the ashtray and loosen the screws located underneath it.
11. Remove the screws securing the central part of the instrument panel.
12. Move the transfer case control lever to the low gear position and partially remove the central part of the instrument panel. Disconnect the wiring from the clock, cigarette lighter, ashtray light, hazard warning switch, and other additional equipment.
13. Remove the central part of the instrument panel.
14. Loosen the mounting screws, partially remove the radio and disconnect the electrical wiring and antenna cable from it. Remove the radio.
15. Remove the handles from the heater control levers. Using a screwdriver, release the heater control panel retaining tabs. Remove the panel.
16. Using a flat-head screwdriver, remove the trim panels from the top of the instrument panel (see accompanying illustration - shown by arrows).
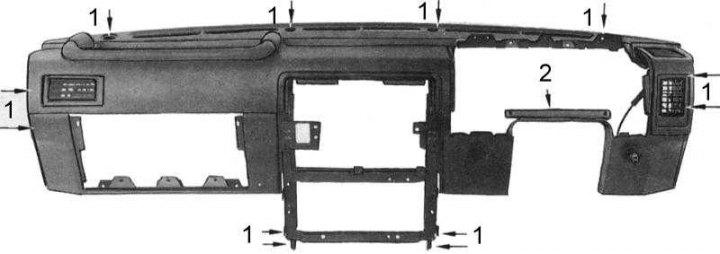
1 - bolts
2 - screw
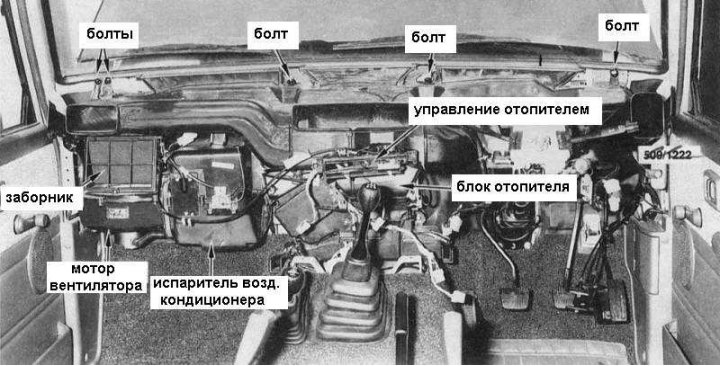
17. Loosen the bolts located along the top edge of the instrument panel, on the sides and along the bottom edge of the hole for installing the radio (are shown by arrows in the accompanying illustration).
18. Release the recirculation/fresh air supply drive cable from the glove box hinge support rail.
19. Carefully remove the instrument panel assembly from the vehicle.
Note: When removing the instrument cluster by one person, it may also be necessary to remove the combination switch by loosening the mounting screw and disconnecting the electrical connectors, then pushing the switch down and turning it a quarter turn.
Installation
Installation is carried out in reverse order.
1. Make sure that the electrical wiring is laid correctly.
2. Check the proper functioning of the heater control drive and make adjustments if necessary.
3. Tighten all fasteners securely.
4. Check the proper functioning of all components that were removed or disconnected during dismantling.