


Table of contents: Power Steering System - Fluid Level…↓ Power steering system - drive belt ↓ Checking the steering gear and…↓ Checking the suspension, wheels and…↓
1. With the frequency given in Section "Maintenance" at the beginning of this manual, check all suspension and components and adjust them using the following procedures.
Power Steering System - Fluid Level and Lines
2. The fluid level is checked on a cold, non-running engine. The fluid level should be between the "Max" and "Min" marks on the tank body.
3. If refilling is necessary, clean the area around the reservoir cap and unscrew it. Add liquid to the "Max" level (photo). Replace the cap.
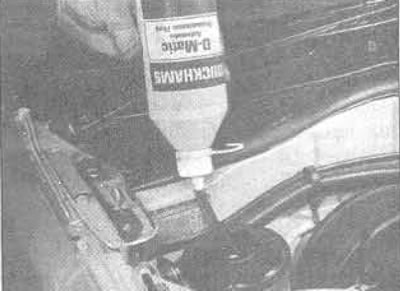
2.3 When refilling the brake system, use only good quality fluid of the specified type
4. Inspect every metal pipe and flexible hose from the fluid reservoir, power steering pump and steering gear.
5. To check the lower pressure of the system, start the engine, turn the steering wheel from lock to lock until the fluid is warm (60-80°C). Set the idle mode, hold the steering wheel for no more than 5 seconds in each extreme position and carefully check for leaks.
6. If there are leaks, they must be eliminated.
Power steering system - drive belt
7. Check the condition and tension of the power steering and drive belt.
Checking the steering gear and connection
8. Apply the handbrake and raise the front of the car.
9. Visually inspect the protective rubber covers of the steering gear and the rubber dust caps on the steering rods and outer ball joints.
10. On vehicles with direct acting steering, the steering shock absorber must be securely fastened.
11. The lower steering column tie rod bolts must be tightened, the steering gear mounting bolts must be securely fastened, the outer tie rod ball joint lock nuts must be tightened, with the pins installed.
12. Check the condition of the steering components by measuring the play in the steering wheel. If the play is not due to loose connectors, it may be caused by wear in the steering column joints, tie rod ball joints, or steering gear. Check the outer tie rod ball joints.
13. To check the outer ball joints of the tie rods, lower the car and watch them closely while an assistant turns the steering wheel back and forth; any wear should be visible in the form of play between the tie rod end and the hub mounting. If a worn ball joint is found, it should be replaced. Nissan recommends that ball joints (with a flat top surface) late type were replaced in pairs even if only one was worn out.
Checking the suspension, wheels and tires
14. With the car on its wheels on a level surface, shake it at each corner to check the suspension struts. If the strut is in good condition, the body will return to its normal position and then stop. If the body oscillates more than once with weak damping and signs of uncontrolled movement, the strut is considered faulty and should be replaced.
15. Apply the handbrake and raise the front of the car.
16. Visually inspect all suspension components for obvious signs of wear, damage, or loose fasteners. Check the rubber dust caps on the lower control arm ball joints. Replace the ball joint if the cover is cracked, holey, or leaking grease. Check for oil leaks from the suspension struts.
17. Grasp the wheel at the 12 o'clock - 6 o'clock position and try to rock it. If there is play, first check the tightness of the wheel nuts, then the drive shaft nut. If they are correctly tightened, repeat the check with an assistant pressing the brake pedal. If there is no play now or it has significantly decreased, the hub bearings are probably worn. If play remains, wear is in the suspension components, especially likely in the ball joints of the lower suspension arm.
18. Spin the wheel quickly and listen. If the wheel spins smoothly and easily without noise and slows down and stops without jumping, the bearings are in good condition.
19. Using a large screwdriver or flat bar, check for wear in the suspension bushings and mounting points by trying to move them to check for play. A small amount of play may be acceptable in the rubber bushings. If play is present, first check the tightness of the mounting nuts or bolts, using a torque wrench if possible. Any worn components should be replaced as described in the relevant Chapters of this Section.
20. Lower the car and engage reverse gear (manual transmission) or "R" (automatic transmission). Block the front wheels. Raise the rear of the car. Release the handbrake and check the hub bearings.
21. Check the condition and reliability of all rear suspension components, first visually then physically as described above. Check the crossmember, link and bushing installations, anti-roll bar installations and strut installations.
22. Check the rear wheel bearings as described above.
23. After checking, lower the vehicle and check the tire tread wear. If there is abnormal wear or the vehicle's steering and wheel alignment have deteriorated, check the wheel alignment.