2. Unscrew the screws securing the front panel of the shield to the front panel and remove the panel.
3. Remove the screws securing the instrument panel to the front bulkhead (photo).
4. Carefully remove the shield and disconnect the cable from the speedometer and wiring connectors, remove the shield.
5. To access the pointers and control lamps, unscrew the screws and remove the shield housing (photo). Take out the lamp sockets, remove the latches, unscrew the screws, carefully remove the printed circuit board.
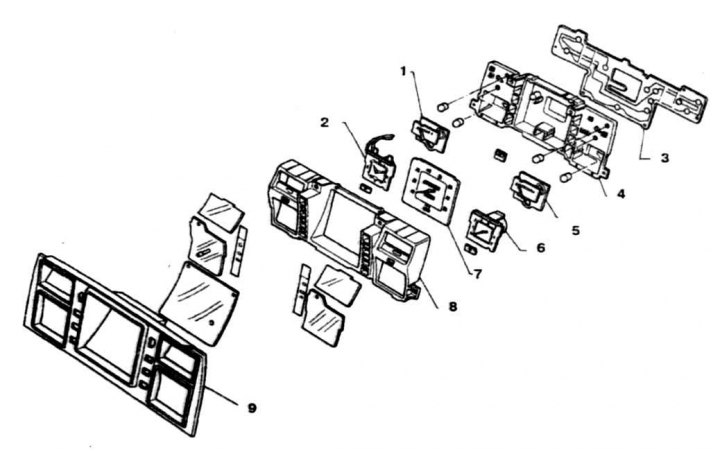
18.5 Parts of the instrument panel
1. Fuel gauge; 2. Clock; 3. PCB; 4. Back cover; 5. Fluid temperature indicator; 6. Tachometer; 7. Speedometer; 8. Front cover; 9. Cladding panel
6. Installation is carried out in the reverse order.