


Table of contents: Removal ↓ Installation ↓
Caution: The bumper trim is made of epoxy resins. Do not apply force to it and do not allow it to come into contact with oils.
Removal
1. Open the trunk door fully.
2. Loosen the screws (A) securing the rear bumper (left and right).
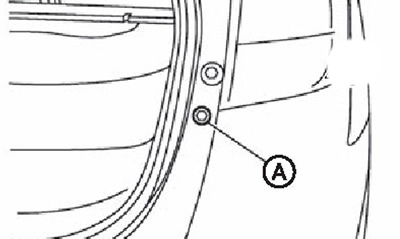
3. Loosen the lower screws (A) securing the rear bumper and the clamps (B) (left and right).
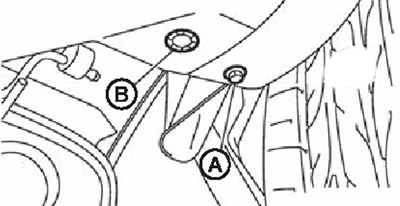
4. Remove the lower rear bumper clips.
5. Remove the rear wheel arch moldings.
6. Remove the retaining clips (A) from the left and right rear mudguards.
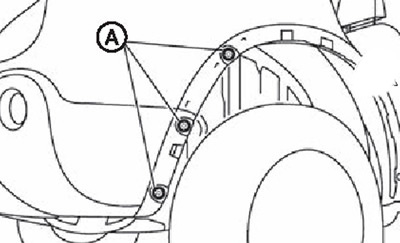
7. Loosen the upper rear bumper mounting screws (A) (left and right).

8. Remove the rear combination lights.
9. If necessary, remove the license plate.
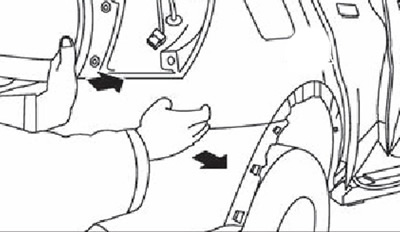
10. Press forward and then pull sideways to release the rear bumper from the side brackets B.
Information copied from the website (NISSANBOOK)
11. Remove the rear fog light, and then disconnect the rear fog light wire connector.
12. Unhook the rear bumper clips (A).
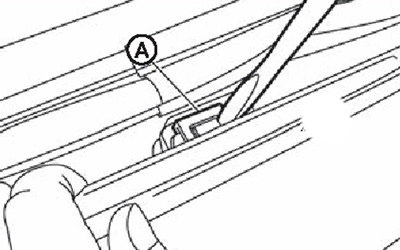
13. Disconnect all wire connectors.
14. Remove the rear bumper trim assembly.
Caution: Two people are needed to remove the bumper cover to prevent it from falling.
15. After removing the rear bumper trim, remove the following parts:
- Rear bumper energy accumulator.
- Rear bumper center holder (left and right).
- Rear bumper side holders (left and right).
- Rear bumper clamps.
- Rear bumper side brackets A (left and right).
- Side brackets B rear bumper (left and right).
- Rear bumper trim assembly.
- Left and right reflectors.
Installation
Installation is carried out in the reverse order of removal.
Note: After installation, adjust the fit.
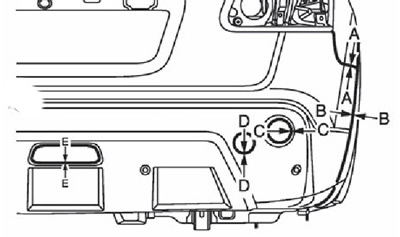
Rear bumper - rear wing (A-A): 0.0-1.0 mm
Rear bumper - rear wheel arch molding (B-B): 0.5-1.5 mm
Rear bumper - reflector (C-C): 0.0-1.0 mm
Rear Bumper - Towing Eye Cover (DD): 0.2-1.2mm
Rear bumper - fog lamp diffuser (E-E): 0.2-1.2 mm