


Table of contents: Disassembly ↓ Assembly ↓
Check the strut assembly removed from the vehicle for signs of leaks, dents, cracks and other mechanical damage. Inspect the coil spring for chips, cracks, signs of sagging, and the rubber cushions of its seats for signs of hardening and aging of the material. At Nissan branded service stations, you can always buy shock absorbers assembled with coil springs on an exchange basis, which allows you to significantly reduce time and money costs. In view of the above, before you begin dismantling the assembly for the purpose of performing its restoration, conduct marketing, determining the prices of replacement components and comparing them with the costs of purchasing a restored strut.
Removing the coil spring from the shock absorber assembly is potentially dangerous and should only be done using quality special tools.
Disassembly
1. Remove the strut assembly from the vehicle (see section Replacing the shock absorber/coil spring of the strut assembly or Removal, condition check and installation of rear suspension struts). Clamp the shock absorber assembly in a vice with soft jaws (not too much).
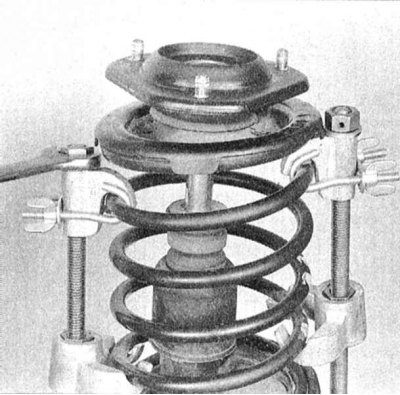
2. Follow the manufacturer's instructions and install the coil spring compressor tool. Tighten the nuts on the tool studs until the spring is compressed enough to completely relieve the upper support base.
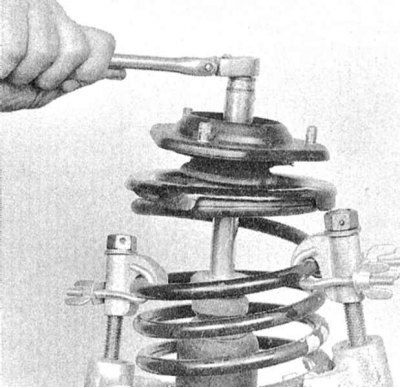
3. Loosen the shock absorber rod nut.
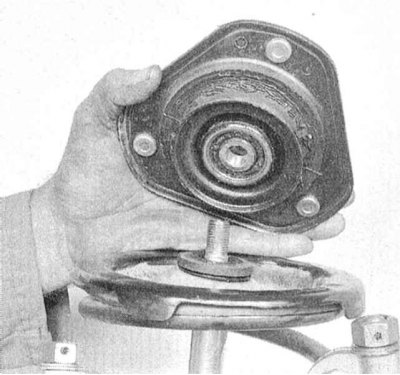
4. Remove the upper support of the strut from the piston rod of the shock absorber. Check the freedom of rotation of the bearing, replace the support if necessary. Assess the condition of the rubber parts, if signs of material destruction are detected, replace the defective elements.
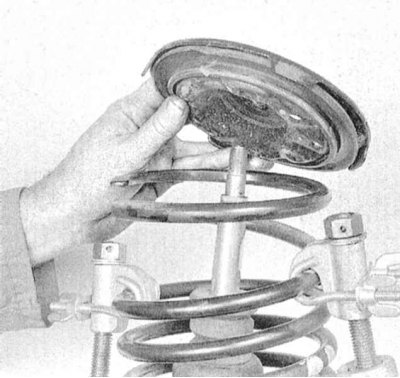
5. Remove the upper spring seat from the shock absorber rod, assess the condition of its rubber cushion, and replace it if necessary. Remove the upper seat rubber cushion from the rod.
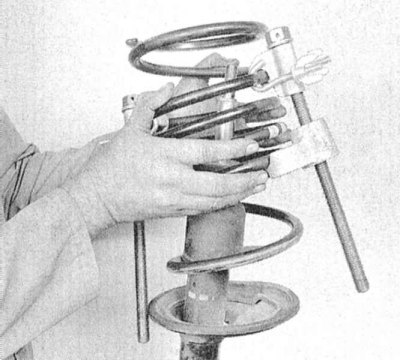
6. Carefully remove the compressed coil spring from the shock absorber and move it to a safe place.
Attention! Try not to turn the compressed spring with the ends towards you!
7. Remove the rubber protective cover from the shock absorber rod.
8. Assess the condition of the lower rubber cushion and replace it if necessary.
Assembly
1. When replacing the lower spring seat rubber cushion, make sure that the notched side of the cushion is facing the seat. Pull the shock absorber rod out to its full stroke length and place the rubber protective cover on it.
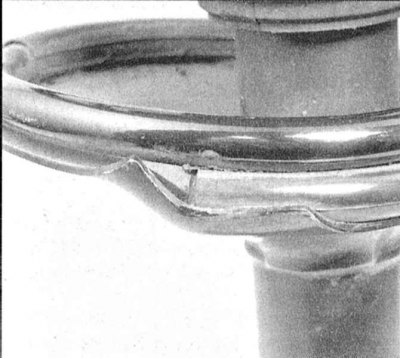
2. Carefully place the compressed coil spring into its lower seat. Make sure that the end of the spring rod hits the most lowered part of the cushion.
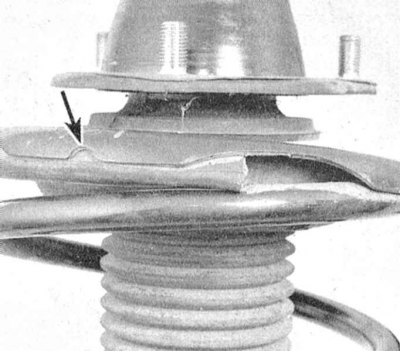
3. Install the upper rubber cushion and upper spring seat onto the assembly. Make sure that the seat is turned with the cutout facing outward from the centerline of the vehicle.
 |
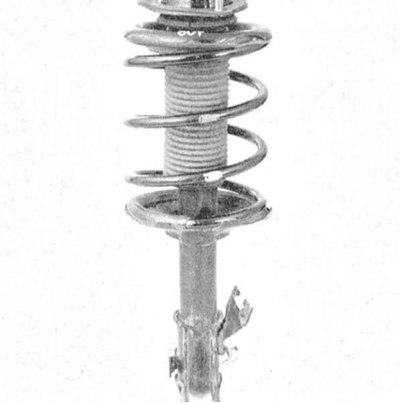 |
4. Place the dust cover and upper support of the strut on the shock absorber rod.
5. Screw on the nut and tighten it to the required torque. Remove the coil spring compressor.
6. Install the assembled rack in its regular place (see section Replacing the shock absorber/coil spring of the strut assembly or Removal, condition check and installation of rear suspension struts).