


Cardan shaft mounting elements
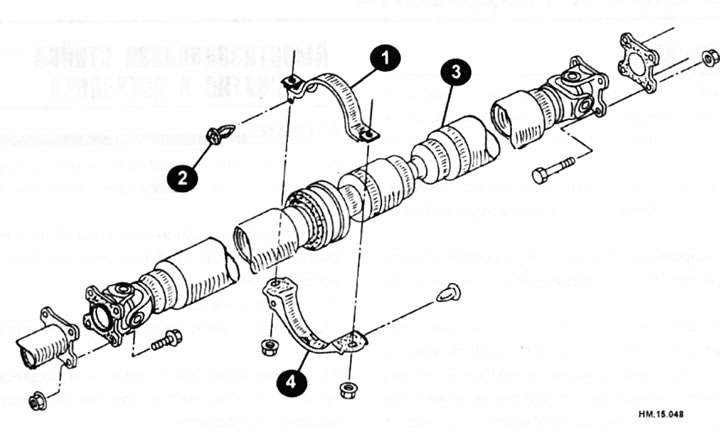
1 - upper bracket for mounting the central bearing; 2 - clamp; 3 - cardan shaft; 4 — lower bracket for mounting the central bearing.
- Disconnect the negative cable from the battery.
- Raise the vehicle and support it securely with stands.
- Put the transmission in neutral (n range) and apply the parking brake.
- Apply alignment marks to the driveshaft flange yoke and to the final drive and transfer case flanges so that the flanges can then be installed in their original positions. To avoid scratching the surfaces, apply marks with paint.
- Loosen the center bearing mounting bracket nuts, but do not remove them completely.
- Loosen the nuts and bolts on the connecting flanges of the propeller shaft, transfer case and final drive.
- Unscrew the nuts securing the central bearing brackets. After this, remove the propeller shaft.
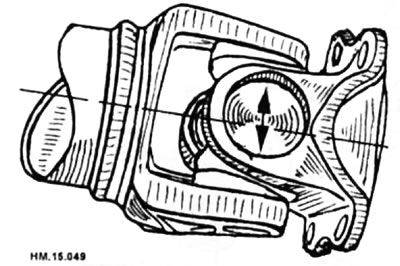
- With one side of the fork secured, check the axial play of the cardan joint as shown in the figure. There should be no play. If you feel even the slightest play, replace the driveshaft.
- Check the driveshaft for deformation and damage. If damage is found, replace the driveshaft.
- Check the driveshaft center bearing for noise and damage. If any are found, replace the driveshaft.
Caution: The central bearing and joints cannot be disassembled.
Installation
- Installation is carried out in the reverse order of removal, taking into account the following.
- When installing the propeller shaft, align the alignment marks made during removal. Tighten the fasteners to a torque of 55.0-64.7 N·m.
- Adjust the position of the mounting brackets by moving them back and forth to eliminate the longitudinal gap of the insulator as shown in the figure. Install the brackets so that the arrow on the bracket points forward and tighten the nuts to a torque of 41-48 N·m.
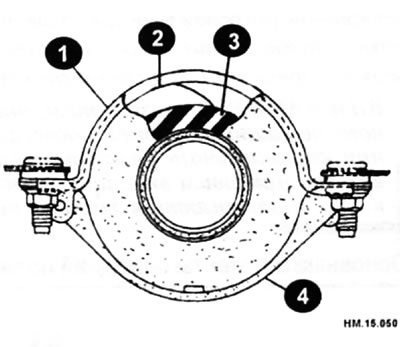
1 - upper bracket of the central bearing; 2 - bearing lining; 3 — central bearing insulator; 4 — lower bracket of the central bearing.
- After assembly, perform a test drive to check for driveshaft runout. If runout is detected, disconnect the propeller shaft from the final drive flange. Set the driveshaft coupling flange in various positions, rotating the shaft 90, 180, and 270°. After setting the driveshaft in each of these positions, perform a test drive and check for driveshaft runout.