Warning! Before doing any work near the airbag unit, steering column or instrument panel, turn off the SRS to avoid injury if it is accidentally deployed (see chapter 12). SRS circuit wiring is easily identified by the yellow color of the insulation. To avoid damage to the SRS system, make sure that the steering shaft does not turn after removing the steering wheel. Block the column with the ignition key with the front wheels straight ahead.
Removing
1. Disconnect from the battery at first a negative wire, then positive.
Attention! If the stereo system installed in the car is equipped with a security code, before disconnecting the battery, make sure that you have the correct combination to activate the audio system! Wait at least 10 minutes before removing the steering wheel.
2. Bring the front wheels of the car into a straight line.
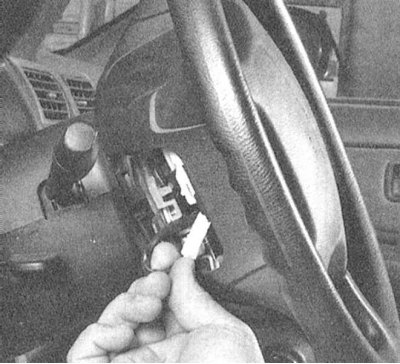
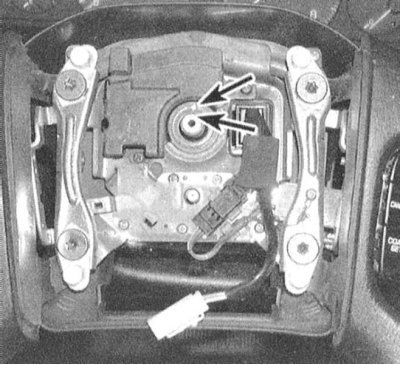
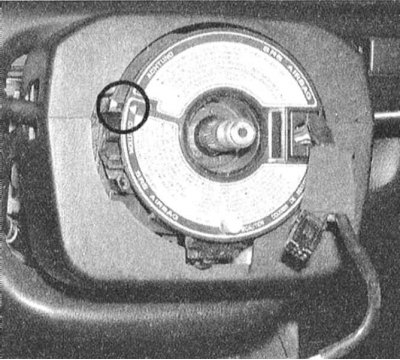
3. Remove the small access hole cover on the side of the steering column cover and disconnect the electrical wiring from the airbag module.
4. Using a small screwdriver, remove the decorative covers of the screws that secure the airbag module. The screws have TORX heads and are coated with a special fixing compound, and therefore, when installing the module in place, they must be replaced without fail. Remove the airbag module from the steering wheel hub.
Warning! Avoid turning the airbag module facing you, as accidental deployment could result in serious injury (see chapter Onboard electrical equipment).
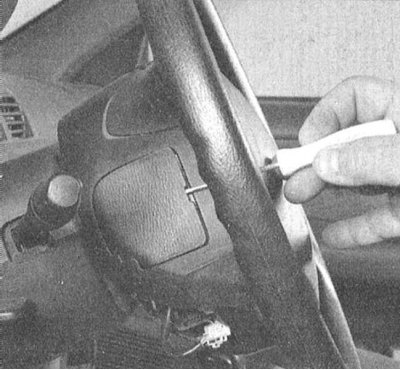 |  |
5. Give a nut of fastening of a steering wheel, then mark position of a nave of the last concerning a steering shaft - such marking can already take place.
 |  |
6. Disconnect the tempostat wiring.
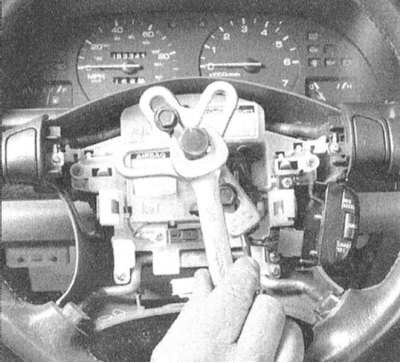
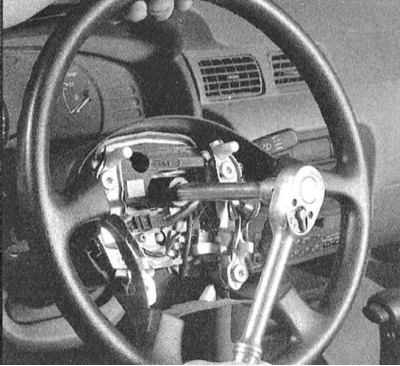
7. Using a special puller, remove the steering wheel from the steering column shaft.
Attention! In no case do not knock the wheel off the shaft with a hammer, after removing the wheel, do not rotate the steering shaft!
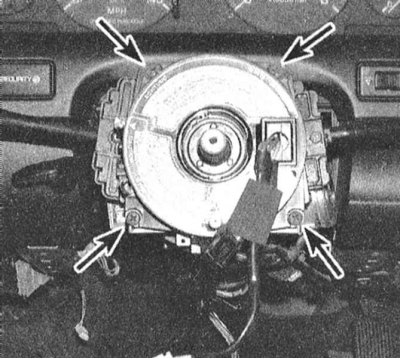
8. If it is necessary to check the condition or replace the steering column switches, remove the spring contact assembly.
Attention! Regardless of whether the spring contact is removed or not, attach the central part of its hub to the outer ring with adhesive tape so as to completely eliminate the possibility of its turning. Do not turn the steering shaft when the steering wheel is removed!
9. In case of need turn out fixing screws, release a clamp, disconnect electroconducting and remove assembly of spring contact from a steering column.
Installation
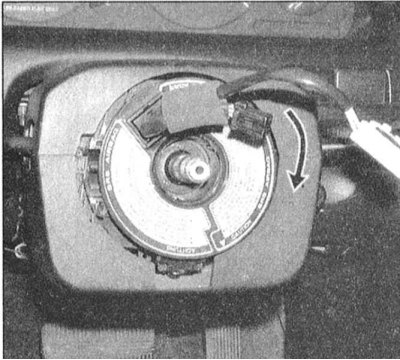
1. Make sure the front wheels of the vehicle are in a straight line. Turn the spring contact of the airbag module mounted on top of the steering column shaft clockwise until a noticeable resistance is felt, then return it 2.5 turns in the opposite direction and achieve the alignment of the two index marks.
 |  |
2. Pass the electrical wiring of the airbag module and the speed control system through the steering wheel and install the latter in its regular place. Make sure that the spring contact pins properly engage with the mating holes in the rear of the steering wheel hub. Make sure the landing marks are correctly aligned.
3. Screw on the fixing nut and tighten it to the required torque.
4. Install the airbag module and secure it with new TORX head bolts. Install the tempostat switch and the side covers of the steering column casing.
5. Connect electrical wiring to the airbag module. Install the bottom cover.
6. Make sure that the airbag module is working correctly - when the ignition is turned on, the corresponding control lamp should light up on the instrument panel for about 7 seconds.
Models without airbags
Removing
1. Disconnect the negative cable from the battery.
2. To remove the horn button, pry it from below with a suitable tool and release it from the steering wheel assembly.
3. Then proceed as described in paragraphs 5 to 7.
Installation
1. Before installing the steering wheel, lubricate the sliding ring of the horn contact and the sliding part of the pin of the turn signal return switch with multipurpose grease.
2. Track that the steering wheel fastening nut has been tightened with the demanded effort.
3. Connect the electrical wiring and install the horn button on the assembly.
4. Connect the negative cable to the battery.