Examination
1. The switch performs two functions - it closes the wires of the reverse signal in the selector position R and prevents the starter from turning on in the selector positions other than P or N. Checking and adjusting the switch is necessary if the reverse signal lamps do not light up or the starter does not turn on in the selector position R or N.
2. Disconnect from the switch of a wire and remove the switch.
3. Check the circuit between the sensor leads at each selector position (photo).
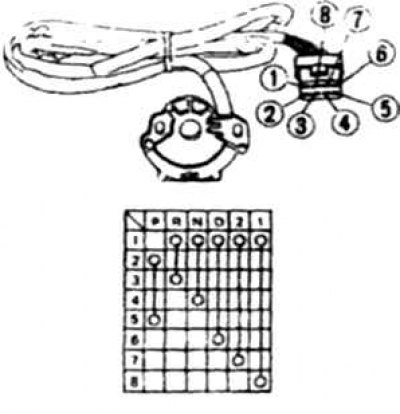
3.3 Checking the circuit between the sensor leads in different selector positions
1. Diagram of closed outputs in various positions of the selector
Move the selector to position N and check that the circuit is closed by varying the position of the selector by approximately 1.5°in both directions.
4. If the shift angle of the selector at which opening is observed differs from the norm, or the conclusions do not close in all positions of the selector, then the switch must be adjusted.
Adjustment
5. Do the following:
- 1). Move the selector to position N.
- 2). On cars other than all-wheel drive 1987-88. unscrew the screw (photo).
- 3). Loosen switch bolts (photo).
- 4). Move the switch with a 2 mm diameter bar inserted into the hole so that the adjusting hole aligns with the hole in the rotor behind the switch. While holding the switch in this position, tighten the bolts.
- 5). Remove the bar and tighten the screw.
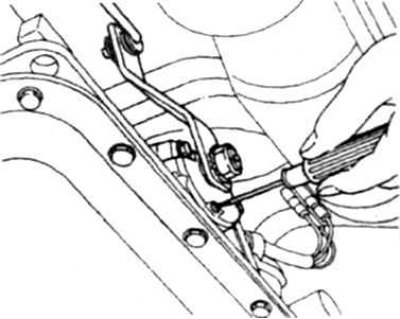
3.5a Adjustment hole screw (for rear wheel drive vehicles).
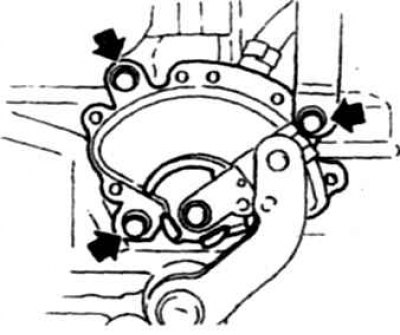
3.5b Typical Lockout Switch Bolt Location (shown for 1987-88 4WD vehicles.)
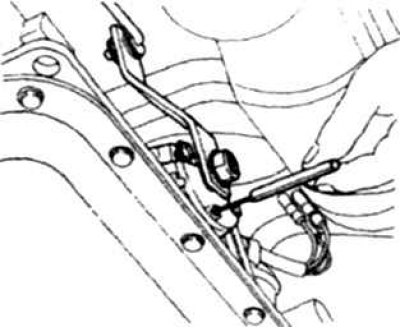
3.5c Move the switch with a bar so that the adjusting hole aligns with the hole in the rotor
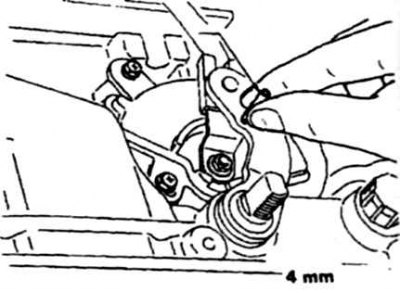
3.5g When adjusting the switch on four-wheel drive vehicles 1987-88. pass the bar through the holes in the switch and selector lever
6. After adjustment, check the circuit between the sensor leads (see above).
If the switch does not operate normally, replace the switch after adjustment.